 Home
Home

 Artists
 Search
 Recent
 Random
 Posts
Posts
 DMs
DMs
 Tags
Tags
 Random
 Importer
 Import
 FAQ
FAQ
 Account
 Register
 Favorites
 Login
Login

Month of boredom: bendy doggo WIP 07 (Patreon)
Content

This is everything I told the renderer to separate into channels so that I can export it after rendering. Sometimes it turns out I don't actually need some of them (specifically two, or rarely three), but it's better to be safe than sorry.
Here is an explanation of what each of these elements is:
- Beauty: the main image composed by the renderer. I export two versions. One is what you kept seeing during previews. It will serve as a base for the composed image. The other is a 32 bit floating point version of it. It doesn't have any exposure control on it. This will be used to generate some additional eye candy.
- Reflection: what you've seen before - the reflection data of every shader in the scene. I'm using this to emphasize reflections where needed (which often means everywhere lol). The result is not physically correct, but it looks more appealing.
- Specular: these are the reflections of only the light sources. I'm using this the same way as the regular reflections, but it's sometimes unnecessary, or applied only to certain objects or areas via masks.
- Refraction: this is the element containing light passing through objects in a refractive matter (like with water or glass that visually bends what's behind it). As you can see, the hair is refractive too, which means that its color can actually be affected by what's behind it. This is one of the many reasons why hair is slow to render haha
- Ambient occlusion: if you're a gamer, you've encountered this term countless times. This is the thing that adds blurry shadows where objects come into contact with each other, or in corners. However, in offline rendering it's much more accurate than in realtime rendering. Its use is obvious, and the reason is that global illumination can be very slow to calculate, and even if it's super high quality, it can be all flat and visually uninteresting. Having an ambient occlusion element lets you add depth to the lighting where the renderer didn't.
- Z-depth: the depth portion of the image. Useful if you want to add some fog, haze, mist, or fake volumetric light if you're feeling brave. Also good if you want to make a faux-stereo image! And rarely it's even useful to improve the composition. I sometimes don't use this at all, but it's a good thing to have. Also looks kinda cool lol
- Normal pass: normals are basically surface vectors. They tell the renderer (or in this case - the person in front of the screen) which way a surface is pointing. That data is kept in the red, green, and blue channels for each direction. Red is for horizontal directions, green is for vertical, and blue is for local Z (a.k.a. towards/away from camera). Extremely useful for adding light and detail emphasis during postwork.
- Multimatte: a V-Ray specific element. It lets you assign objects to each of the image's three channels, so that you can have a mask for each of those object during postwork. It's easy to set up if you only have one character and a prop. It gets difficult to do efficiently if you have more characters and complex interactions. I once needed three of these. ._.
- Object color: while working on your scene, you can assign colors to objects. They're not used during rendering; they're only for readability. This element represents those colors. I use it when the multimatte is not enough (i.e. when I need a mask for an object that was so minor that I didn't include it in the multimatte).
So that's it for the elements. Now let's get to actual work!
The first thing I will do is preprocessing. Which means taking all the elements and making them useful for the image. This is just boring exposure/gamma control for most of them, but one is pretty damn special. The 32 bit beauty pass. I use a program called Photomatix to process that one image into three very important elements. Here they are:

The first one will improve the colors and diminish the contrast. The second one will restore lost contrast and emphasize the details. The last one will be used to make bloom (a.k.a. glare).
So once the other things are preprocessed, we've expanded this:

Into this:

12 files became 21 files. :^) Of course not all of them will be used in actual processing.
Alright, so let's do some basic processing on the image now. We're starting off with this:

And initial processing gave us this:

The colors they are poppin. This is only using the three images generated from that one 32 bit beauty pass. I am super proud of my technique for making bloom btw. It's the bloom pass duplicated three times and blurred 4x wider than the previous one via gaussian blur. They're all smart objects so that I can modify the blur width anytime I want. I'm also setting them to screen blending mode. The other layers are usually experimented upon - their blend modes and opacities often vary between pieces. But yeah, let's keep adding stuff.

Here I've added ambient occlusion and some basic color processing. Also extracted the masks from the multimatte pass, because those are needed from like the beginning. Now let's move onto basic lighting.
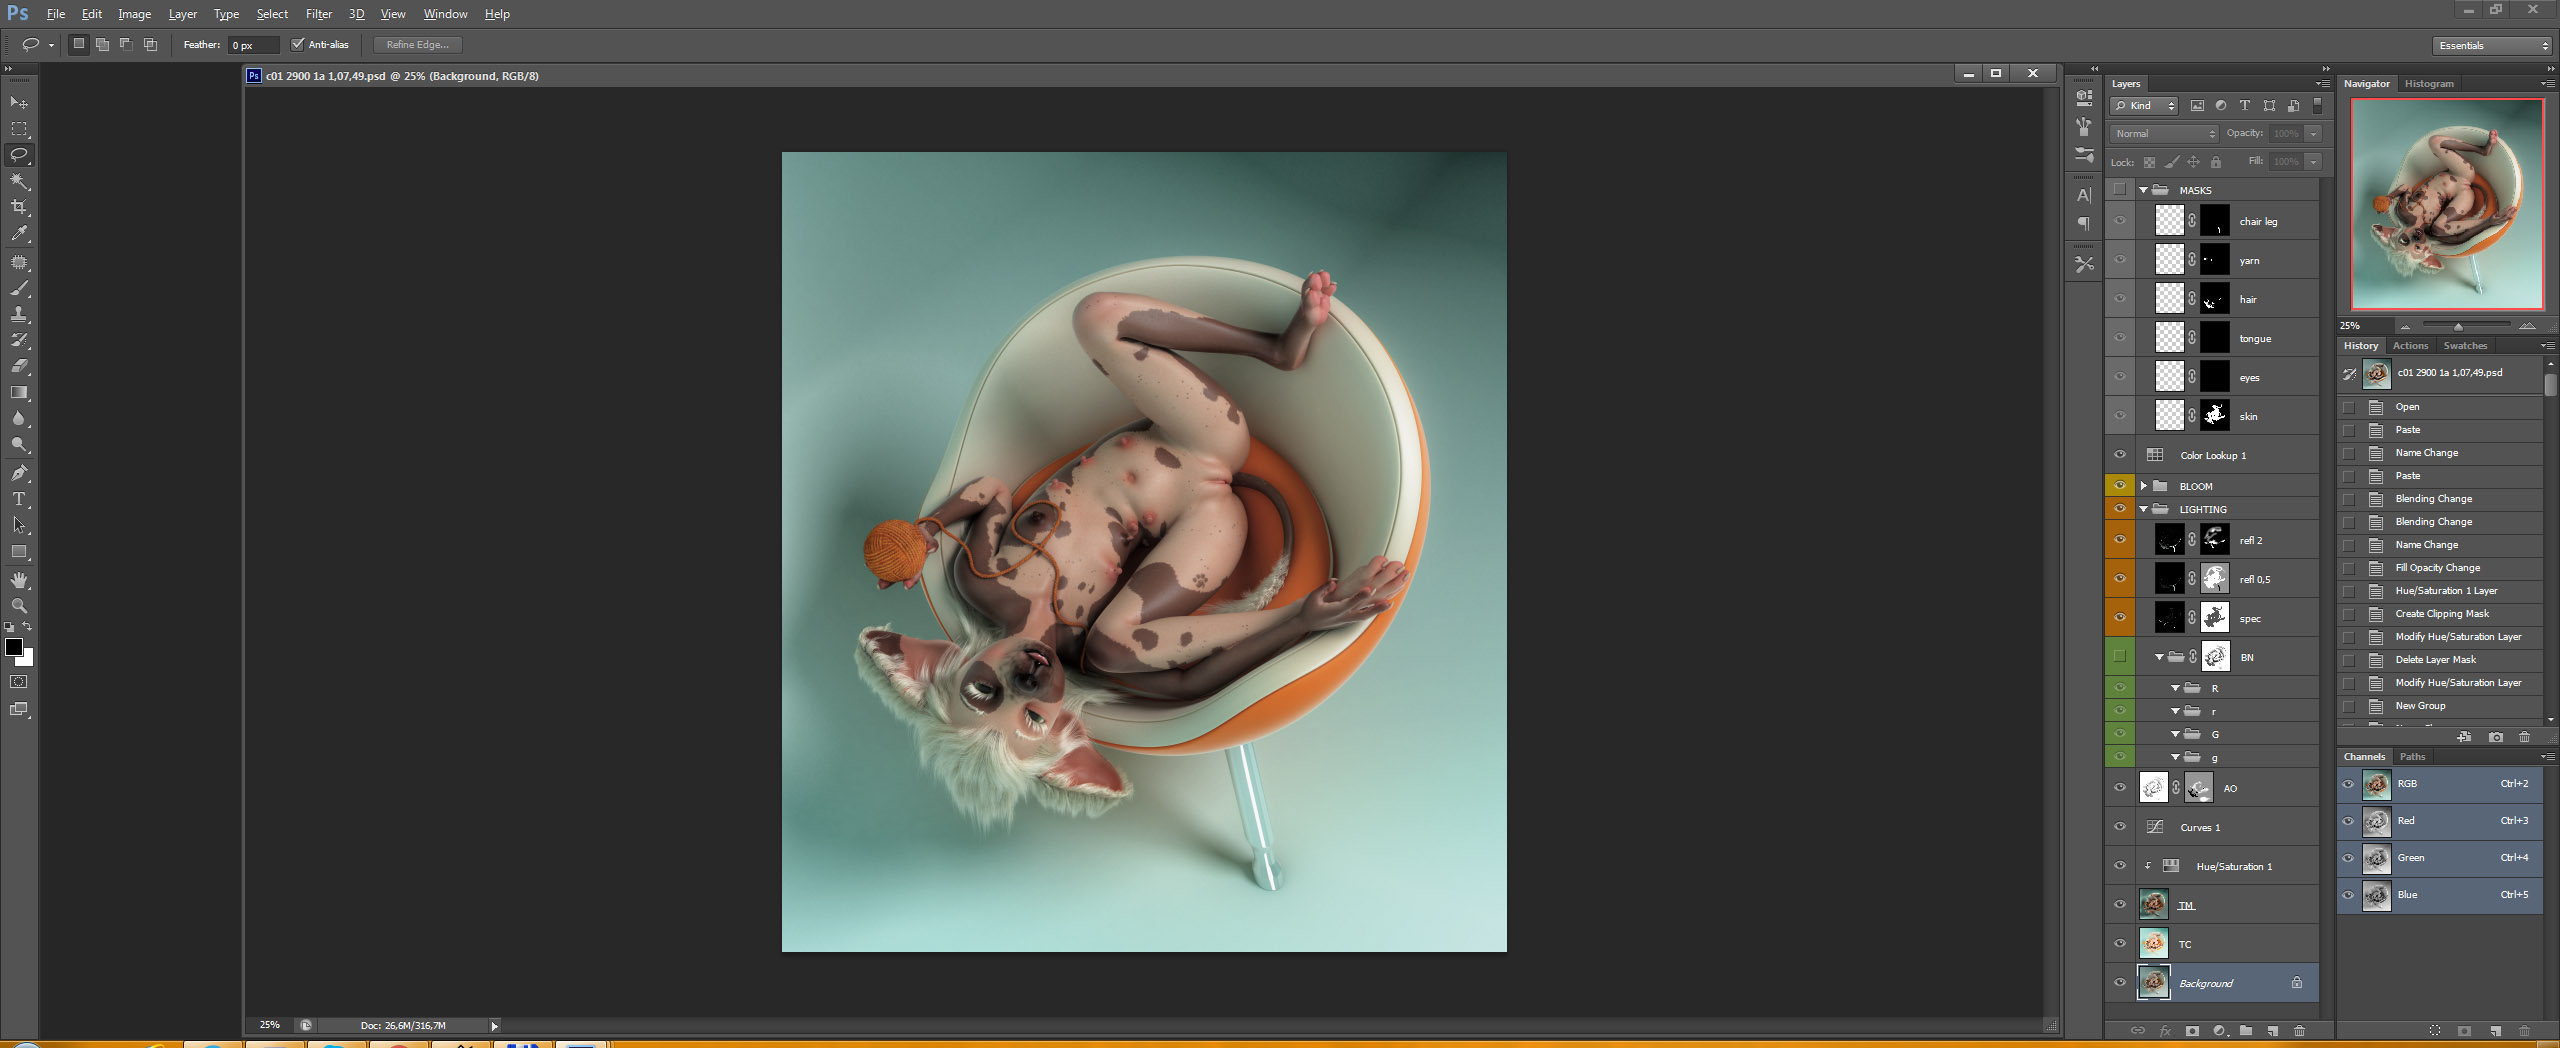
Here I've just added the specular element with some masking, and two reflection elements in different exposures. One is applied somewhat evenly, and the other is very strictly controlled with a mask.
Also I can't remember if I ever mentioned that, but the masks are either used directly as they were extracted from the multimatte, or a combination of extracted masks and painting. Sometimes just painting alone, sometimes extracted masks with altered values. Nothing particularly fancy.
Anyway, gotta finish for today. Will continue on Monday probably because frickin Sundays. ._. Next up: more advanced color processing and more lighting! Also fixes! And whatever other things I forgoat about! I also think the next post will be the last WIP post for this piece! :D
Enjoy somehow! :^D
Files
