Home
Home

 Artists
 Search
 Recent
 Random
 Posts
Posts
 DMs
DMs
 Tags
Tags
 Random
 Importer
 Import
 FAQ
FAQ
 Account
 Register
 Favorites
 Login
Login

YL2 Update - Breast dynamics, vagina customization and more! (Patreon)
Content
Hi all!
We hope you're doing great!
I'm really excited about all the progress we've made this month. It marks the passing of a major milestone, as we now have a working tech for dynamic breasts inside the editor. This tech involves many different parts that have been developed over the months. Finally, for the first time, we can see it all coming together!
Read on to get an in depth explanation of this work as well as many other topics!
Dynamic breasts
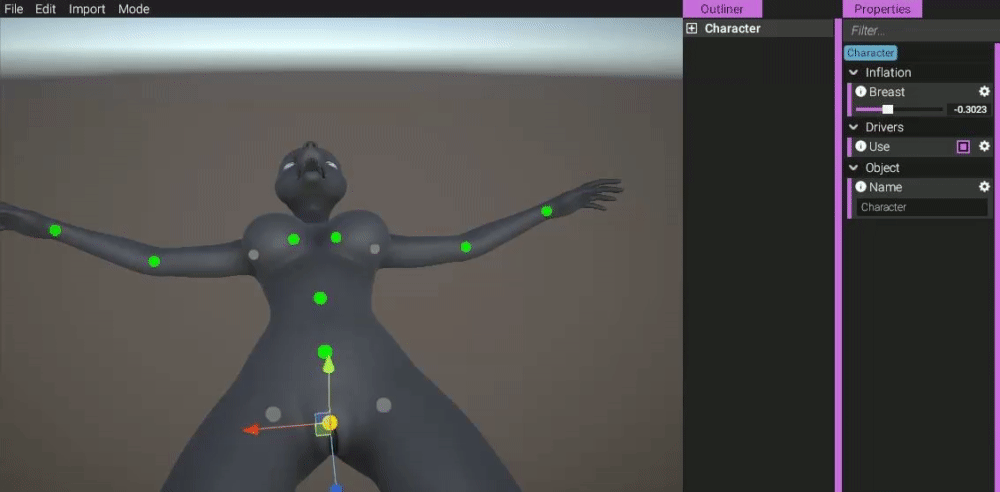
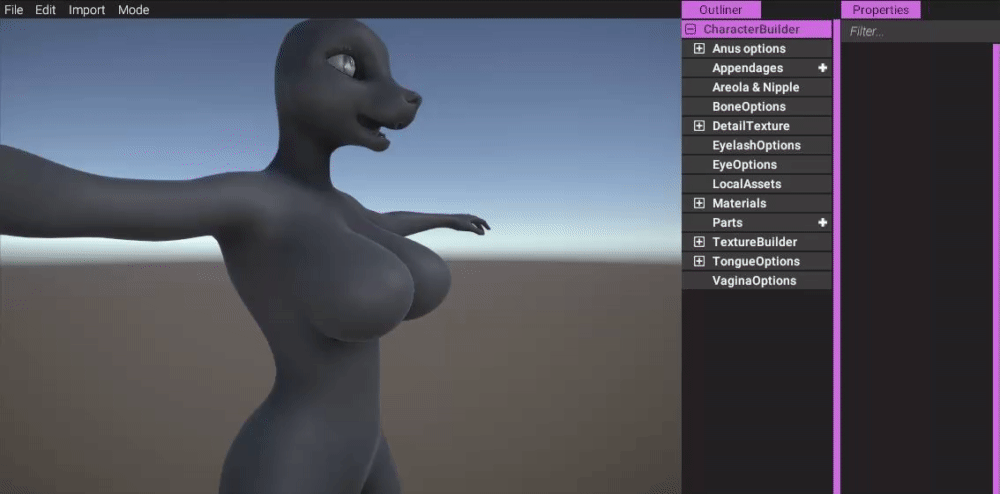
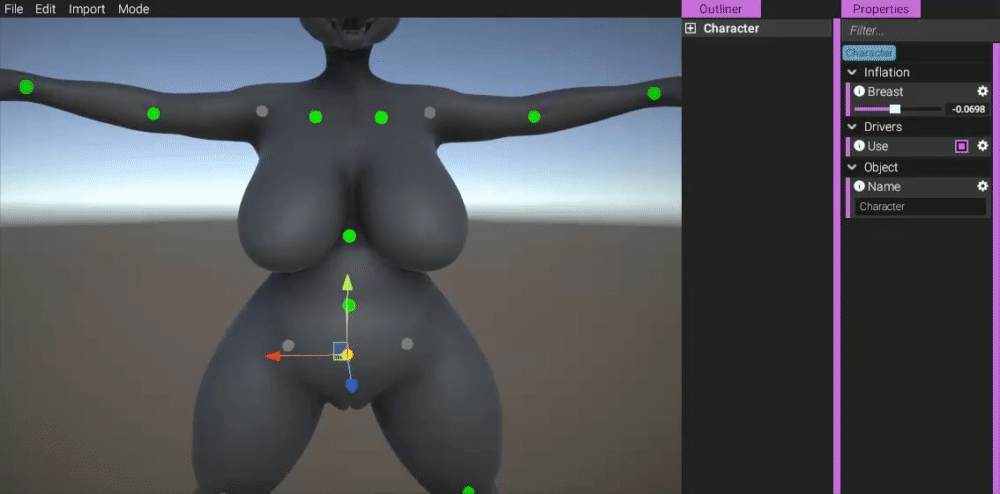
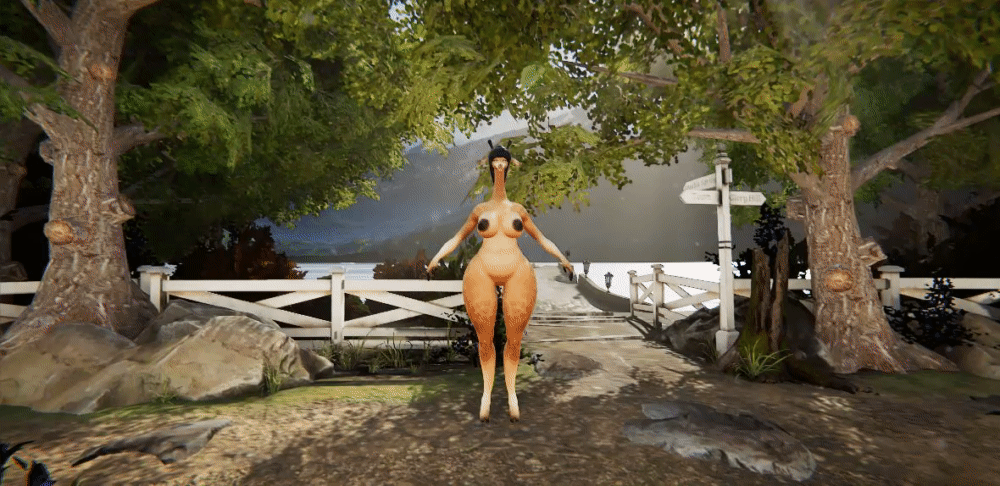
Getting breasts to be dynamic in YL2 has been a huge challenge for us. In Yiffalicious (1), we had to manually set up breasts on a per character basis, which cost us a lot of time. This time around we wanted to automate as much of this process as possible, not only to save time, but also out of necessity as characters are now authored by users. So breasts would have to work as expected regardless of what shape (body type/inflation etc) you would throw at them. It's an understatement saying this has been challenging!
Before we go into how it works exactly in YL2, lets examine how things worked in Yiffalicious (1).
Old physics behavior
In Yiffalicious (1), we were cheating a lot with how breasts worked in regards to physics, flatchested and inflation. Essentially, each one of these states had their own simulation - and not even necessarily using the same method. (Or worse - for older characters, we only had 1 physics state (the default one) which means physics would look weird when breasts were inflated, as the inflated breasts were simulated using the default breasts' physics.)
(Older characters only used 1 physics simulation. The physics weren't affected in any way as you inflated the breasts. This is not good.)
https://gyazo.com/ab0b67ac9c8bfd5cb0406e7012f083c1
Then, when inflation or flatchested was used, the breasts would interpolate from the default state's physics result (rotation) to the other ones. But not through actually affecting the simulation itself - only by interpolating between each simulations' final result.
What this means is that if you had a mix of states (for example using inflation at 50%), then two simulations would affect the breasts at the same time. This could look quite odd, as two simulations would essentially "fight" over affecting the breasts in the way they want.

(Since two separate simulations are affecting the breasts at the same time, the result might behaving a bit weird if those simulations are not in sync. Here we see the default and inflated breast physical objects swinging, but they're swinging in opposite directions.)
https://gyazo.com/070a0ac4c6a8ae4fb5c31d1ce75aebd1
For flatchested, this would be even worse, as flatchested worked entirely different. Instead of actually affecting the breasts through skinning (bones), flatchested would instead be achieved through shader tricks (essentially moving the verts in the shader according to an influence mask and - again - a simulation of its own). This means that when breasts were for example 50% flatchested, then the default physics would influence the breasts (50%), while at the same time, 50% vertex offsets would be used from the flatchested simulation and shader offset, causing strange effects such as this:
(Examining 50% flatchested breasts in slow motion. Notice that the breasts continue to jiggle in a strange way when the character motion stops. This is because the flatchested simulation is affecting the breasts through shader vertex offsets while at the same time the default breast simulation is affecting the breasts through bones.)
https://gyazo.com/59e14bf6a4c87d3191ed21beb95684a0
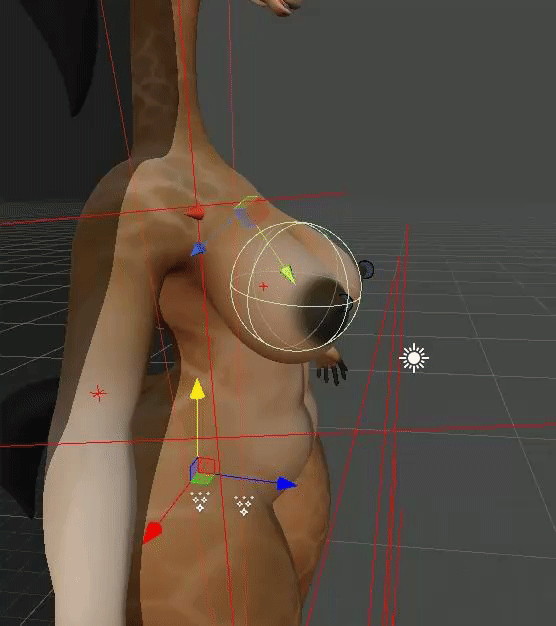
(Here we can see what's going on in more detail. The transform driving the shader vertex offsets is represented by the XYZ arrows, while the default physical object is represented by the sphere. As you can see, these two may be entirely out of sync with eachother, which is not surprising since they have different physical properties (as they should have!).)
https://gyazo.com/8518ebb9aee7cffc75423fb0d4b533b4
How it works in YL2
Obviously, breasts shouldn't be affected by 3 simultaneous simulations. Rather, breasts should always only have 1 simulation, but that simulation should be affected in such a way that the breasts behave flatchested/default/inflated depending on what the user has configured them to be. And this is exactly what we've tried to achieve with our new implementation. But this is very challenging to do, for many reasons and especially for a scenario such as ours, where we're not only trying to automate the process entirely, but also trying to make it work on any user authored character!
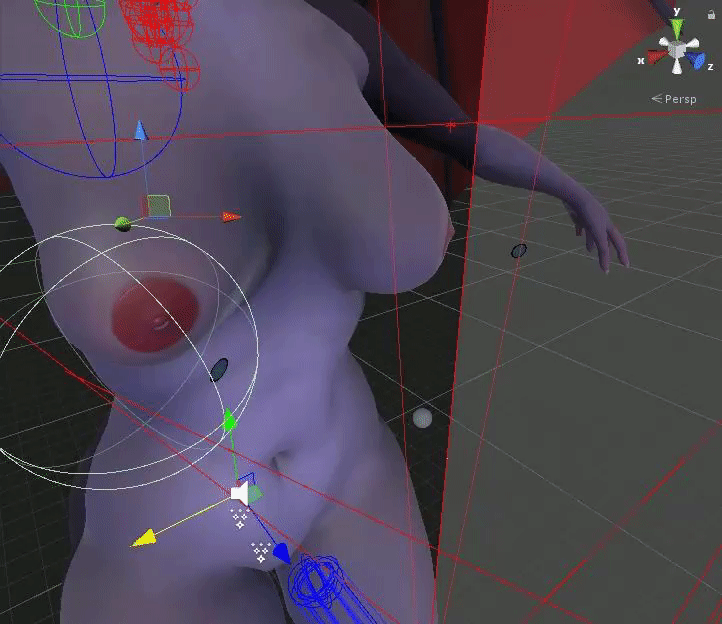
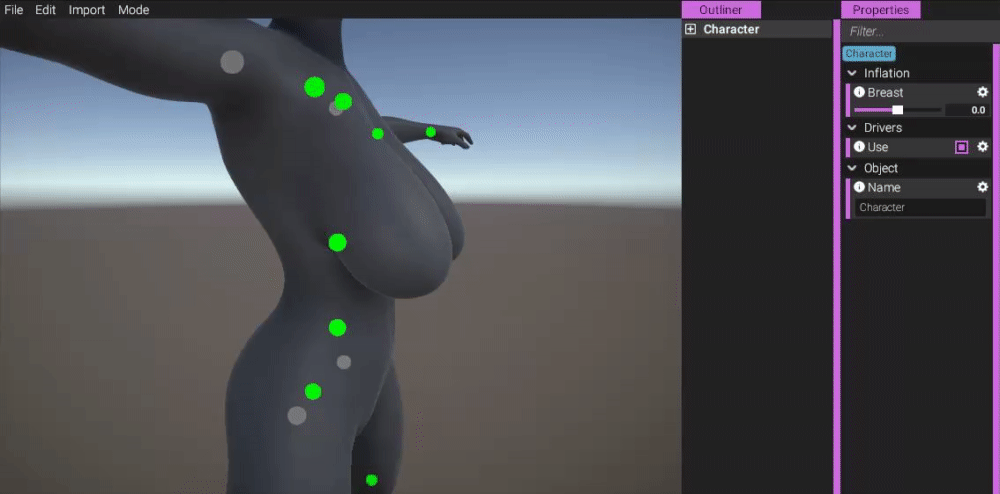
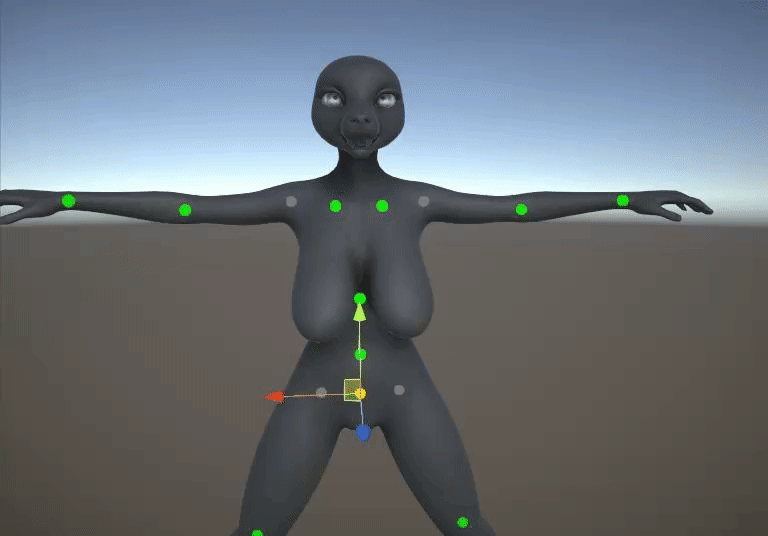
Firstly, the bones affecting the breasts need to be moved to allow for the best possible simulation. For example, when breasts are flatchested, the bones should move far further back, while inflated, the bones should move further out. How much and in what direction exactly the breast bones should move depend entirely on the shape itself, which means we have to do a mesh analysis and move bones accordingly.
None of this should be something we author - rather we should come up with a solution that can calculate these things automatically so they can work on whatever shape is used. (Moving bones is a bit of a science itself, since moving a bone would also affect skinning unless you do the proper calculations.)
Secondly, the rigid bodies, springs and joints driving the physics behavior need to change in real time to reflect user changes to flatchested/inflation, and these changes need to be somewhat stable. Affecting rigid bodies and joints in real time is not trivial. (Things can easily spaz out.)
Thirdly (and this is a BIG one), any corrective shapes that need to be used in the simulation should be generated automatically.
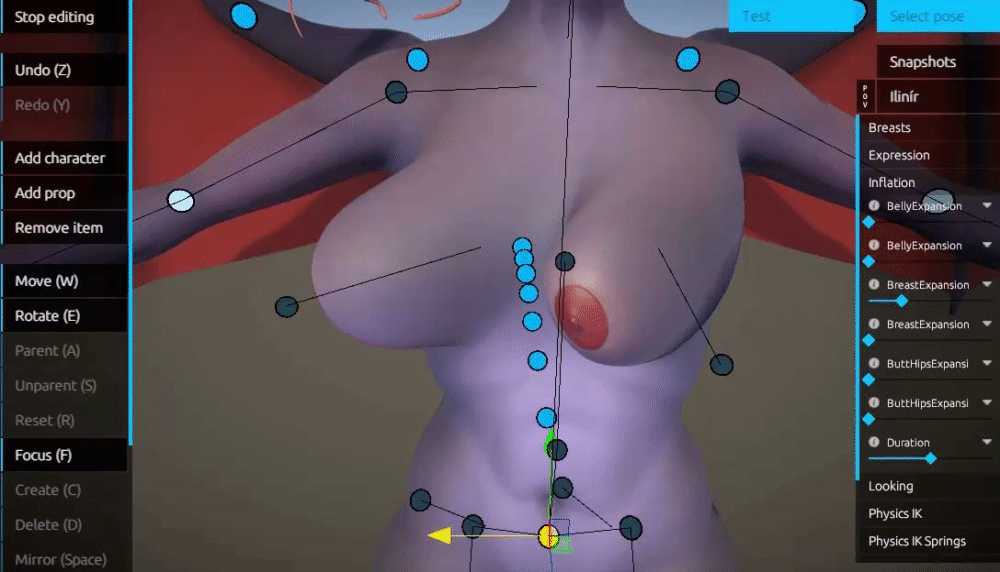
Lastly, we need to have an automatic system in place that blends these corrective shapes into the simulation using drivers (systems that translate values from a source into a destination - for example taking the angle of the breasts and converting it into a value to be used in blend shapes).
I'm happy to say we've been able to achieve all of these things. While the results aren't always exactly what we expected/wanted them to be in all cases, I definitely think this is a great start and a solid foundation to build upon in the future.
Other improvements (compared to Yiffalicious)
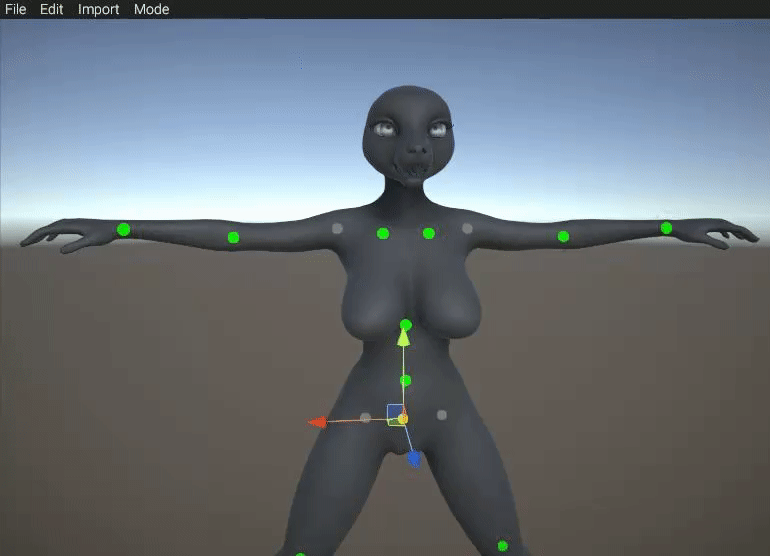
In Yiffalicious (1), we were only affecting the breasts through rotation. In YL2, we have implemented a system that also affects the breasts through squash & stretch. This gives the breasts a much more dynamic and fun behavior.
Results
So with all that said, let's have a look at how breasts behave in YL2 at the moment!
NOTE!
WE RECOMMEND OPENING THE GYAZO LINKS AS THEY PROVIDE A FAR BETTER FRAMERATE THAN THE GIFS.
When going into pose mode, you'll notice that the breasts start hanging immediately:
(When entering pose mode, the simulation for the breasts kicks in and they start hanging.)
https://gyazo.com/7812c9c36b23735e77ea2f09a58b4f9d
This is something that was very important to me, as I wanted to make it clear to users that the default "zero gravity" pose of the tits is just a temporary thing and that they won't stand out like that when affected by a simulation. So I'm very happy we've been able to make this work in time for the first build!
Here you can see the drivers in action:
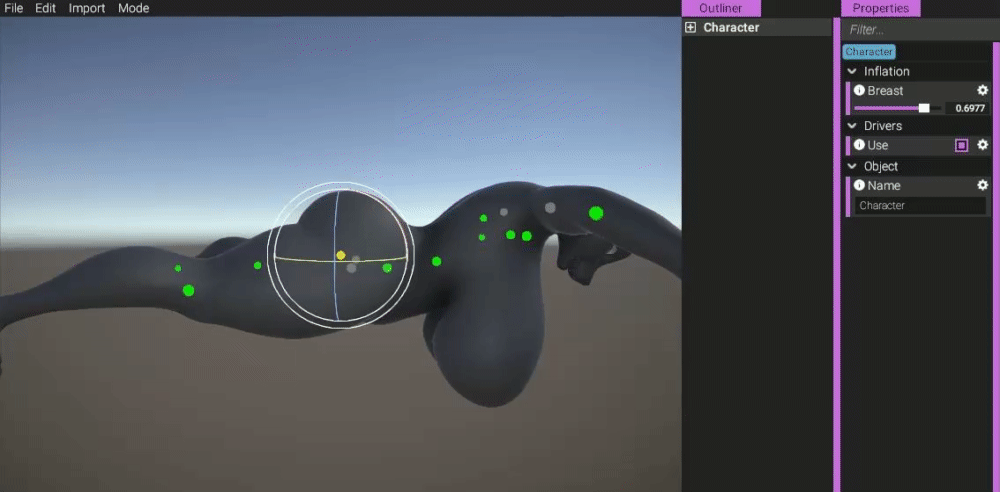
(Drivers blending in automatic blend shapes according to how the tits are angled.)
https://gyazo.com/df70a77630e6cb5bfb75bf412e7ef244
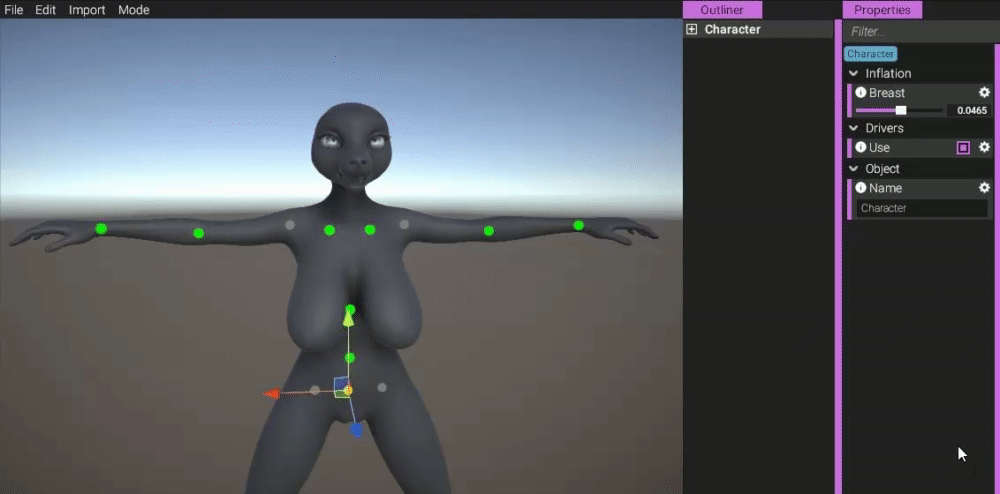
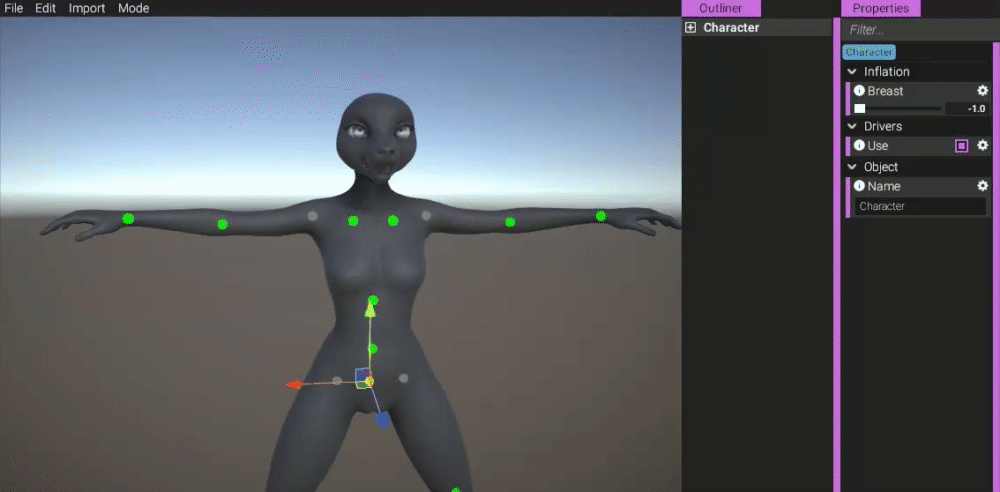
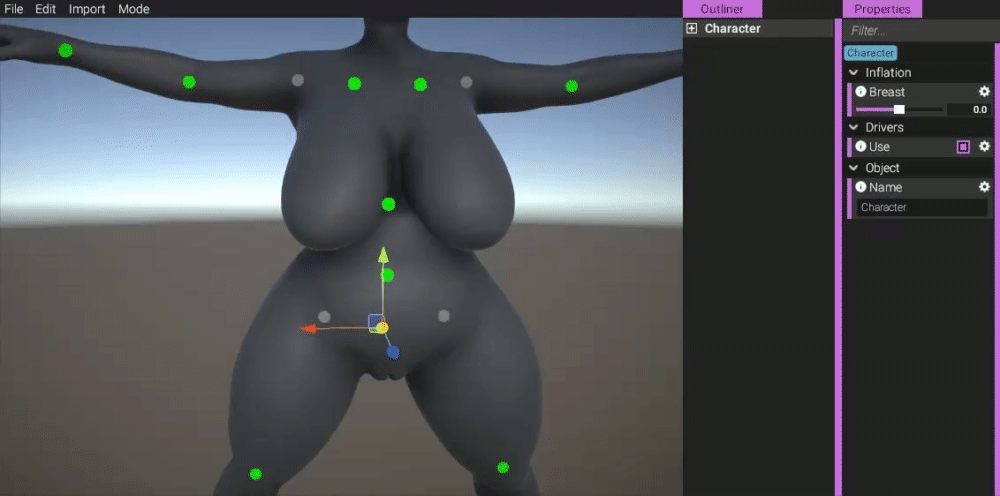
Again, the corrective shapes used in these drivers are calculated automatically. We calculate 4 shapes (breasts swinging up, down, left and right), times 2 breasts, times 3 states (flatchested, default, inflated), which equals 24 shapes. All of these shapes are calculated in just 20 ms (total time) by making use of GPU compute. (Compare that to Blender, which calculates 1 corrective shape in around 5000 ms.)
When configuring flatchested/inflation, bones are moved to their optimal locations for best possible deformation. All this is calculated automatically:
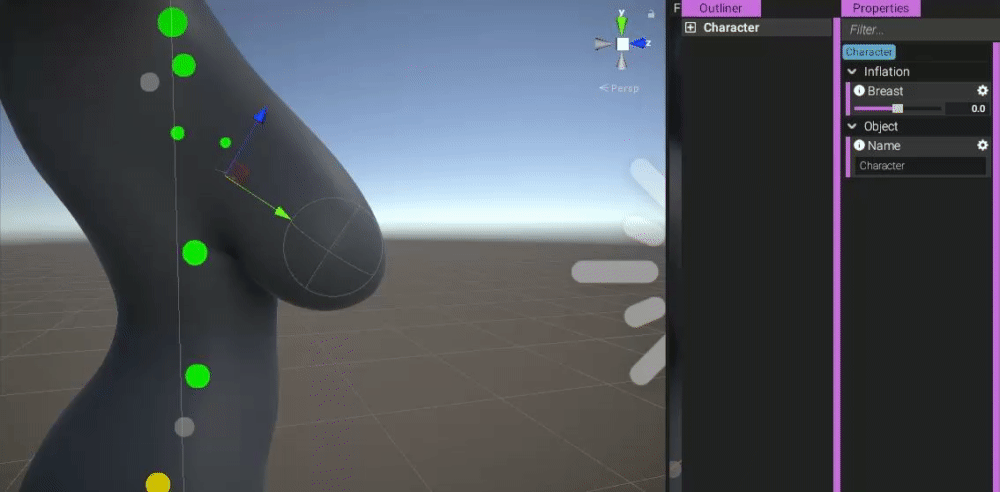
(The bones affecting the breasts are moved and rotated according to automatic calculations to have them properly configured for flatchested/inflated behaviour.)
https://gyazo.com/47820a596a0197b42d7b1fa51ac19c2b
(Just swinging breasts around in their default state to examine physical behaviour.)
https://gyazo.com/9f0f7d3a8760768877ef4a157336939a
(Examining flatchested behavior. Again, this behaviour is driven through the same physical representation, only that it has been altered to behave in a flatchested way.)
https://gyazo.com/db91565c9a9ec5a9cd81edfc95a110f4
(Configuring the breasts to be a mix of flatchested and default state. Since only 1 simulation is running, this won't cause any strange behaviour. Mixing states is fine.)
https://gyazo.com/90aec349b574f3cee69d6d59bfe8927b
(Inflating the breasts and playing around with them.)
https://gyazo.com/90e504d8351aee106d46ad3a7a0a3f2f

(Examining the new squash & stretch behavior on a character lying down and with a mixed flatchested/default configuration.)
https://gyazo.com/52b06c2038b683d0c476f00bf4fe6121
(Using a body type in default breast state.)
https://gyazo.com/3d745006fefc446fd8759931a4e3ad8a

(Configuring a mixed flatchested/default state while body type is active.)
https://gyazo.com/e2ef71a7a9339513022353ab03792b80
(Configuring inflation while body type is active.)
https://gyazo.com/dca14525ef2744e544707af987019614
(Examining inflated breasts when hanging downwards.)
https://gyazo.com/bbc95f1b93b9f1944e11d4a7b65925e3
Future work
Again, the shapes don't always necessarily look exactly the way we would like them to, but for being an entirely automated system, I still think it's pretty good. However, it would still be good if we could author corrective shapes manually if we wanted to.
This is something I mentioned in a previous text. In it, I wrote how this was a challenge to do because we don't even have access to the skeleton for body types during authoring (the skeleton is calculated at runtime inside the app), which is required in order to create corrective shapes. This means we would have to come up with a system to export the skeleton from the app, import it into our authoring software, create the corrective shape, export it and then import it - something that felt like a very inefficient and cumbersome workflow that we weren't to thrilled about having to deal with.
However, now we have thought of a way that is much simpler than this. Since the corrective blend shape is calculated inside the app by simply using a target shape, it doesn't matter how this target shape has been produced. In the case of the automated system, the target shape is something that has been calculated using delta mush (we wrote our own system operating on GPU). But this target shape could be anything, for example a manually authored one instead. The only thing we would need to do then is export the mesh, edit it the way we want, and then import it again. That's way less cumbersome than having to deal with skeletons.
This could also potentially open up for you authoring your own shapes in your own 3D authoring software in the future to get just the right kind of hang for the breasts that you want. (Affecting the models through custom offsets in general is something that we're interested in and want to implement at some point, and this goes hand in hand with that.)
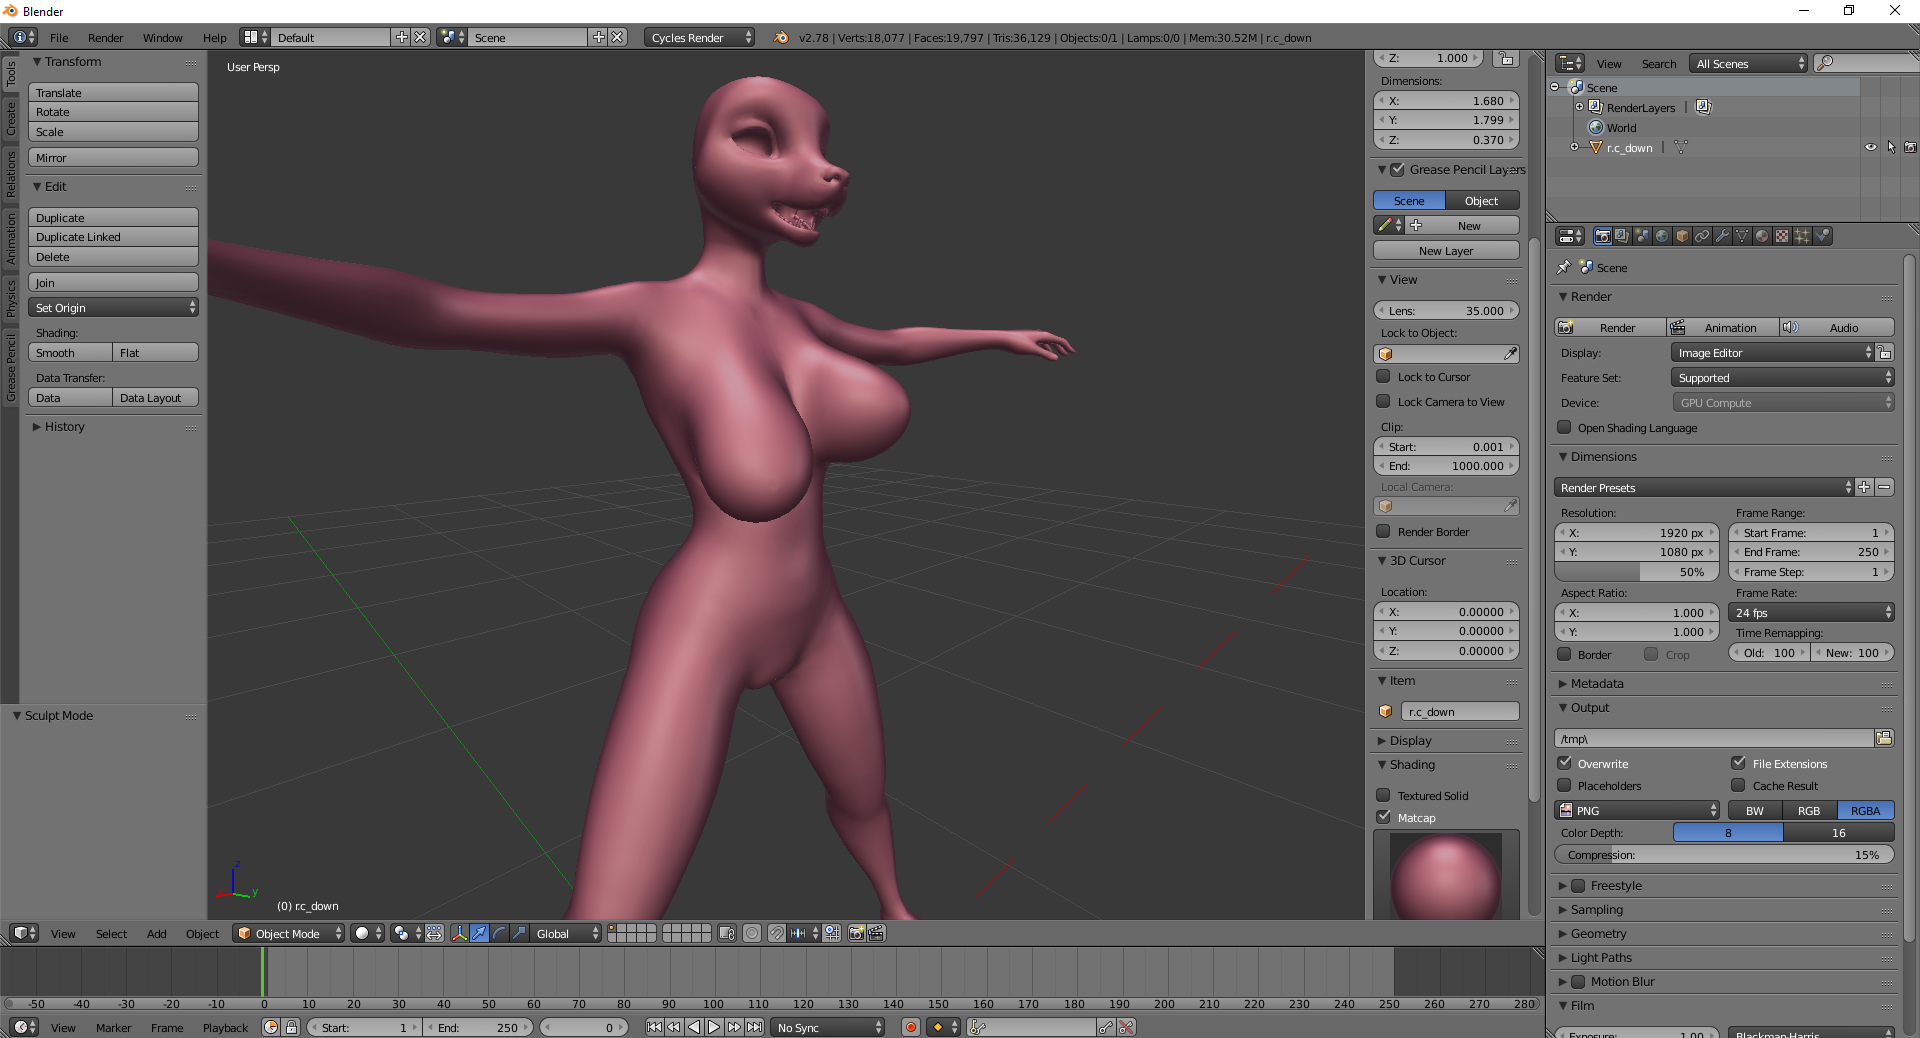
(We implemented test code to export the automatically calculated "down" shape. Then, we imported it into Blender. The idea is to allow such shapes to be tweaked in 3rd party software, if desired, and then brought back into the editor, where this shape is used as a target for calculating the corrective shape gradient used together with skinning.)
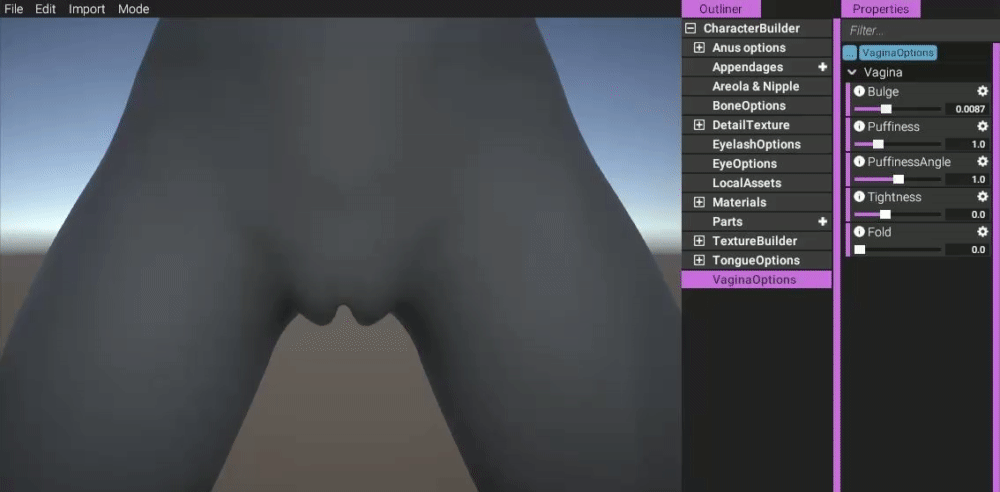
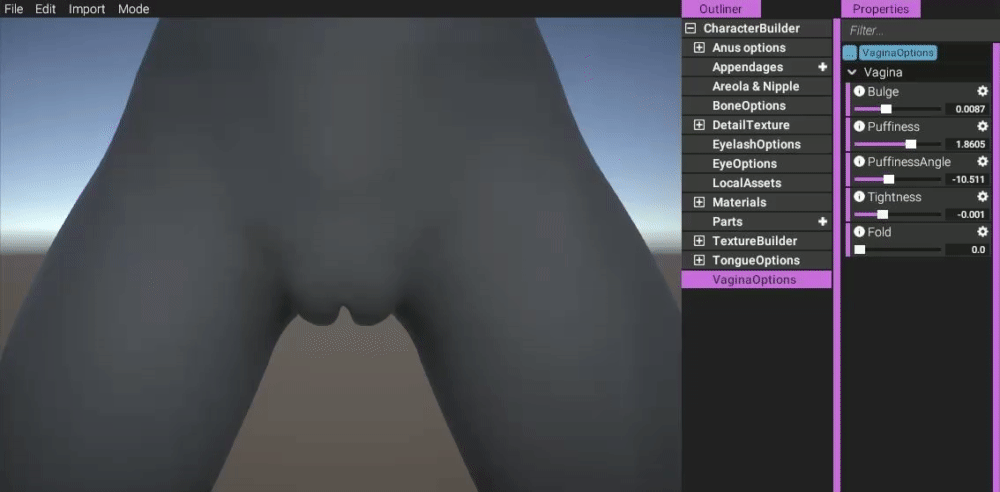
Vagina options
We stated previously that we didn't have the time to implement options for vagina for the first release. However, given the recent success of using bones for body customization, we figured we could get something going here relatively easy using a similar method for vagina. So that's what we've done, and here's how it works!

(Configuring bulging.)
https://gyazo.com/128bdf417806f64897c5fee1d7730794
(Configuring puffiness.)
https://gyazo.com/bce8e462f03fe3da870fd6aa938d2c93
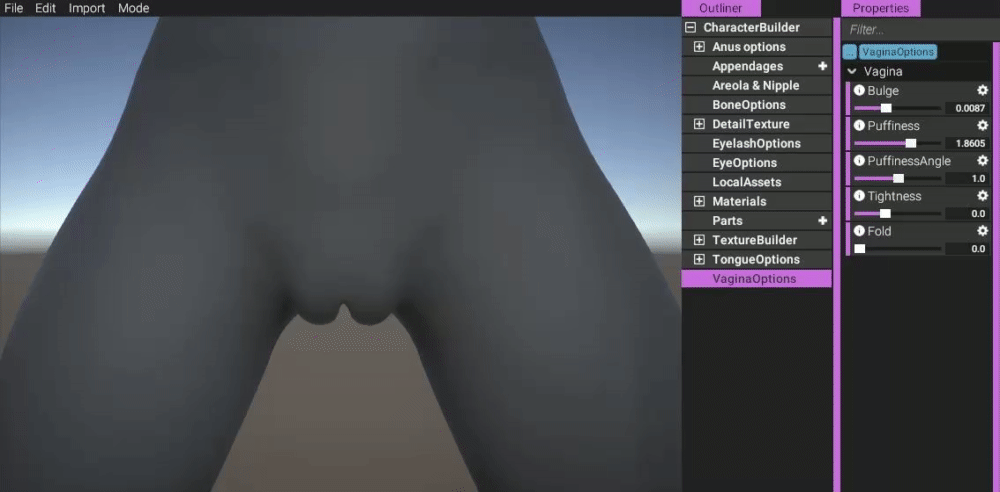
(Configuring at which angle puffiness is applied. Requires puffiness from above to be set for this to have any effect.)
https://gyazo.com/fd25dcb033c47b72612d6cef6be769f2

(Configure tightness.)
https://gyazo.com/94942175a0747e64e676501da84a5f9d
(Configure how the vagina "folds".)
https://gyazo.com/0d18ce805ca008ef3745a374b39f661a
We're happy this is making it into the first release. After all, it wouldn't feel fair if only shafts were possible to customize. This didn't take that long to implement either.
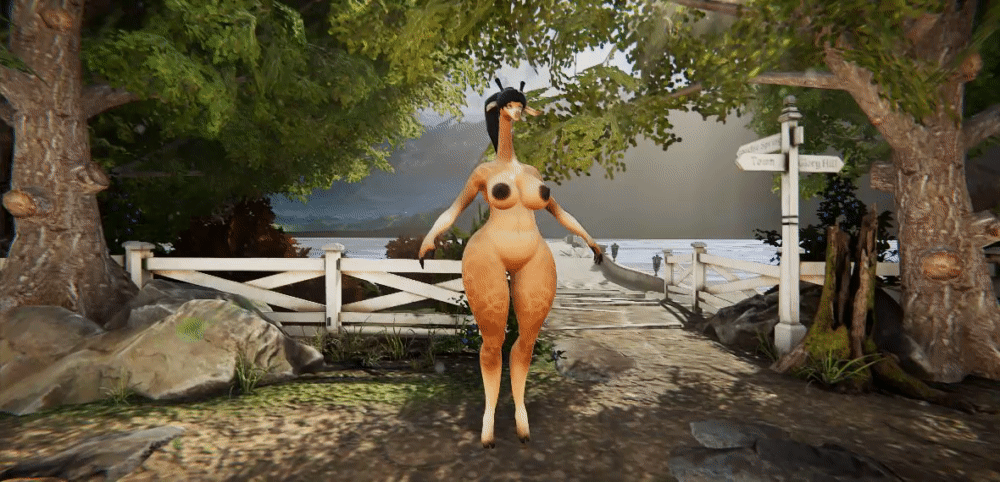
Character creator environment
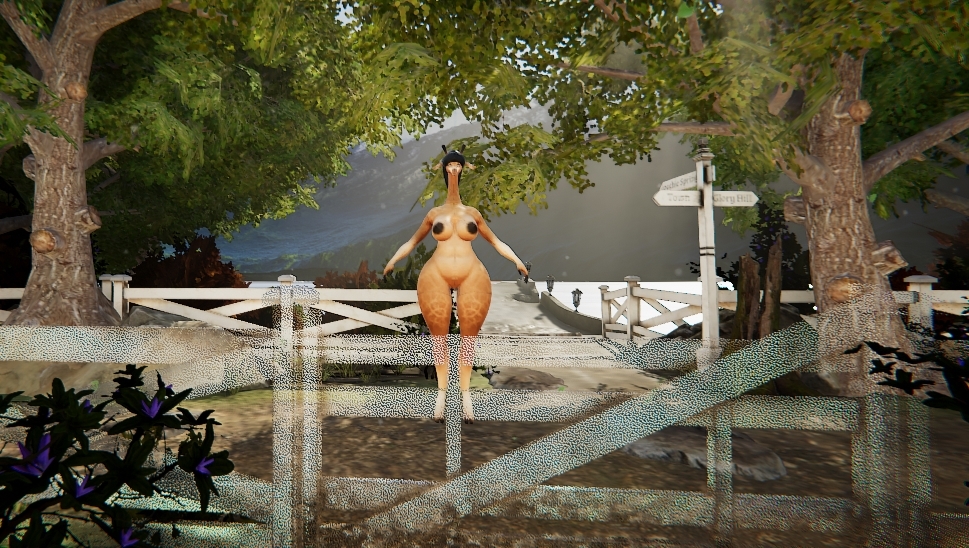
We wanted to create a cozy and welcoming environment for you to create your characters in. We're happy to finally show you Pegashis latest work! (In case you're wondering why Maya is standing there - she was just a placeholder Pegashis used as a reference for scale when working on the level.)
https://gyazo.com/a744cecaa3b2d10f06568583d4c729a3
Dither fade
Objects obscuring the view can be quite annoying, and was indeed a problem that would arise for many camera angles and situations in Yiffalicious. That's why we this month have invested time into creating a special type of shader for YL2 to handle this specific problem.
The way this shader works is that if anything is deemed to obscure the view, then the object is faded out. But this is tricky, for two reasons:
1. How exactly is something determined to be obscuring the view?
Using solely distance from camera would not be a good technique, as that would fade any object the camera approaches, even if it isn't necessarily obscuring the view. Imagine if a character is sitting on a couch, and as you approach the character from the front, suddenly the couch starts to fade out. That wouldn't be ideal. Furthermore, perhaps sometimes the user even wants to be looking close up on some item in the environment. If distance was the only deciding factor, then that wouldn't even be possible to do as those objects would be faded out as the camera approaches them.
2. How is object fade even supposed to work?
Fading objects is more tricky than you might realize. Due to the nature of how Unity's built-in pipeline renders objects, it's not possible for transparent objects to receive shadows (and obviously we want objects to be able to do that). This is a catch 22 - in order to fade the objects out, they need to be transparent, but if they're transparent, they can't receive shadows. (Furthermore, all transparent objects are rendered using the forward rendering path, which is far slower than the deferred one. Since we want to use this shader on as many objects as possible, that would mean significant performance loss. Unacceptable. The fading needs to happen in the deferred rendering step.)
(Some might say, then, why not simply use pixel blending in the deferred path? The answer to that is simple - pixel blending does not work in the deferred rendering path. Or rather, if you'd use pixel blending in it, not only would you blend colors, but also normals, glossiness and emission, which clearly is not what you want.)
Luckily, there's a way to "fake" transparency on opaque objects in the deferred rendering path by using an ancient technique know as "dithering". Dithering is a method where you're able to achieve effects of gradual color change despite only using a very limited palette. You probably recognize this effect from older portable gaming consoles like the Nintendo Game Boy, where developers were limited to only 4 colors. So in order to create these gradual color changes, developers had to use clever patterns of pixels.
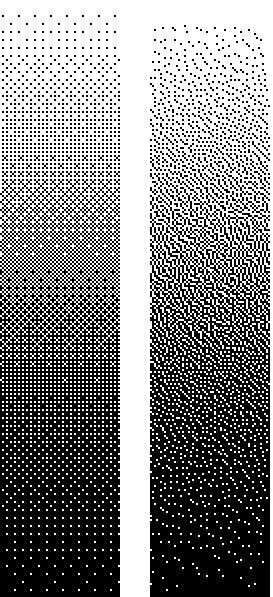
(An example of dithering. Despite only using 2 colors (black and white), the effect of a gradual transition from black to white can be achieved. On the left side - a repeating pattern. On the right side - a noise.)
So essentially the way transparent dithering would be implemented into a deferred shader would be to clip pixels (discard them from rendering) in a dithered pattern. So even though the object would still be 100% opaque, it would appear transparent as pixels from the background are sprinkled inside the object!
(The fence is dithered.)
So that's that for transparency, but what about the first point (determining obscurity)? For this problem, we're still going with distance, but combined with a focal point. So that means if the focal point is on, let's say, the character on the couch, then the couch wouldn't be faded as the focal point is closer to the camera than the couch is. And in the case of looking at an item in the environment, the focal point would be on that item, and thus not faded.
But what exactly is the focal point? That's easy - it's the user placed pivot point of the camera!
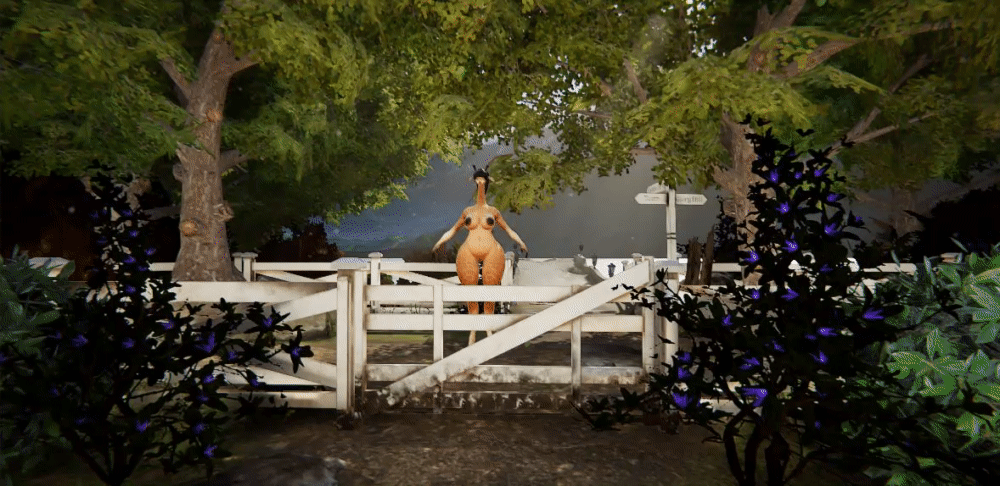
(The fence is faded out as the camera approaches the pivot point, which in this case is placed on Maya.)
https://gyazo.com/a527172d7978ea05c556338505c2dbd3
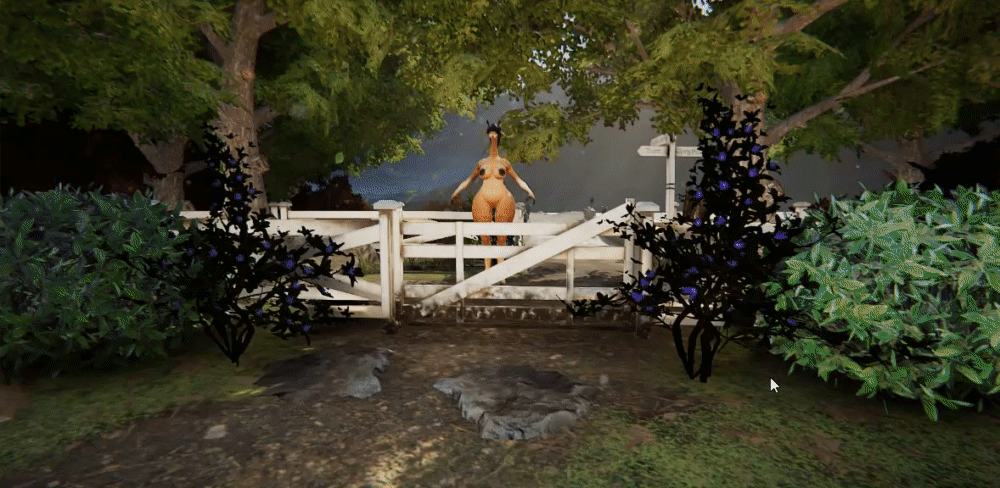
(Likewise, when moving the camera backwards, the fence doesn't just pop up in the view, but rather is gradually revealed as the camera recedes away from it.)
https://gyazo.com/45d3c5e863a7a0995e25dbb7b97bcaa3
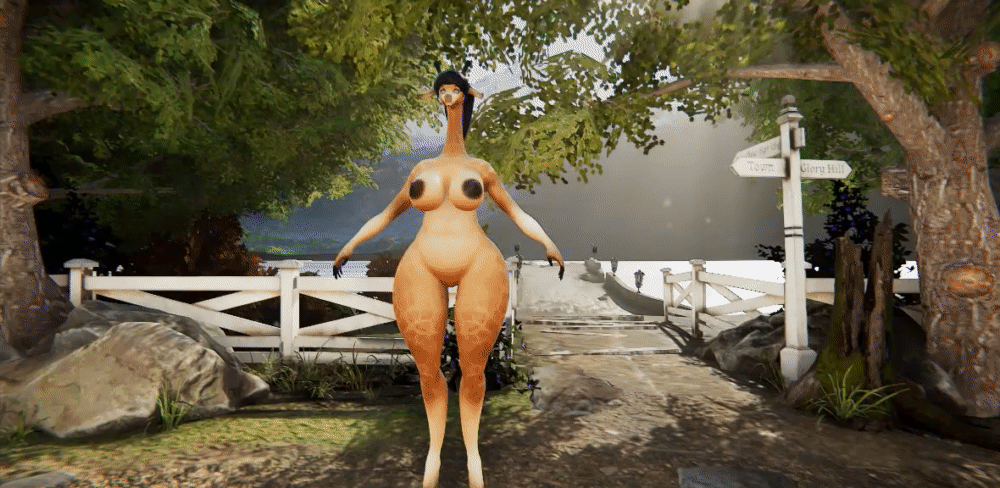
(When the pivot point is placed on the fence, the fence won't be faded out unless it starts intersecting into the camera too much.)
https://gyazo.com/17959088020d807a0eb8c5c908e09747
(Dither shader in action when pivoting around character.)
https://gyazo.com/90c705ea5f8bb062088413f3938375b2
There's still some limits to where exactly we can use this effect. For example, trees and bushes use special shaders of their own, so this effect would not work on that. But for most other things, we should be able to use this shader and that is indeed what we intend to do in future environments.
We're super excited about this shader and think it will make the experience much better for the user.
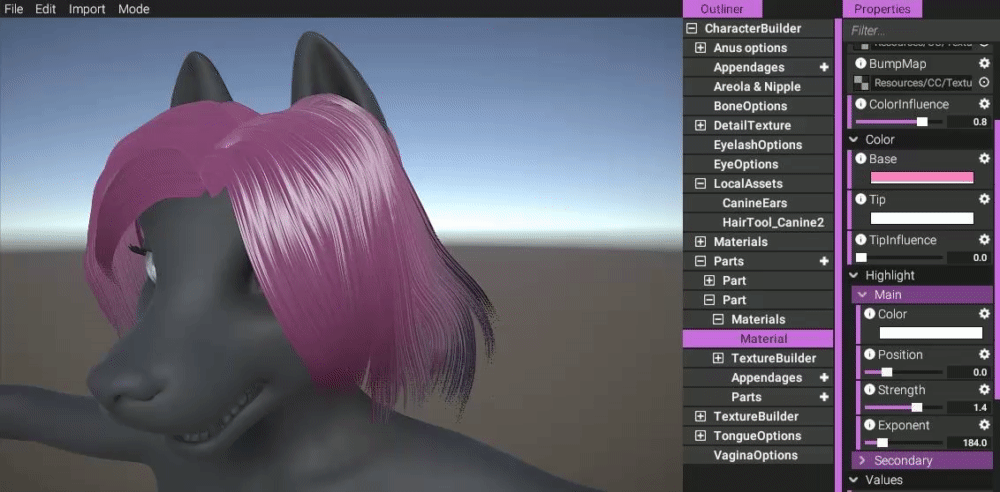
Hair shader
We now have a hair shader that is possible to select in the material properties of "parts" (you cannot use hair shader on the character directly).
To demonstrate this shader, we have designed a hair style in blender using Hair Tool for Blender.
Let's see it in action!
To start things up, lets import the hair Dogson authored in Blender:
(Importing authored hair.)
https://gyazo.com/56d9cf8726f6d4bbd72f22c2467b8c4a
Then we can set this object up to use our hair shader:
(Configuring the material of the imported hair to use our hair shader.)
https://gyazo.com/740848ca775aa4d5663611dfac02d2e0
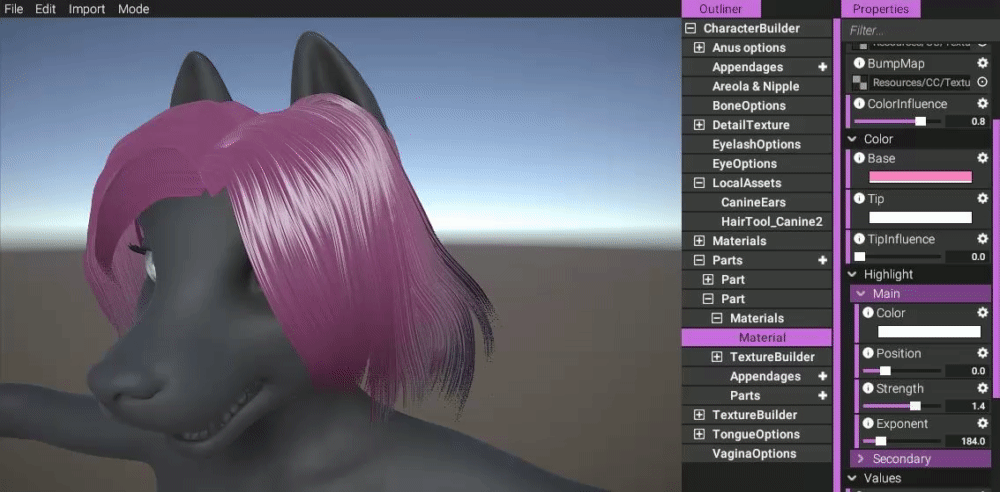
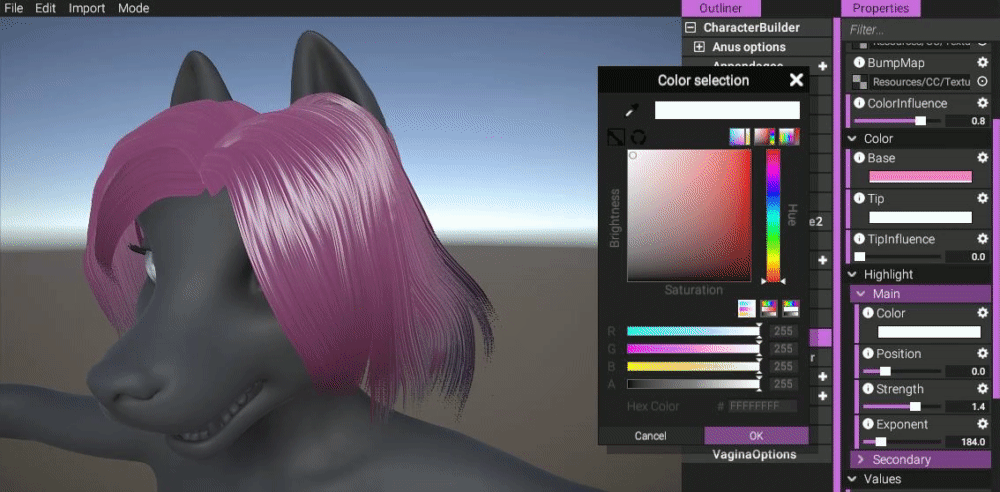
This shader has as bunch of properties you can configure. Lets go through them!
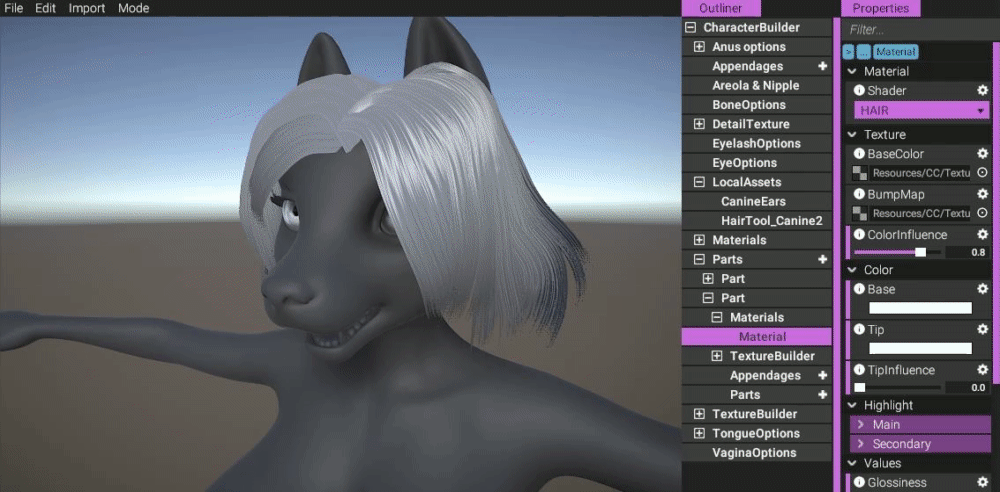
(You can configure the color of the hair.)
https://gyazo.com/b7d4ba8a881eb504ad8a762f810b920a

(You can configure where the highlight of the hair appears.)
https://gyazo.com/10f628b4bfc571c1ece810e2d57c8814
(You can configure the strength of the highlight.)
https://gyazo.com/fc3227c30b2e66d7fbb87db0e8cb8ce7
(You can configure how much the highlight spreads out.)
https://gyazo.com/21bcf9a0d8944c52f8930ce476fe3596
(You can configure the color of the highlight.)
https://gyazo.com/5de2a8a058677ab5c2b70713ca5513d0
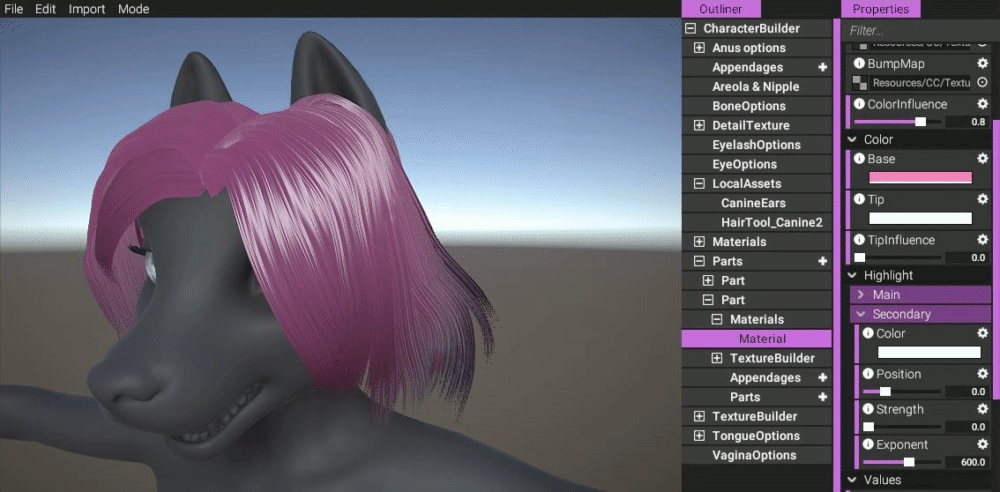
(You can also configure a secondary highlight, if desired.)
https://gyazo.com/b6007d3cd4a198c163b358377815cd25
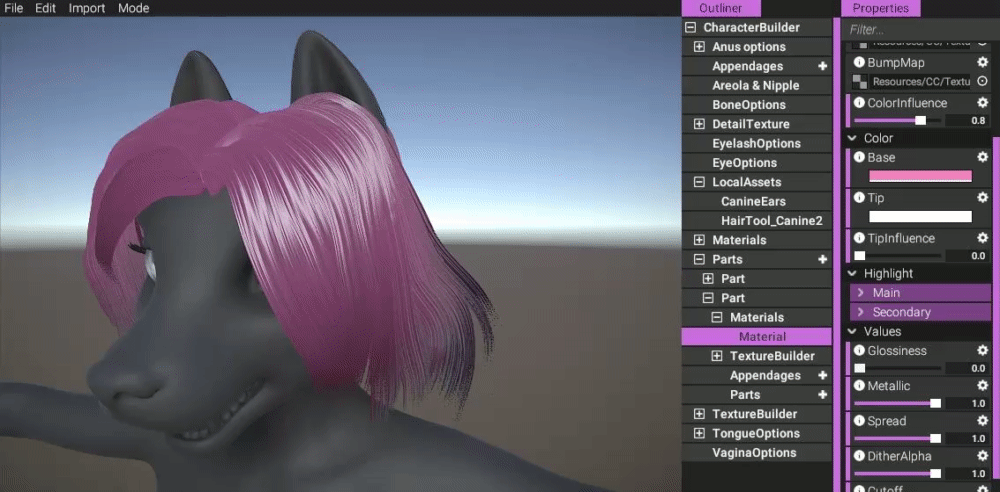
(Properties for configuring glossiness and metallic.)
https://gyazo.com/ba0c48b06f4e89baa317f0cfc0f4c6b4

(You can also configure the nature of the spread of the highlight.)
https://gyazo.com/61a58c6d06f3763a42e46d0ed39d4d30
Achieving transparency on hair is a tricky business. Due to the nature of real time rendering and the fact that triangles in a mesh are distributed seemingly random, it means that they could be rendered in the "wrong" order, causing undesired artifacts. The solution that would produce the best result would be to order the triangles every frame, so that the closest ones to the camera are rendered last, on top of the other ones. However, this is an extremely slow operation to do and not something you want to do every frame.
Many artists don't use transparency at all for real time hair, simply to avoid this problem entirely. Others might use clipping, but clipping can cause some really ugly looking edges.
With the success of using dithering for fading obstacles, we were curious how it would look on hair. So we implemented a dithering fade slider into our shader. Here you can see the result:
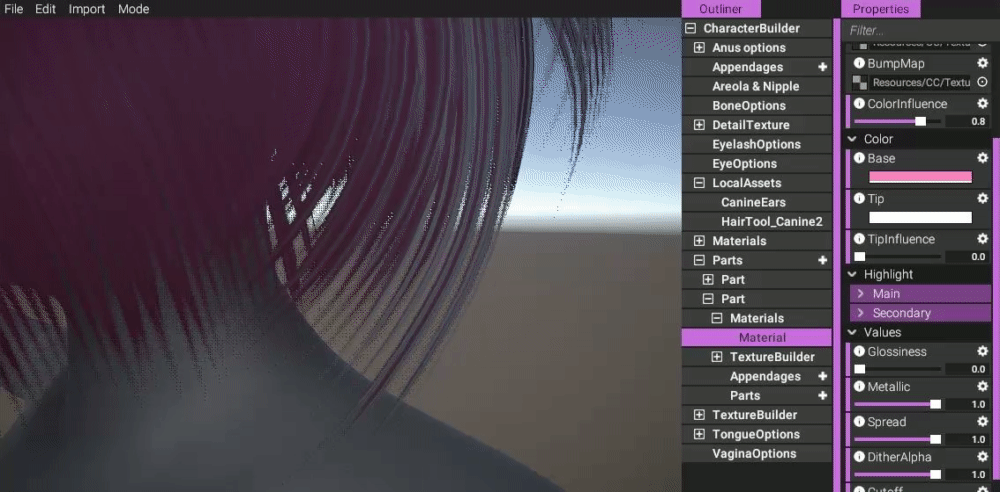
(Here we can see a close up of dithering in action. You can configure whether or not to use dithering.)
https://gyazo.com/d93e9eb3175233dc66bac24c997f9bfe
This is just an optional slider. We think it definitely makes things look better than when using solely alpha clipping, but it's up to you if you want to use it or not (or simply avoid using transparency all together a.k.a. blob hair).

(360 degree observation of the hair shader in action.)
https://gyazo.com/c64a8e54af0463560895095e566b4dd4
Shaft options curve
This is more of a side note but I thought I'd mention anyway.
A user asked if we would implement curving for shafts in the editor:

Since this is such a trivial thing to add, we added it right away:
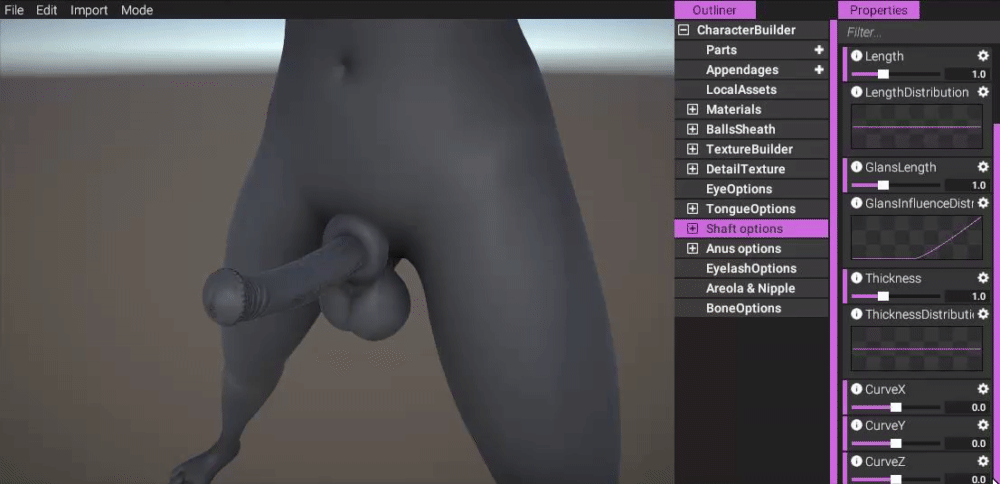
https://gyazo.com/1c8d5fd80056d24288187a566197627f
Release schedule
By now, I think our intended release date is pretty much self evident. In either case, I'd say we're still on point for this planned release date, but it's going to be tight and a bit crunchy.
No more massive progress updates such as this one will happen until we have a build out for our patrons.
There will probably be some updates closer to release, mostly detailing what exactly is included in the build so non-patrons can see for themselves and decide whether or not to pledge.
Summary
We now have a system in place that dynamically adapts the physical representation of breasts regardless of what shape or inflation you throw at them. This has been very challenging to accomplish. The results don't always look exactly the way we want, but it's a good foundation.
We've also implemented customization for vaginas.
Additionally, we've implemented a shader that fades object out if they're deemed to obscure the view of the camera.
A hair shader has also been implemented.
No further massive updates will be posted until we have a build.