 Home
Home

 Artists
 Search
 Recent
 Random
 Posts
Posts
 DMs
DMs
 Tags
Tags
 Random
 Importer
 Import
 FAQ
FAQ
 Account
 Register
 Favorites
 Login
Login

YL2 Update Dec 2018 (Patreon)
Content
Hi all!
We hope you had a great time during these holidays!
We're a bit later than usual with this month's update. This is partly due to the holidays and all its social gatherings, but also because I started out the month by being ill in the flu. We've still managed to make some great progress though and we feel good about it, so let's just jump straight into it!
Part system
This month we've been busy with implementing the "part" system in YL2.
"Parts" are separate objects that can be added to a character. A typical example would be ears or tails. Parts differ from "appendages" (fluff/decorative models) in the sense that they can be transformed during an interaction (unlike appendages which are static and "glued" to the surface of a mesh). Since parts are individual objects, they are not batched together during rendering (unlike appendages).
Parts use the same model referencing system as the model appendage groups. The idea is to offer an ever increasing selection of different pre-made parts, but of course custom models are also supported. For this example, we'll import an external model.
To import a model, simply navigate to Import > Model in the menu:
https://gyazo.com/5933353c014b84241a473e046f3a6d21
Then, to add a part, go to Parts and click the plus sign.
https://gyazo.com/0ed64e2623ac24a7a776eba701ba1eb2
An empty part is not of much use though, so let's reference the model we imported:

https://gyazo.com/41bade32f5363fa9db36efacca68d3ad
We can now move the part around in any way we like:
https://gyazo.com/788d8b9c37524e5ae8b2e8f5efbeca35
Parts, like other objects, use our "OmniPoint" system, that can represent a point in space in many different ways. If we want the part to stick to a certain area, we have three options:
1. Directly set a parent for the part:

https://gyazo.com/5b3de44ea5f6778230b7fefeb0b942bb
2. Snap the part to a bone (using shift + click):

https://gyazo.com/aa684a52d661f10d1fba5824cf7b19bf
3. Snap the part to a surface point (using ctrl + click):
https://gyazo.com/15ef32affecb82d043ab01d783cdaff0
Once snapped, you can still move the object around, but the new location will be stored as an offset from the snapped point to the newly configured one.
Scaling is configured inside the inspector:
https://gyazo.com/d36e9366ba66d0569d9311ac0ccee63c
If you want to mirror a part, of course you can do that easily by checking the mirror checkbox:
https://gyazo.com/fa3f5e48026f9412898385d9bd8b42d8
A part has its own texture builder:
https://gyazo.com/bdac7c354eb2efc0d009573a91f6e96d
You can also add appendages to parts:
https://gyazo.com/89d9942bf8717b8e0c437c6a0d1473f7
What happens if you switch a part to another model when it already has fluff added to it? It tries to adapt the appendages to the new model:
https://gyazo.com/a2144defdf82d9d0429643036c6df387
You can of course undo this, and the appendage instances will recover their previous configurations:
https://gyazo.com/1e2d10d5ff92ae4fb2874a2c0cd55dd6
This specific action proved extremely tricky to implement. Since history is only tracked on a per property basis, i.e. if the user changes a property, then only its former and new state is stored in the history command. Here however, what happens is that the locations and directions of the appendage instances are indirectly affected by the change of another property - in this case the model reference property. This means the locations and directions of the appendages would essentially become corrupted if you changed the model and then undid that action, because the appendages would first try to adapt themselves from the old model to the new one, and then from the new one to the old one when the undo command is run (which of course does not guarantee the result would look the same as it did before any of these actions were made).
The solution we came up with was to implement a system where it's possible to hook into a property and inject extra commands during its history processing. So in this case, we're hooking into the model property to not only store the model property's before and after state, but also the before and after states of the appendages.
Parts can also contain other parts, forming a hierarchy:
(Silly example of parenting a sphere to the ear.)
https://gyazo.com/3d1a8738c23cdcf9639b52555030d263
If you enable the mirror option in a child part object, it will mirror according to its direct parent:
(Silly mirroring example.)
https://gyazo.com/b229eeaa994d6a0d343affd3e42d5c08
Bone scaling
Another feature we've been working on this month is bone scaling. In the main character object you're now able to scale specific bone groups:
https://gyazo.com/d3a801c4e7cf4ecc6d1c4063c17e2de6
Right now the sliders are capped at +- 20%, but it's hardly carved in stone. We just think it makes sense to put a limit somewhere, but where exactly that limit should be remains to be decided.
The bone scaling caused a ton of issues for us with the appendage and part systems, since they assumed the character always was in its unscaled form. When calculating the appendage locations and skinning, we essentially had to "undo" the scaling by applying the bind pose and bone matrices in the inverse order, getting the locations as if the model was unscaled.
Fluff coloring
There always were several features we knew we wanted fluff appendages to support, like blending in with the color of the model they're attached to, while at the same time being able to have their own individual color, connected to the color indexing system. How exactly all of that was going to work was always a bit of a question mark for us however. This month, we've been working on exactly these questions.
Our original idea was that during the placement of the fluff instances, the UVs of the source surface below (that they're connected to) would be stored inside the instance. Then, during rendering, the instance could simply sample the source textures, and blend in their colors according to a curve.
However, during the implementation of the shaders for this system, we realized we had overlooked a major issue - the source mesh isn't always made up of 1 material and 1 set of textures. To ease our content authoring and increase texture resolutions, we have opted for giving each switchable part of the character their own materials and textures. A character is made up of 4 parts - the head, the body, the hands and the feet. This meant if we were to sample the source textures during the rendering of a fluff instance, we would either have to use branching when deciding what texture to sample (which is very bad to do in shaders), or we would have to split the fluff mesh into several sub meshes according to what part of the character they're attached to (but that would increase draw calls). Neither one of these paths were satisfactory, so we decided to go back to the drawing board.
We realized that looking up textures is actually a bit of an overkill regardless, since it's just a single point in the source UVs that's used per instance anyway (i.e. just the color in the point they're attached to). Therefore, rather than looking up any colors in textures during rendering, we could simply just pre-sample the textures and bake the color information directly into the fluff mesh instead. So now we're doing exactly that - not only for color information but also for metalness, smoothness and emission. This means we don't need to do any source texture lookups at all when rendering fluff instances. This solution comes at a small cost of having to re-generate the fluff mesh each time textures are changed, but the benefit of not having to branch or do any source texture lookups makes it worth it.
So that's that for the source color lookups, i.e. the color blending into the source mesh. Next is how individual coloring was supposed to work.
As stated earlier, our original idea was to simply use a curve to decide how much to blend from the source's colors into the fluff instance's own color. However, we realized that this method was far too intrusive, since this curve would be on a per group basis rather than on a per instance basis (having it per instance would be far too cumbersome to work with). So we tried to think of something better.
This is when we realized we didn't really have a good idea for how coloring of individual instances was supposed to work to begin with. We really wanted the color indexing system to be used everywhere in the character editor, making colors easy to change in a single place, affecting the whole character. But forcing the user to only use colors defined in the swatch list would make smooth color transitions in the fluff instances very cumbersome to do. Still, we felt that if we side-stepped the color indexing system, it would kind of defeat its purpose.
At this point, we realized we had actually already implemented a color gradient system earlier which would fit perfectly for this problem. Instead of binding each instance to a certain color index or color value, we could simply reference a color gradient in the group itself, and then have each instance store a single floating point value between 0 and 1 to represent a lookup in that gradient. This way, the color indexing system would still be used, and you can still create smooth color transitions in the fluff instances. This method was also very simple to implement into our already existing sculpting system, since it was already adapted to work with single floating point values.
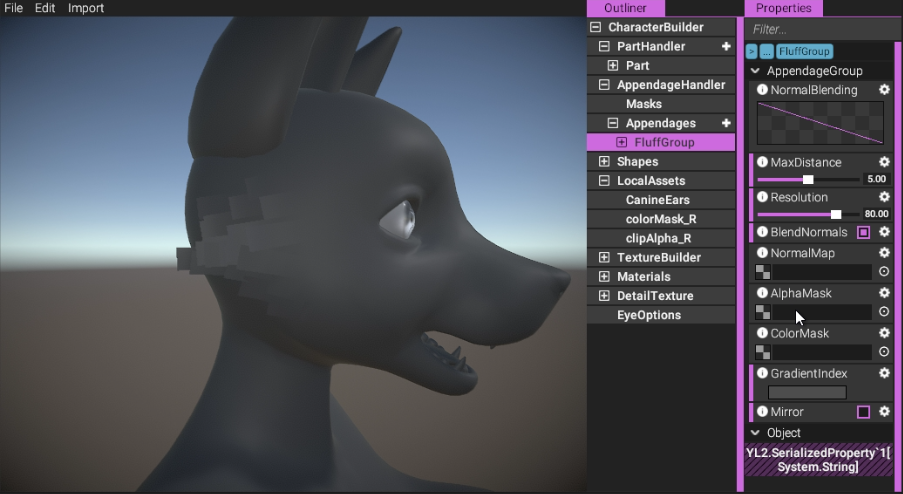
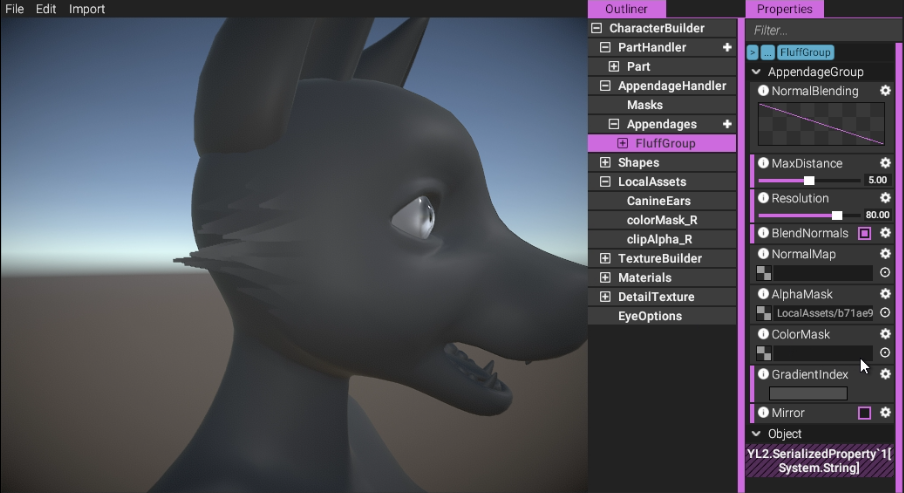
Great! So now we have individual coloring and source color blending. Next up was trying to figure out how the shader was supposed to know what color to use of these. We realized we wanted it to be possible to define a pattern of how the color is distributed, so rather than using a curve, we decided to use an alpha mask. That way the user is fully empowered to create whatever styles of transitions they want. We also realized it's not always that you want to use the individual coloring, but instead only use the source color. For this we implemented yet another single floating point value to represent how much to use the individual fluff color (essentially an alpha).
Additionally, we wanted it to be possible to change the silhouette of the fluff instances. This was accomplished simply with another alpha mask (these masks - the color blending mask and the alpha mask - are automatically combined by YL2 into a single texture).
Lastly, we also wanted the color mask to be possible to "move" up and down in the UVs, so for example only the tips of fluff instances are colored but can be smoothly transitioned to cover the whole instance if wanted.
Here's examples of the final system.
(Just adding fluff - nothing new here.)
https://gyazo.com/12dd8239f08396e1c225033d17c05593

(Just sculpting and tweaking of instances - nothing new.)
https://gfycat.com/PopularSparseAmericanrobin

(Here, we're importing two textures we quickly threw together in photoshop - one clip mask and one color mask. Then, we set the group to use the clip mask to change the silhouette of the appendages.)
https://gfycat.com/WelltodoTinyAfricanfisheagle
(No clip mask used.)
(Clip mask active.)

(Here we're setting the color mask for the appendages and gradient index for the group. Then we sculpt the coloring of the individual appendages. The example is a bit silly since the area is so small. It's mostly to show the possibility.)
https://gfycat.com/BetterRevolvingBluebottle

(Finally, we show the UV offset and alpha features.)
https://gfycat.com/HugeSmugEastsiberianlaika
Material system
This is more of a side note than anything, but I thought I'd it mention anyway. While the PBR workflow will probably be sufficient for most things, we have implemented a system where you're able to select what shader to use when rendering characters and parts. This is done through a dropdown menu. When a new shader is selected, a material will be instanced and then populated with the textures from the texture builder. Each material can also have its own custom properties. For example, in the future we intend to offer a sub-surface scattering material, and perhaps a thickness slider would be appropriate for it. Right now we don't have anymore shaders than the PBR one, so it's mostly a system for the future when we may want to offer more types of shaders...
Penetration dynamics experimentation
Every once in a while, I feel the need to cheat a little bit and work with other things than the character creator. This month, I had a few ideas I wanted to try out for how penetration mechanics could work in the next iteration of the interaction systems. So I decided to do just that.
In Yiffalicious, we relied heavily on raycasting and a custom method for parsing those rays and applying their interpretation on a mesh. The method was relatively simple to work with and create content for, and I think it was a great first step to take. However, this method came with several limitations. Each ray could essentially only determine how much the orifice should stretch at a given point, but not actually physically take into account pushing, pulling or friction. On top of that - the rays didn't affect eachother in any way. It's true we added systems for these later on, but they were essentially hacked together on top of a system that didn't actually support them. The push/pull mechanic only worked on the entire orifice (not individual points in it), and only in 1 direction. No matter how much we'd try to improve them, the limitations in the base idea and implementation would always manifest.
This month, we've been working on trying to remedy these issues by using a different penetration method altogether. In this new method, instead of using raycasts, we're relying on a physical model made up of colliders and springs, meticulously configured to achieve the kind of effect we're looking for:
https://gyazo.com/79bed241f99dafacb0443c3a68910f96
(Pushing and pulling is essentially given "for free".)
https://gyazo.com/981b40304265a4bd97767aae7368658c
(A setup such as this handles friction and angles in a much more physically realistic way.)
https://gyazo.com/a72ea37df5fbc6fcab2157591fafbd1b
Each point is connected to its neighbors, meaning if one point is affected, it will push and pull its neighbors too, propagating the effect through the whole configuration. Also, pushing and pulling of the whole object, together with adaptation to angle of the penetration, are essentially given "for free" using this setup.
There are a lot of question marks remaining with an implementation such as this, especially regarding how to interpret these results and apply them on a mesh. We do have a few ideas though, so hopefully we could put something together. This lies further down the road though when we get to implementing the interaction systems. We still need to focus on the character creator first and foremost. Still, we think this is an interesting approach that's worth exploring more in the future.
Dogson stuff
Hello, this is Dogson, So this month I’ve been busy remeshing and making sure the various parts such as heads, hands and feet fit as perfectly as they can. It’s crucial to have the intersecting vertices identical to prevent faulty shading rendering and to avoid holes in the mesh that can break the illusion.
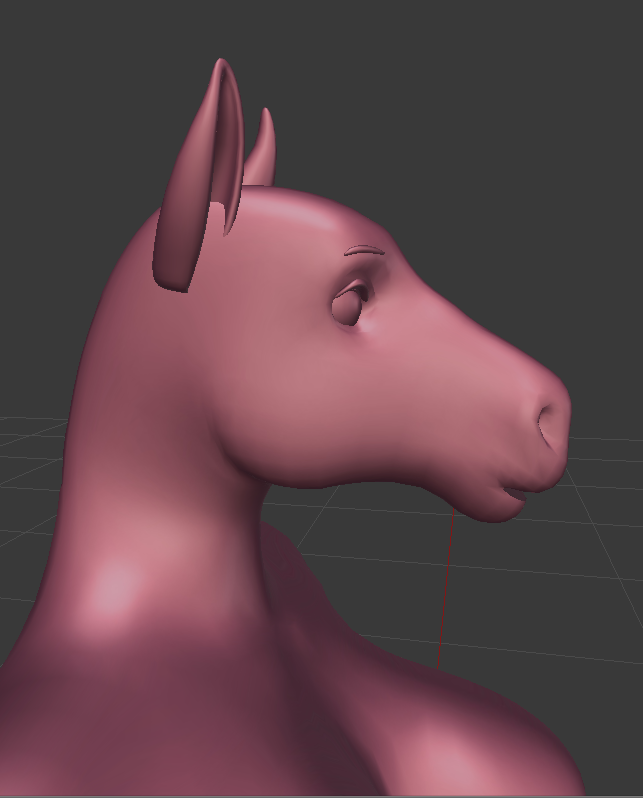
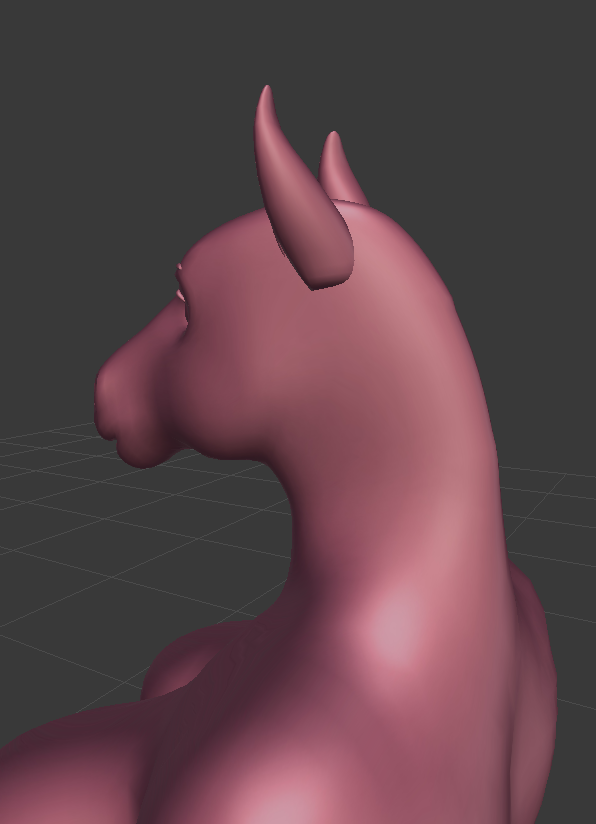
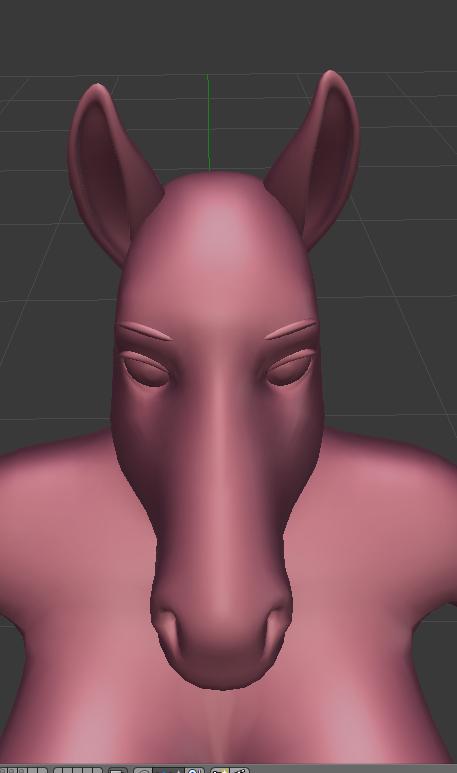
On a different note is that I’ve started to iterate an equine head this last weekend now that I feel that I have less laborious work of remeshing and refitting to do now. So I thought I'd share some images of it:

Summary
Illness and social gatherings did cut into the development of YL2 this month, but we still managed to get a lot of crucial things done. While the part system will probably require some final polish, it could for all intents and purposes be considered complete.
Bone scaling, penetration experimentation, fluff coloring and masking are other tasks we've been working with this month. Dogson has continued the work on content for the character creator, including an equine head.
The idea now is to start getting the new content into the character creator, so we can finally start testing and tweaking the character assembly and shape layering system we developed earlier.
- odes
