 Home
Home

 Artists
 Search
 Recent
 Random
 Posts
Posts
 DMs
DMs
 Tags
Tags
 Random
 Importer
 Import
 FAQ
FAQ
 Account
 Register
 Favorites
 Login
Login

09/27 Commission work process (Patreon)
Content
※주의 ! gif 이미지가 포함되어 있으니, 패트리온 어플을 제외한 환경에서 읽어주세요! 패트리온 어플은 이미지를 강제로 리사이징 하기 때문에 gif를 재생할 수가 없습니다!
// ※Caution! gif The image is included, so please read it in an environment other than the Patrion app! The Gif cannot be played because the Patrion application forces the image to be resized!

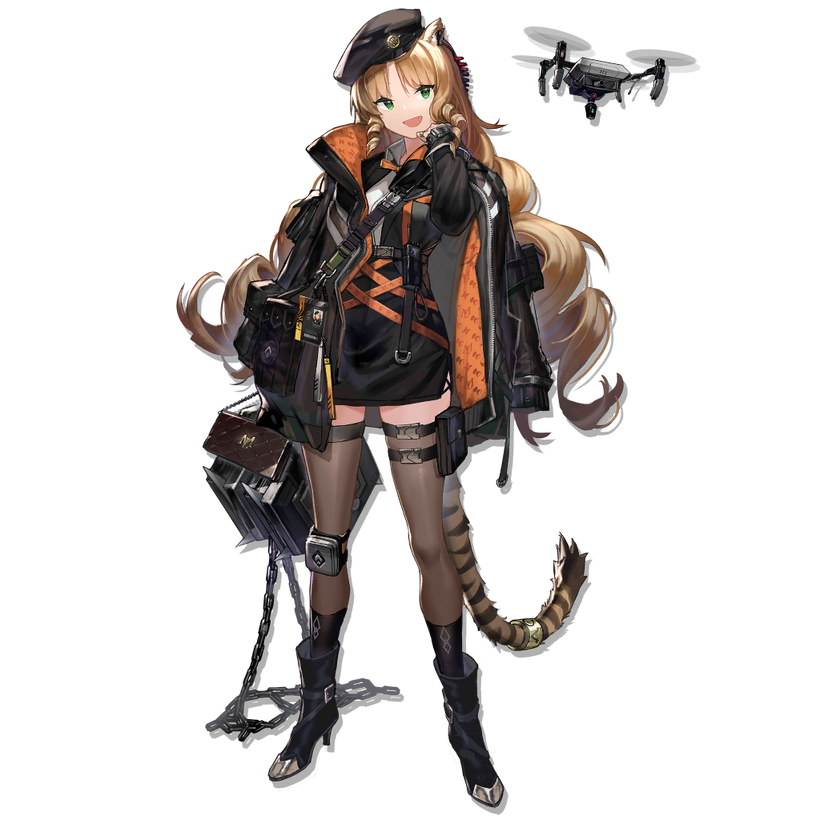
오늘의 캐릭터는 Arknights에서 등장하는 Swire 입니다. 그럼 시작하죠
// Today's character is Swire in Arknights. Then let's get started.

늘 그렇듯 러프 -> 디테일 순으로 진행합니다.
순서는 하체 -> 상체 순이든, 상체 -> 하체 순이든 상관없습니다.
// As usual, proceed in the order of rough sketch -> detail.
Order doesn't matter. Let's do as we please.

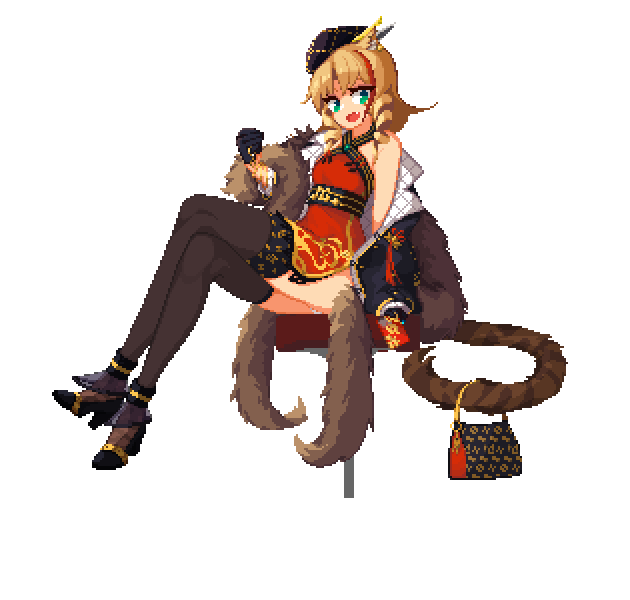
옷에 들어가는 문양, 무늬같은 경우는 옷을 먼저 다 그린 뒤 덧씌우는 방식으로 작업했습니다.
이런 방식으로 하면 디테일 넣는 과정이 매우 단순해집니다. 무늬를 잘못 그렸을때 수정하기도 쉽지요.
// In the case of patterns that go into clothes, you can finish drawing the clothes first and then overlay them.
This way, the detail-in process is very simple. It's easy to correct when you draw the wrong pattern.

나누어진 캐릭터의 주요 파츠들입니다. 움직임을 고려하여 나눠줍니다.
// The main parts of the divided character. Let's divide it considering the movement.

그리고 애니메이션 파트입니다. 큰 모션은 부채를 펼치고 닫는 것 뿐이니, 가볍게 작업해줍시다. 캐릭터의 파츠를 제대로 나눠놨면 어렵지 않습니다.
// And it's the animation part. The big motion is just to open and close the fan, so let's do it lightly. It's not difficult if the characters' parts are divided properly.
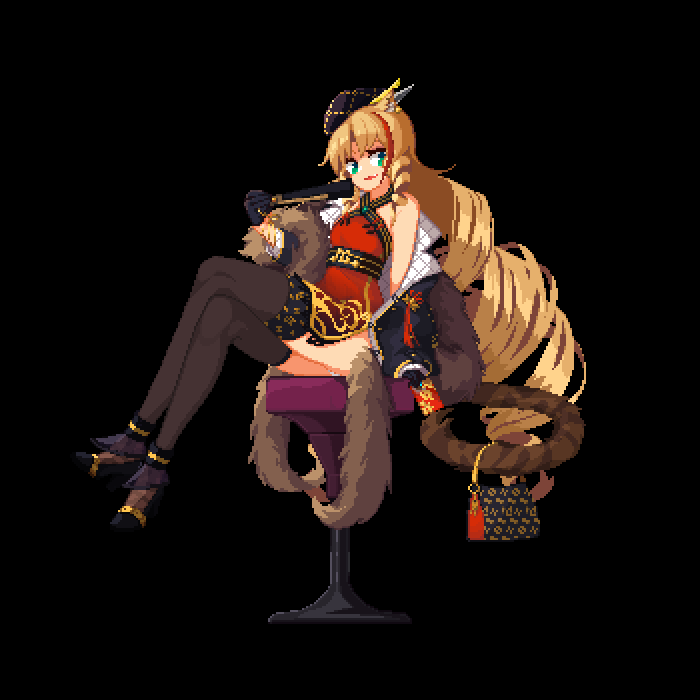
부채를 펼치고, 흔들고, 접는 동작입니다. 이 동작이 제일 크고 복잡하므로 주의해서 작업해 줍시다.
// It's spread, shaking, and folding a fan. This is the biggest and most complicated move, so let's work it carefully.


부채를 흔드는 파츠입니다.
그림자의 유무에 주목해봅시다. 그림자가 있으면 더욱 입체감을 살려 부채가 어느 방향으로 흔들리고 있는지 표현할 수 있습니다.
// These are fan-shaking parts.
Let's pay attention to the presence of shadows. Shadows give you a more three-dimensional feel to express which direction the fan is swaying in.

그리고 작업된 모션들을 합쳐줍니다. 기존에 작업된 숨쉬기(breath) 모션과 부채 모션을 합치기만 하면 되기에 간단한 과정입니다.
이후는 후처리 과정입니다.
// And it combines the motion that was worked on. It's a simple process because all you need to do is combine the existing breathing and fan motions.
Subsequent is the post-processing process.
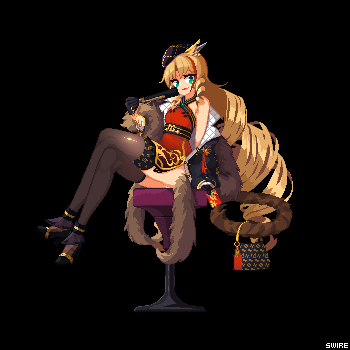
다리에 하이라이트를 넣고,
// Put the highlight on leg.

역광, 반사광을 넣고,
// Add Backlight, reflective light.

오버레이로 마무리하여 완성합니다.
// Finish with overlay.


이렇게 만들어진 캐릭터는 이런 방식으로 활용할 수 있습니다.
간단한 캐릭터를 만들어 이런식으로 활용 해 보는것도 좋을 것 같네요.
// These characters can be used in this way.
I think it would be good to make a simple character and use it like this way.
구독자 대상 커미션은 앞으로 예정된 작업이 끝나면 한달에 한번 정도 진행 할 예정이며, 다음 오픈은 100pixel 미만 한정으로 10월 말 오픈 예정입니다.
긴 글 읽어주셔서 감사합니다.
// The commission for subscribers will be carried out once a month after the scheduled work is completed.
and next open is limited to less than 100 pixels and will be open at the end of October.
Thank you for reading the long article.
※ 커미션 작업물은 보상으로 제공되지 않습니다.
// ※ Commission work is not planned to be offered as a reward to date.
Files
