Home
Home

 Artists
 Search
 Recent
 Random
 Posts
Posts
 DMs
DMs
 Tags
Tags
 Random
 Importer
 Import
 FAQ
FAQ
 Account
 Register
 Favorites
 Login
Login

[Diaries - Beginner] Blender From Scratch (Patreon)
Content
Hi guys!
It's been a while since I write my last diary. I also have not made any tutorials that discuss how to use Blender from scratch. So in this diary, I will discuss the basis of blender which will cover the foundation of the software. It's going to be a long diary, so be prepared.
Center of attention
These highlighted items should be the primary attention when you're trying to use Blender for the first time.

Modes
There are lots of modes in Blender. As a beginner you should only focus on 3 modes: object mode, edit mode, and sculpt mode

Object mode, is a mode where you can move, rotate, and scale the model that you created in the world. However, you cannot edit the geometry of the model unless you do it in edit mode.
Edit mode, is the bread and butter of Blender. This is the mode where you can edit the geometry of the model, add or remove vertices, extrude faces, edges, vertices, and more.
Sculpt mode, is a mode where you can sculpt the model the way you do in playdoh. It is essentially an edit mode that has the "human touch" characteristics into it. It is recommended to use a pen tablet to use this mode.
Select mode
TLDR; If you go to the edit mode, how do you select the object?
vertex = only select the vertex (points)
edge = Only select the edge (line)
face = Only select the face

Important shortcuts
These are the shortcuts that you need to use as a beginner:
- Shift + A = Add an object
- G = Grab, moving an object using the cursor
- R = Rotate an object
- S = Scale an object
- G + (X,Y,Z) = grab and move according to the designated (global) axis
- R + (X,Y,Z) = rotate according to the designated (global) axis
- S + (X,Y,Z) = scale according to the designated (global) axis
- X = Delete an object
- Tab = Changing modes
- Z = Changing material preview (Solid, wireframe, material, rendered)
- CTRL + P = Parent an object
- Alt + P = Remove Parent from an object
- NUM 1 = Front orthographic view
- NUM 3 = Right orthographic view
- NUM 7 = Top orthographic view
- NUM 9 = Bottom orthographic view
Edit mode
- E = Extrude, the bread, and butter of Blender. You can also refer to it as "Extend" since it will extend the vertices/lines/faces
- E + (X,Y,Z) = Extrude the vertex, edges, or faces according to the designated axis
- E + S = Scale Extrude, Let's say you have a rectangle, and you want to make a frame out of the rectangle. You're going to need Scale Extrude to make it happen. It will extrude from all sides of the selected vertices/edges/faces
- E + S + (X,Y,Z) = Scale Extrude according to the designated axis
- CTRL + R = Loop Cut, it will create a designated amount of vertices or edges to the object, that is looped without altering the object's geometry. Adjust the number of loops by using the scroll wheel
- CTRL + E = Edge menu, useful for UV Editing (marking seams), and bridging disconnected vertices/edges.
- CTRL + F = Face menu, useful for shade smooth
- CTRL + X = Dissolve (removing the vertex/edge without interrupting the connection of the bridge). Be mindful of the select mode. If the select mode is set to vertex, it will only dissolve vertices. If the select mode is set to edge mode, it will dissolve the edge
Transform Pivot Point
TLDR; If you're about to edit an object in edit mode, how would the selected vertices, edges, or faces react?
- Median Point = Selected items will adjust according to the center of the selection
- 3D Cursor = Selected items will adjust according to the location of the 3D Cursor
- Individual origins = Selected items will adjust themselves according to their (Selection) islands. Any separate selection will not influence other selections that are not connected to the selection

Outliner
Outliner is the list of objects that you have created in blender.

Properties
Properties is a menu that lists numerous customizations that you could do to the object or to the environment world in Blender.
The most important properties are :

- Render Properties (DSLR Camera logo)
This is where you are going to how you will render the model, alongside what kind of rendering engine you will use. Eevee is the lightest engine that lots of other artists use. However, I primarily use the cycles engine because of how beautiful the rendering results are.
- Output properties (printer logo)
This is where you are going to set up how many FPS within your animation, alongside the number of frames you will produce during rendering. In addition, you can set where your rendering results are going to be located alongside the data type of the rendering results.
- Object Properties (Orange cube logo)
this is where you can edit the location, the rotation, and the scale of the object besides using the shortcut keys. If you want to use a precise number, you can go over here to edit it
- Modifier Properties (Blue wrench logo)
This is the place where you are going to apply a modifier to the object. Some of the most popular modifiers are :
Mirror = Make a mirrored object based on the original object. Very useful when creating complex patterns, or humanoid objects.
Subdivision Surface = divides the mesh of an object into pieces which will increase the number of polygons of the object. However, it also increases the details that can be utilized towards the object. Making it high quality.
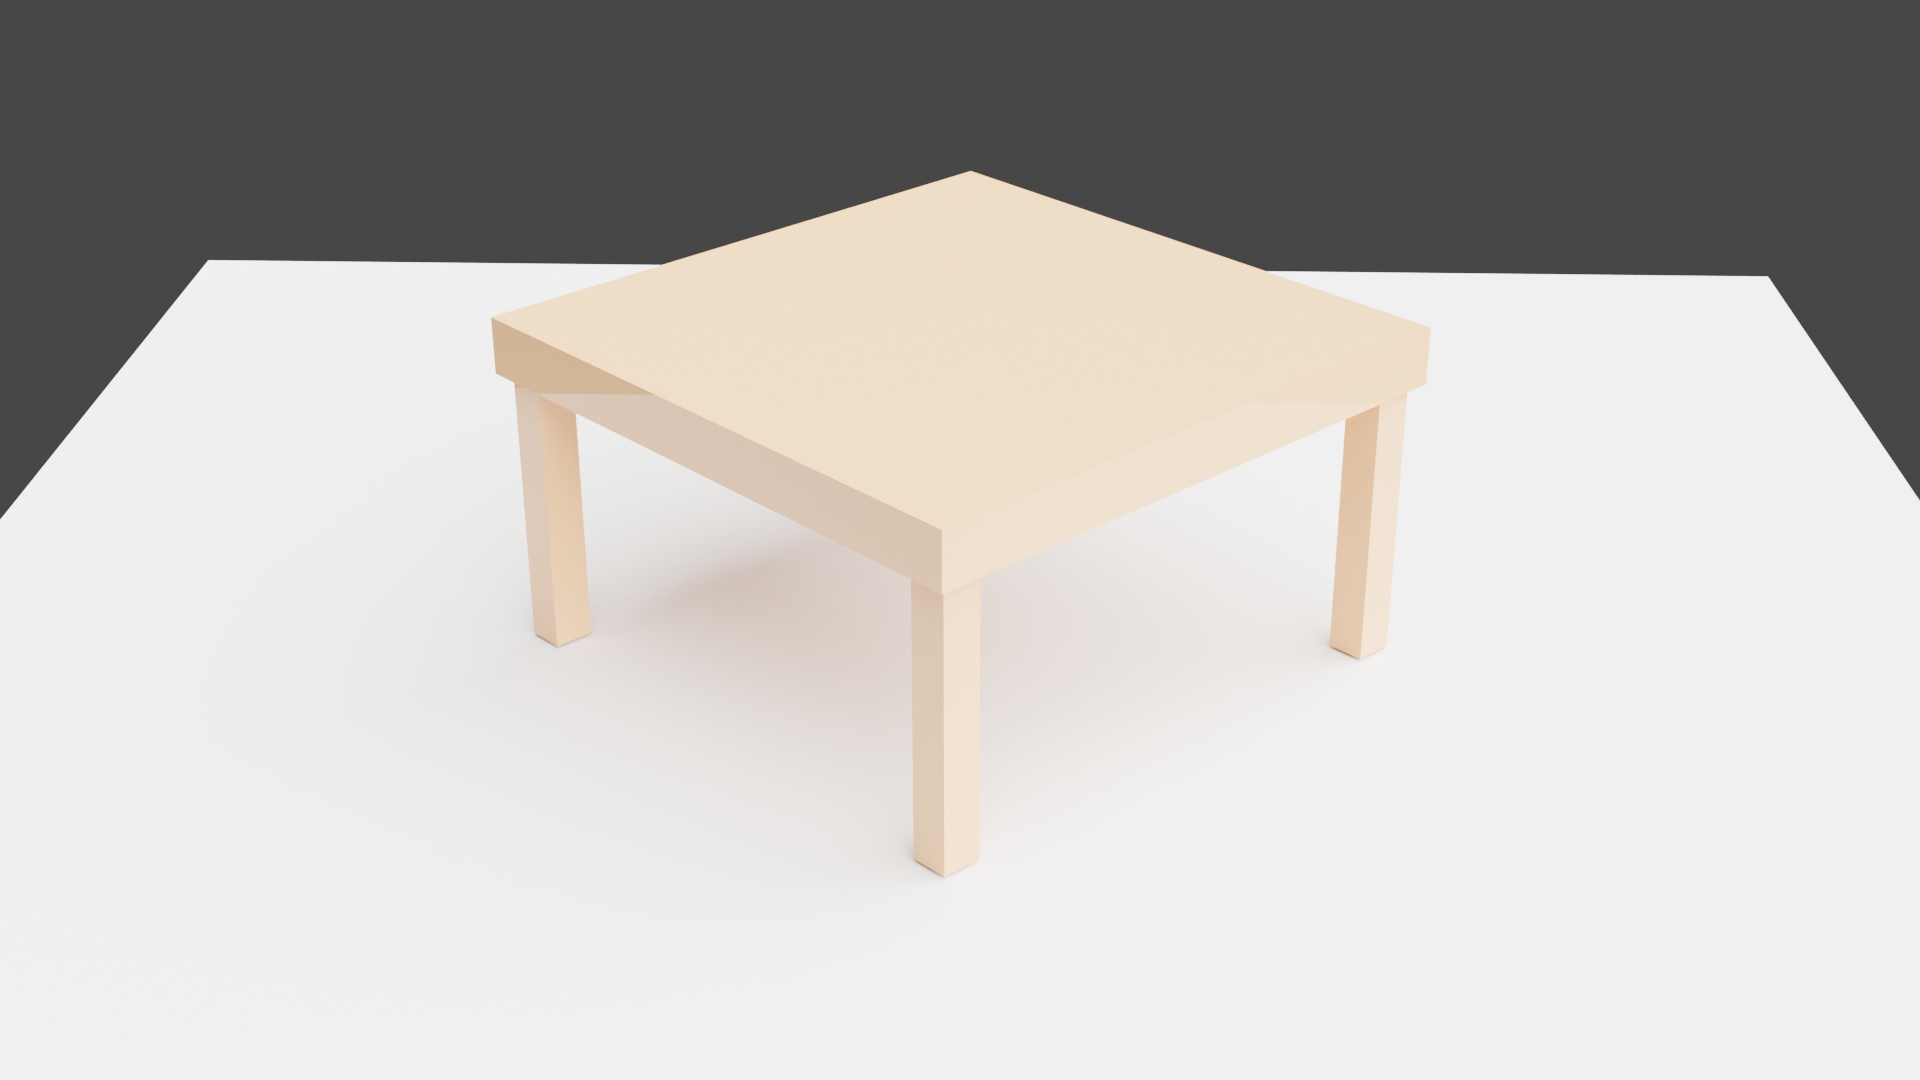
Let's try to make a table
The first step that I would do is to create a cube by pressing SHIFT + A.

Then, I would eventually go to edit mode.

Let's expand the cube first by using S.

Eventually, we will flatten it by using S + Z.

To make the legs of the table, we need to make a loop cut first by using CTRL + R. Add one loop cuts at a time and drag it to the edge of the table. Repeat this step until it creates 4 smaller squares at each edge of the table.

Before we extrude the leg, we need to make a gap by using E + S (Extrude scale). To make sure it works properly, the extrude scale needs to be done on each origin. So, we need to set our pivot point into "individual origin"

Change the select mode to "face"
Finally, select each square on each edge of the table and use Extrude scale (E + S)

Extrude the squares downwards to make the legs

Congratulations, you made a table in Blender. However, it is still a long way to go. These are the list that I need to deal with when I'm creating a model. If you decided to hop on and start learning blender, I wholeheartedly wish you a safe journey.

Workflow
The way I made my model can be comprised of several phases and steps.
1. Modeling Phase
- a. (Object mode) add an object, mesh, or curves
- b. (edit mode - mesh) edit an object via extruding, scaling, rotating, or bridging edges
- c. (sculpt mode - mesh) edit an object using sculpting tools to shape easier
- d. (edit mode - curves) edit an object via scaling, tilting, grabbing, and adding shapes to the curves
- e. (modifiers - add) adding modifiers (blue wrench logo) to improve the quality of the model (subsurface modifier), or making modeling easier (mirror modifier). Do not apply the modifiers on this phase just yet.
2. Texturing Phase
- a. (Object mode) merging any necessary objects for easier texturing/rigging
- b. (edit mode) adding seams to an object to be prepared for UV editing
- c. (edit mode) unwrapping the object to be prepared for UV editing
- d. (UV Editing) moving the UV map accordingly to the designated location within the texture
- e. (Texture Paint) If the texture is not yet made, create the texture using texture paint or use other 2D software to make it. I usually use Paint Tool SAI and the older version of adobe photoshop. It is highly advised to use either Paint Tool SAI or Clip Studio Paint as a substitute for Photoshop
- f. (Right side - Properties) adding a new material
- g. (shading) adding an image texture node to the shader editor
- h. (shading) connecting the image texture node to the shader node base color
3. Rigging phase
- a. (Plugin - one time only) installing Rigify
- b. (Object mode) adding Metarig armature, and making necessary adjustments/editing to fit the needs of the model
- c. (Properties - modifier) adding "Armature" to the model and assigning the armature as the Metarig
- d. (Object mode) Parenting the model to the armature and assigning it automatic weights
- e. (weight paint) selecting the vertex group and weight paint the necessary vertices
- f. (Properties - modifier) for clothing, adding a data transfer modifier and an armature modifier
- g. (Properties - modifier) in the data transfer modifier, the source is the body of the model
- h. (Properties - modifier) check the vertex groups in the data transfer modifier
- i. (Properties - modifier) generating the data layers, and applying the data transfer modifier
- j. (Edit mode) on the armature, duplicate the hands, legs, and other necessary bones that would serve as the target for inverse kinematics
- k. (Pose mode) select the bones for inverse kinematics, go to bone constraint properties (the blue bone logo), and select the inverse kinematics modifier
- l. (Object mode) adding several simplified geometries (usually cubes) that will use soft-body physics
- m. (Edit mode) align the geometry to the bones that require physics
- n. (Properties) add soft body physics to the geometry in physics properties (blue planetary logo)
- o. (Physics) make any necessary adjustments to the soft body physics
- p. (Physics) bake the physics
4. Shape Keys Phase
- a. (Object mode) select the face, go to properties, object data (green connected vertex logo), and add the shape keys
- b. (edit mode) select the shape keys, go to edit mode, and make the necessary adjustment to the shape keys
Files