Home
Home

 Artists
 Search
 Recent
 Random
 Posts
Posts
 DMs
DMs
 Tags
Tags
 Random
 Importer
 Import
 FAQ
FAQ
 Account
 Register
 Favorites
 Login
Login

Water Tutorial (Patreon)
Content

안녕하세요. 이제 작업과정에서 핵심이거나, 설명이 집중적으로 필요한 부분은 따로 튜토리얼로 제작하기로 했습니다.
// Hello, I've decided to create a tutorial for the core part of the process, or for the intensive explanation.
오늘 준비한 것은 Water VFX 튜토리얼입니다. 픽셀 아트로 효과적으로 물을 표현하려면 알아야 하는것 위주로 준비했으니 재미있게 봐주세요.
// What I prepared today is the Water VFX tutorial. To express water effectively with pixel art, we prepared things you need to know. so, please enjoy it.
먼저, 물을 효과적으로 구현하기 위해 필요한 각각의 구성 요소들을 단계별로 나눠봤습니다.
1. 굴절 효과,
2. 물,
3. 거품,
4. 반사광,
5. 물결 그림자가 이에 해당됩니다.
// First, I divided the components of each component in order to effectively implement water.
This includes
1.refraction effects,
2.water,
3.foam bubbles,
4.reflection light, and
5.wave shadows.
VFX에서는 각각의 구성 요소가 하나씩 빠질수록 극적으로 차이가 나는 것을 확인 할 수 있습니다.
반대로 생각하면 구성요소를 미약하게나마 갖추면 표현이 매우 풍부해지지요.
// With VFX, you can see that the more components are missing one by one, the more dramatic the difference is.
On the other hand, if you think about it, if you have a small component, it's very rich in expression.
아무 효과도 들어가지 않은 베이스 오브젝트입니다. 수면 아래로 가려진 부분도 표현되므로, 이 부분도 꼼꼼하게 표현해 주는게 매우 중요합니다.
//Base object with no effect. It is very important to express this part meticulously because it is also expressed in areas covered below the water.

굴절 효과입니다. 물이 흐르면, 굴절이 발생하죠.
물 밑이 휘어져 보이는 효과가 있어야 비로소 위에 물이 흐른다는 느낌을 줄 수 있기 때문에 매우 중요합니다. 방향(vector)를 따라 이동하는 느낌으로 만들어 주면 좋습니다.
// It's a refraction effect. When water flows, refraction occurs.
It's very important because it has to have a bending effect under the water to give the feeling of water flowing over it. It's good to make it feel like it's moving along the vector.
베이스 오브젝트를 복사 한 뒤, 굴절이 발생할 부분을 Select 툴로 선택 한 후, 양 사이드로 Move 기능을 이용해 이동시켜 뒤틀어 줍시다.
// After copying the base object, select the part where the refraction will occur as the Select tool, then move it to both sides using the Move function and twist it.
이후 Blur (F9) 등의 기능을 이용해 마무리합니다. Blur를 굳이 사용하지 않아도 좋습니다.
// Then, use functions such as Blur (F9) to finish. It doesn't matter if you don't have to use Blur.
이후 물을 씌워줄 차례입니다. 물은 물의 베이스 컬러에 Opacity (투명도) 를 조절하여 씌워줍시다.
// After that, it's time to cover it with water. Let's adjust the Opacity (transparency) on the base color of the water.
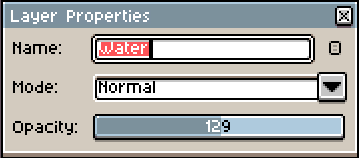
튜토리얼에 사용된 물의 Opacity 입니다.
// The Opacity of the water used in the tutorial.

다음은 물거품입니다.
// Next, it's time to draw foam bubbles.
물이 사물에 닿는 부분은 현실에선 반드시 물거품이 생기지 않지만, 극적인 효과를 위해서는 표현해 주는것이 알맞습니다. 일렁이는 느낌 정도로 충분합니다.
// The part where water touches objects does not necessarily bubble in reality, but for the dramatic effect, it is appropriate to express it. It's enough to make it look shallow.

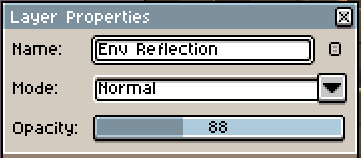
이 다음은 제일 중요한 요소중 하나인 반사광입니다.
// And then, one of the most important elements, the reflection light.
반사광을 표현할땐, 광원의 위치에 주의 해 주세요. 물거품과 마찬가지로 일렁이는 느낌을 주는게 제일 중요합니다.
두개 내지 세개의 프리셋 작업을 하여 복사해 붙여넣는 것으로도 효과적인 느낌을 줄 수 있습니다.
위의 예시는 프리셋 작업을 사용하였습니다.
// When expressing reflective light, pay attention to the position of the light source. Just like foam bubbles, it's most important to give the feeling of jolting.
Copying and pasting two or three presets can also make you feel effective.
The example above used the Preset action.

다음은 물결 그림자입니다. 물이 흐르면 물결이 발생하고, 물의 이동 경로에 따라 파동이 생기지요. 이것을 그림자로 표현 해 주는 것이 매우 효과적입니다.
이것 또한 반사광과 같이 프리셋 작업을 해 주면 편하게 만들 수 있습니다.
// Next is the wave shadow. When water flows, waves are generated, and waves are generated along the path of the water. It is very effective to express it in shadows.
This can also be made comfortably by pre-setting, such as reflected light.
이제 기본적인 작업은 끝났습니다. 이후는 마무리를 위한 작업입니다.
// The basic operation is now complete. After that, it is for finishing work.
물을 제외한 베이스 오브젝트를 복사합니다. 이를 위해 미리 베이스 오브젝트를 모두 합쳐두는 것이 좋습니다.
// Copy the base object except water. To do this, we recommend that you merged all of the base objects in advance.

그리고 물의 하위 레이어에 붙여 넣은 후, 상하 반전을 시켜줍시다.
// Then, paste it in the lower layer of water and turn it upside down.

그리고 물의 아웃라인을 따라 깔끔하게 지워 준 후,
// Then, cleanly erase along the water's outline,

Opacity를 조정해 마무리합니다.
// and Adjust Opacity to finish.
이렇게 물이 완성되었습니다.
// So the water is complete.
저는 원리를 먼저 이해하면, 이후 응용하는건 그다지 어렵지 않다고 생각합니다.
물이나, 홀로그램이나, 기타 여러 효과들도 기초적인 방식과 환경 구현의 원리가 있고, 이것을 토대로 그려나가면 어렵지 않습니다.
// I think it's not that difficult to apply after understanding the principles first.
Water, holograms, and other effects have a fundamental way of implementing the environment, and it's not difficult to draw based on them.
Momo wallpaper의 홀로그램 전환 효과, Aseprite 베이직, 일반적인 반사광의 원리와 구현방법에 대한 튜토리얼도 준비하고 있으므로, 준비가 끝나면 적절한 시기에 게시하도록 하겠습니다.
// I'm also preparing a tutorial on Momo wallpaper's hologram conversion effect, Aseprite basic, general light reflection principle and implementation method, so I'll post it when I'm ready.
긴 글 읽어주셔서 감사합니다. 해당 내용이 배워가시는 분들께 도움이 되었으면 좋겠네요.
// Thank you for reading the long article. I hope it helps those who are learning about it.
Files