 Home
Home

 Artists
 Search
 Recent
 Random
 Posts
Posts
 DMs
DMs
 Tags
Tags
 Random
 Importer
 Import
 FAQ
FAQ
 Account
 Register
 Favorites
 Login
Login

8 / 31 WIP & Finished (Patreon)
Content
※주의 ! gif 이미지가 포함되어 있으니, 패트리온 어플을 제외한 환경에서 읽어주세요! 패트리온 어플은 이미지를 강제로 리사이징 하기 때문에 gif를 재생할 수가 없습니다!
// ※Caution! gif The image is included, so please read it in an environment other than the Patrion app! The Gif cannot be played because the Patrion application forces the image to be resized!
The Horizons 월페이퍼의 마지막 과정입니다.
// This is last phase of working "The Horizon's" Wallpaper.


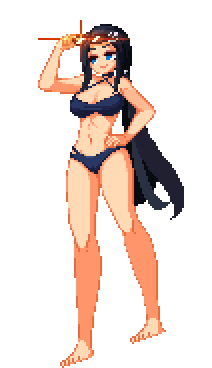
일단, 모든 캐릭터의 작업이 끝났습니다.
배경과는 달리 정교한 애니메이션이 들어가야 하는 캐릭터가 보통 시간을 제일 많이 잡아먹는 편입니다.
이번 작업도, 배경이 제일 크긴 하지만 결국 캐릭터가 모든 시간을 다 잡아먹었네요...
// First of all, I'm done with all the characters.
Unlike the background, characters who need sophisticated animation usually take up the most time.
This work, the background is the biggest, but the character took up all the time...
캐릭터와 배경을 분리하는 작업을 합니다. 스케일이 매우 큰 관계로 효율적으로 메모리를 관리하기 위함입니다. 항상 최적화를 염두해 둬야 합니다...
캐릭터는 상황에 맞게 포즈를 배치 한 후, 모든 레이어를 합치고 배치할 예정입니다.
// I work to separate characters and background from background. It is to manage memory efficiently because the scale is very large. Always consider optimization.
The character will pose according to the situation and then combine all layers together.
물을 그리는 모든 과정은 이전 Talonfeather 작업과정과 동일합니다.
// The whole process of drawing water is the same as the previous Talonfeather process.


기존에 작업했던 오르카호에, 수평선과 구름을 깔아줍니다. 하늘 < 구름 < 수평선 순서로 해줍시다.
// On the Ship, which I worked on before, lay the horizon and clouds. Let's do it in the order of the sky < cloud < horizon.
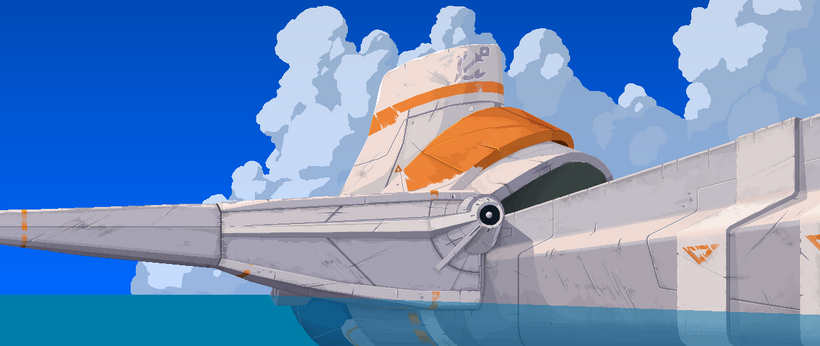
그리고 앞쪽까지 바다를 깔아줍니다. 바다는 오르카 호와 캐릭터보다 앞순서로 되어있어야 합니다.
// And lay the ocean to the front. The sea should be in the front order rather than the ship and the character.

이제부터가 중요한 순서입니다.
수평선에 보이는 물결과, 물이 배와 닿는 부분을 그려줍니다. 물의 흐름, 배가 나아가는 방향을 의식합니다.
// This is the important step.
Draw a line of water on the horizon, and the part where the water touches the ship. Be aware of the flow of water, the direction in which the ship is moving.

그리고 뱃머리 등 물에 강하게 부딛히는 선두, 측면 부분에서 일어나는 물보라와 포말을 그려줍니다.
// Then, draw a water spray and foam that occurs in the front, side of the water, such as the bow, etc.

물보라와 포의 보조
// Assistant to water spray and Foam

그리고 수면의 반사광을 그려줍니다. 복잡하고 많아 보이지만, 바리에이션을 작업해서 붙여넣어주면 굉장히 수월하게 할 수 있습니다. 물을 물처럼 보이게 하는 최고 핵심중 하나이므로, 꼼꼼하게 넣어줍니다.
// And it paints the reflection of the surface of the water. It looks complicated, but it can be very easy if you work on a few types and paste them. It's one of the best ways to make water look like water, so put it in meticulously.
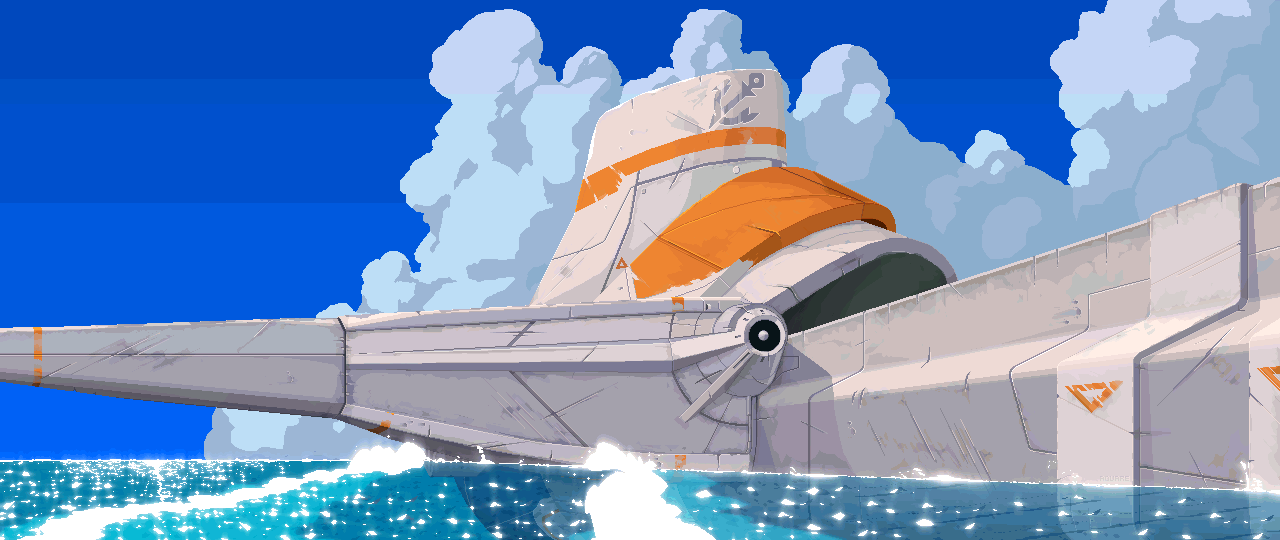
반사광에 포함해 수면, 수중의 물결에 발생하는 그림자를 그려줍니다. 디테일을 더해주는 느낌이라고 보시면 좋습니다.
// Draw a shadow that occurs on the surface of the water, including the reflection light.
It's like adding details.

그리고 배가 물에 잠긴 부분의 굴절현상을 만들어줍니다.
// And it creates refraction of the submerged part of the ship.

물을 걷어내고 보면 이런 모습입니다.
// This is what it looks like when you take off the water.

갈매기도 넣고
// And the seagulls,

고래도 넣어줍니다.
// And the whale.

구름이 흘러가는 것은 따로 작업해 줍니다. 260프레임을 기준으로 제작했습니다.
이와 관련된 스크롤링에 대해선 나중에 따로 다루도록 하겠습니다.
이렇게 배경의 기본요소들이 전부 만들어졌습니다. 다음은 합치고 후처리를 하는 단계입니다.
// Clouds are working separately. It's based on 260 frames.
We'll deal with scrolling related to this later.
So all the basic elements of the background are created. The following steps are for merging and postprocessing.

먼저, 모든 요소들을 조합해서 배치해줍니다. 이떄 최종 결과물의 모습을 얼핏 상상할 수 있습니다.
해수면의 푸른빛이 배의 밑부분에 반사되는 부분도 이때 미리 넣어줍니다.
// First, we put all the elements together. You can imagine the final result at a glance.
Add the blue light of the sea surface to the bottom of the ship in advance.

그리고 배에 비춰지는 햇빛을 강조해 디테일을 더해줍니다.
// And, add details by emphasizing the sunlight that shines on the ship.

빛줄기도 넣어주고
// add the lightray,

엔진 구동부의 연출과, 화면 전체에 오버레이로 푸른색을 조금 더 해 마무리합니다. 구름의 가장 밝은 부분에도 블룸을 넣어줍니다. 이렇게 씬이 완성되었습니다.
// Finishes with a little bit of blue overlay across the screen and draw of the engine drive.
It also puts a bloom in the brightest part of the cloud.
So the scene is done.
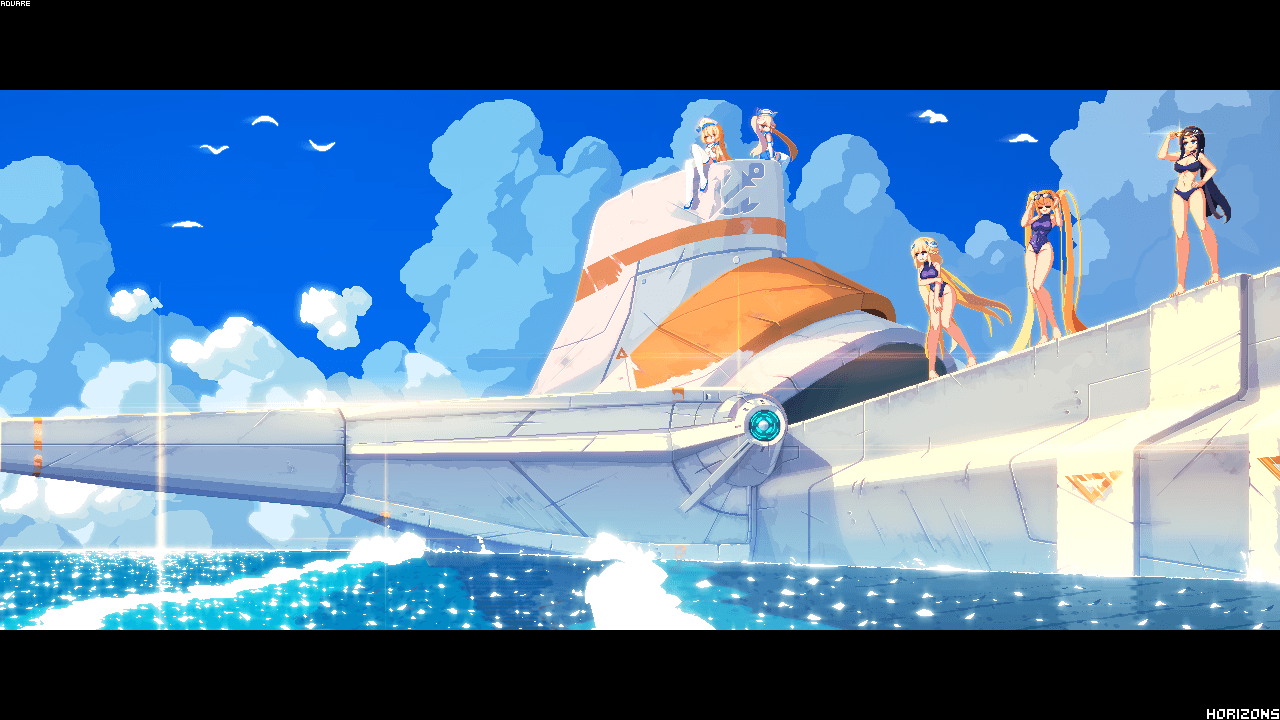
The Horizons
최종결과물. 한달하고도 반이 걸린 초대형 작업이었습니다. 1280*540 사이즈로 지금까지 작업한 것중 가장 큰 사이즈였습니다.
종국에는 한번 세이브 하는 데에만 1분이 넘게 걸려버리더군요
다음부턴 크기 조절을 좀 해야겠네요..
// The final result. It took more than a month and a half. The size is 1280*540 and it was the largest size I've ever worked on.
Eventually, it took more than a minute to save once.
Next time, I'm gonna have to resize it.
9월부터는 규모가 작은 작업을 위주로 진행할 예정입니다. 이후 10월에도 월페이퍼 하나가 예정되어 있습니다.
너무 큰 작업이라 많은 것을 업로드 할 수 없어 구독자 분들께 죄송할 따름이었습니다.
항상 작품 봐주셔서 정말 감사합니다!
다음 업데이트는 일주일 정도 뒤입니다.
// Starting in September, I will focus on small projects. After that, one of the wallpapers is scheduled for October.
I was just sorry to the subscribers because it was too big to upload many things.
Thank you so much for always watching my work!
The next update will be in about a week.
Files
