Home Artists Posts Import Register

Downloads

Content

When I first received my GPD XP I was saddened to see it didn't support HDMI output.

Something just rubs me the wrong way when I can't use my handhelds on the big screen, so I figured, why not try to bring the feature back?

This small side-adventure of mine quickly grew into something bigger which now listens to the name "UniDock".

The UniDock project aims to bring a unified, easy to implement HDMI output option to every Android OS that wishes to implement it, regardless of whether the device has a dedicated HDMI encoder or FPGA chip!

An upcoming newsletter will go into more detail about this, how it all works, what patches to the Android OS were required to make it all play nice, etc.

How to install: Unpack the attached files using 7zip and follow the included instructions found inside README.txt.

For those needing the Google Play Store: The GPD XP is a read-only partition device, which means flashing Google Play app packages (via a recovery) isn't possible. Magisk is shipped out-of-box though, allowing the install of system-less Google Play packages like MagiskGapps. The included README.txt contains a section explaining how to.

For those needing root: Magisk is included out of box and only needs to be activated on first boot. A WiFi connection is required for the initial Magisk activation.

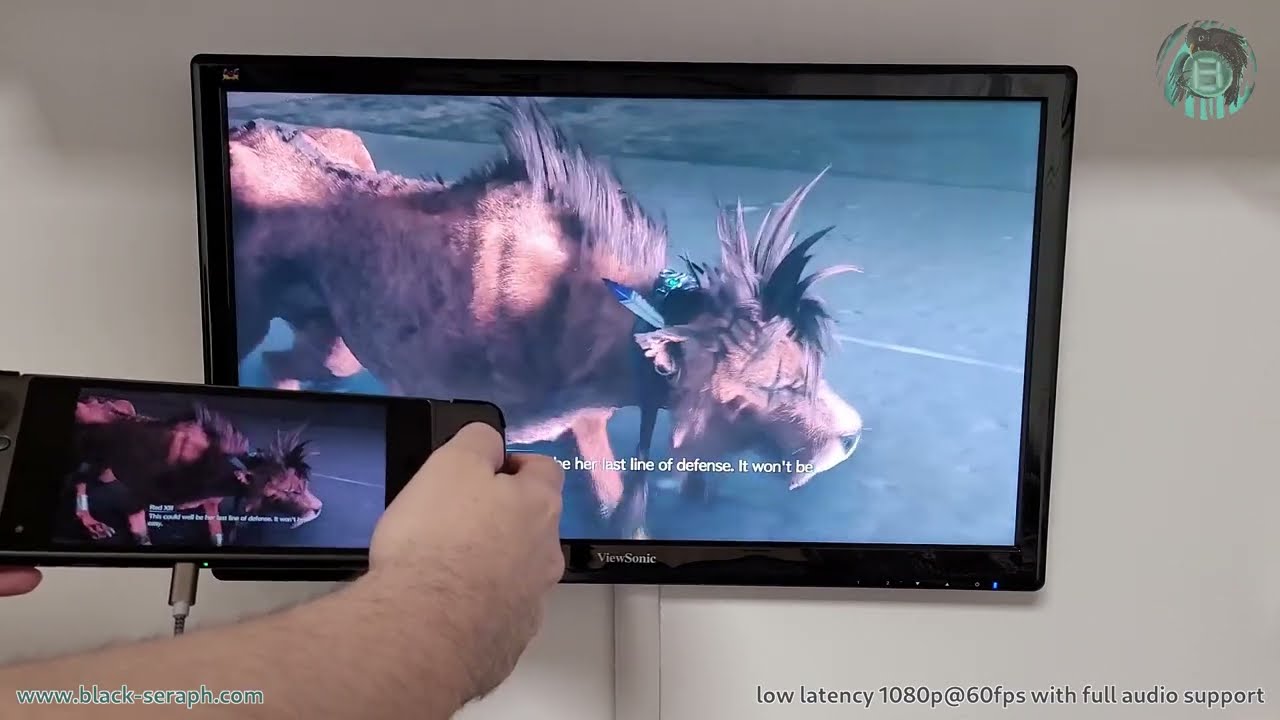
For those needing HDMI output: Please refer to the following tutorial to build yourself your very own UniDock, giving you access to the newly added HDMI output support!

Changelog

  • Added support for UniDock HDMI output
  • Released the initial version of the UniDock Raspberry Pi MicroSD card image (Pi 4 is the preferred build base, older Pi models are compatible though, please see the dock image's config.txt file for more information, older under-voltage prone models like the Pi Zero need their USB port's 5v-pin masked and a separate Y-cable to provide power to the GPD XP)

Fixable known issues

  • The built-in touchscreen mapper offsets are slightly shifted while in UniDock mode (this will be fixed in a future revision)

Files

Building your own UniDock (GPD XP HDMI output)

Video chapters: 0:00 - Intro 0:24 - Required items 0:57 - Case assembly 4:19 - Preparing the MicroSD card 5:05 - Plugging everything in 6:42 - Using the dock 9:38 - Outro Required files / tools: ► UniDock image & LineageOS for GPD XP: https://black-seraph.com (in the 10$ Patreon tier) ► Raspberry Pi Imager: https://www.raspberrypi.com/software Required items: ► Raspberry Pi 4: https://www.raspberrypi.com/products/raspberry-pi-4-model-b (go for the lowest RAM model, no need to burn money for RAM you will never use or need, older Pi models will work to an extend, but if something goes wrong or your performance doesn't live up to what you see in this video then you will have to figure things out yourself, the config.txt file of the dock has some options you can play with to make it more "old-pi-friendly") ► Raspberry Pi 15W Power Supply: https://www.raspberrypi.com/products/type-c-power-supply (be smarter than me, the flickering lines in my monitor came from my bad Power Supply) ► Slow charging (28+AWG, 100~500ma max carry on the 5v line) USB-A to Type-C cable: https://www.amazon.com/XIAE-Charger-Braided-Samsung-Colorful/dp/B09CCMYH88 (for connecting the GPD XP to the dock, this one did the job for me and is inexpensive) ► 4GB+ MicroSD card: https://www.amazon.com/s?k=micro+sd+card (if you have an old 4GB one in a drawer somewhere, now's the time to use it) ► A Micro-HDMI to HDMI cable: https://www.raspberrypi.com/products/micro-hdmi-to-standard-hdmi-a-cable (but any Micro-HDMI to whatever dongle will do, I used a generic one I had in a drawer) Suggested (but optional) items: ► A case / heatsink: https://www.amazon.com/Geekworm-Raspberry-Compatible-Aluminum-Only-Black/dp/B07ZVJDRF3 (I'm fairly fond of this one, but any case / heatsink you pick should work just as well) Where to follow us: ► Twitter: https://twitter.com/teamblackseraph ► Patreon: https://patreon.com/blackseraph

Comments

Anonymous

smooth as always and so much better then before

Anonymous

I tried using this update and now it says system is corrupted and turns off in 5 seconds. I can still turn on the system while holding the volume up button

Anonymous

okay i did the SPF flash fix and retried it. the only thing i will add is that when it prompts you to reboot you must reboot in fastboot mode to complete installation. this error can be quite scary if you encounter it.

blackseraph

I'm not sure what you are talking about. When you start flashing LineageOS all you have to do is wait until it's done. You don't need to manually reboot anything at all, it will reboot by itself when needed.

Anonymous

hello so when I try to flash 18xs when holding up then the + and power the device turns on off still and I once I connect to my PC it doesn't show up and it still turn on and off repeatedly is their away I can reset it or put it in safe mode? I follow the Readme to so how did you get it to work ?

Anonymous

ok I read it wrong its just holding the plus down after realback but it sill doesn't work after when it turns on it says lock flag any suggestions

blackseraph

Reading your sentences is really difficult to me, I figure English isn't your first language? I'll just assume you're having issues using BeTools. Here's the required steps to reset your unit again: 1. Make sure your device isn't plugged into a PC yet. 2. Open BeTools and load the firmware image into it, then deselect all partitions except FDL & FDL2. 3. Hit the start all button. 4. Plug your device into the PC, then hold the volume minus button down and after a second also hold the power button down (so both are held). 5. Let go of both buttons once BeTools detects the device. 6. Wait until BeTools reports "Succeed". 7. Hit the stop all button. 8. Re-select all partitions you previously deselected (so all are selected again). 9. Hit the start all button. 10. Hold the volume minus button down and after a second also hold the power button down (so both are held). 11. Let go of both buttons once BeTools detects the device. 12. Wait until BeTools reports "Succeed". 13. Hit the stop all button. 14. Disconnect your device from the PC and reboot it, it will now boot back into stock OS and you can now re-install LineageOS.

Anonymous

sorry I was using my phone voice text 😁

Anonymous

ok I followed everything in Readme but it didn't work using the SP_Flash_Tool_v5.2028 is this the be tools your talking about or is this different?

blackseraph

Damn. My bad. That's what I get for rushing out an answer before my workshift starts. For a second I thought you were talking about an X18S.

Anonymous

yes x18s powkiddy this is the item I'm talking about I followed beta 1 like you said

blackseraph

Then why are you trying to install a GPD XP build? Go grab the latest X18S build instead!

Anonymous

were ?

blackseraph

Just scroll down on the frontpage until you see the latest beta build for your X18S. (Or go to www.black-seraph.com and click on your device name, it will always take you to the latest build available for that particular device.)

Anonymous

thanks I got