Home
Home

 Artists
 Search
 Recent
 Random
 Posts
Posts
 DMs
DMs
 Tags
Tags
 Random
 Importer
 Import
 FAQ
FAQ
 Account
 Register
 Favorites
 Login
Login

【2022/09~10】Process - 60,000 | 過程 - 60,000 (Pixiv Fanbox)
Content
Concept Inspiration | 概念靈感來源
Okay, you might be wondering what unholy creation I'm messing with again. This time, I want to create a 3D card that can be flattened for mailing purpose! This is inspired by @TsukimotoSeiji sensei's elegantly designed 3D cards. The sphere I built for trying to understand the concept comes from her website too! It's really magical how she does her cards, definitely check out her Twitter!
你可能會想我又在創造什麼奇怪的鬼東西。這次呢,我想做一個可以摺疊寄送的3D卡片!靈感來自@TsukimotoSeiji老師非常優美的3D卡。我用來理解背後原理的這顆圓球就是來自他的網站哦!他的卡片真的都超像麻法的,可以去他推特看看!
Idea | 點子
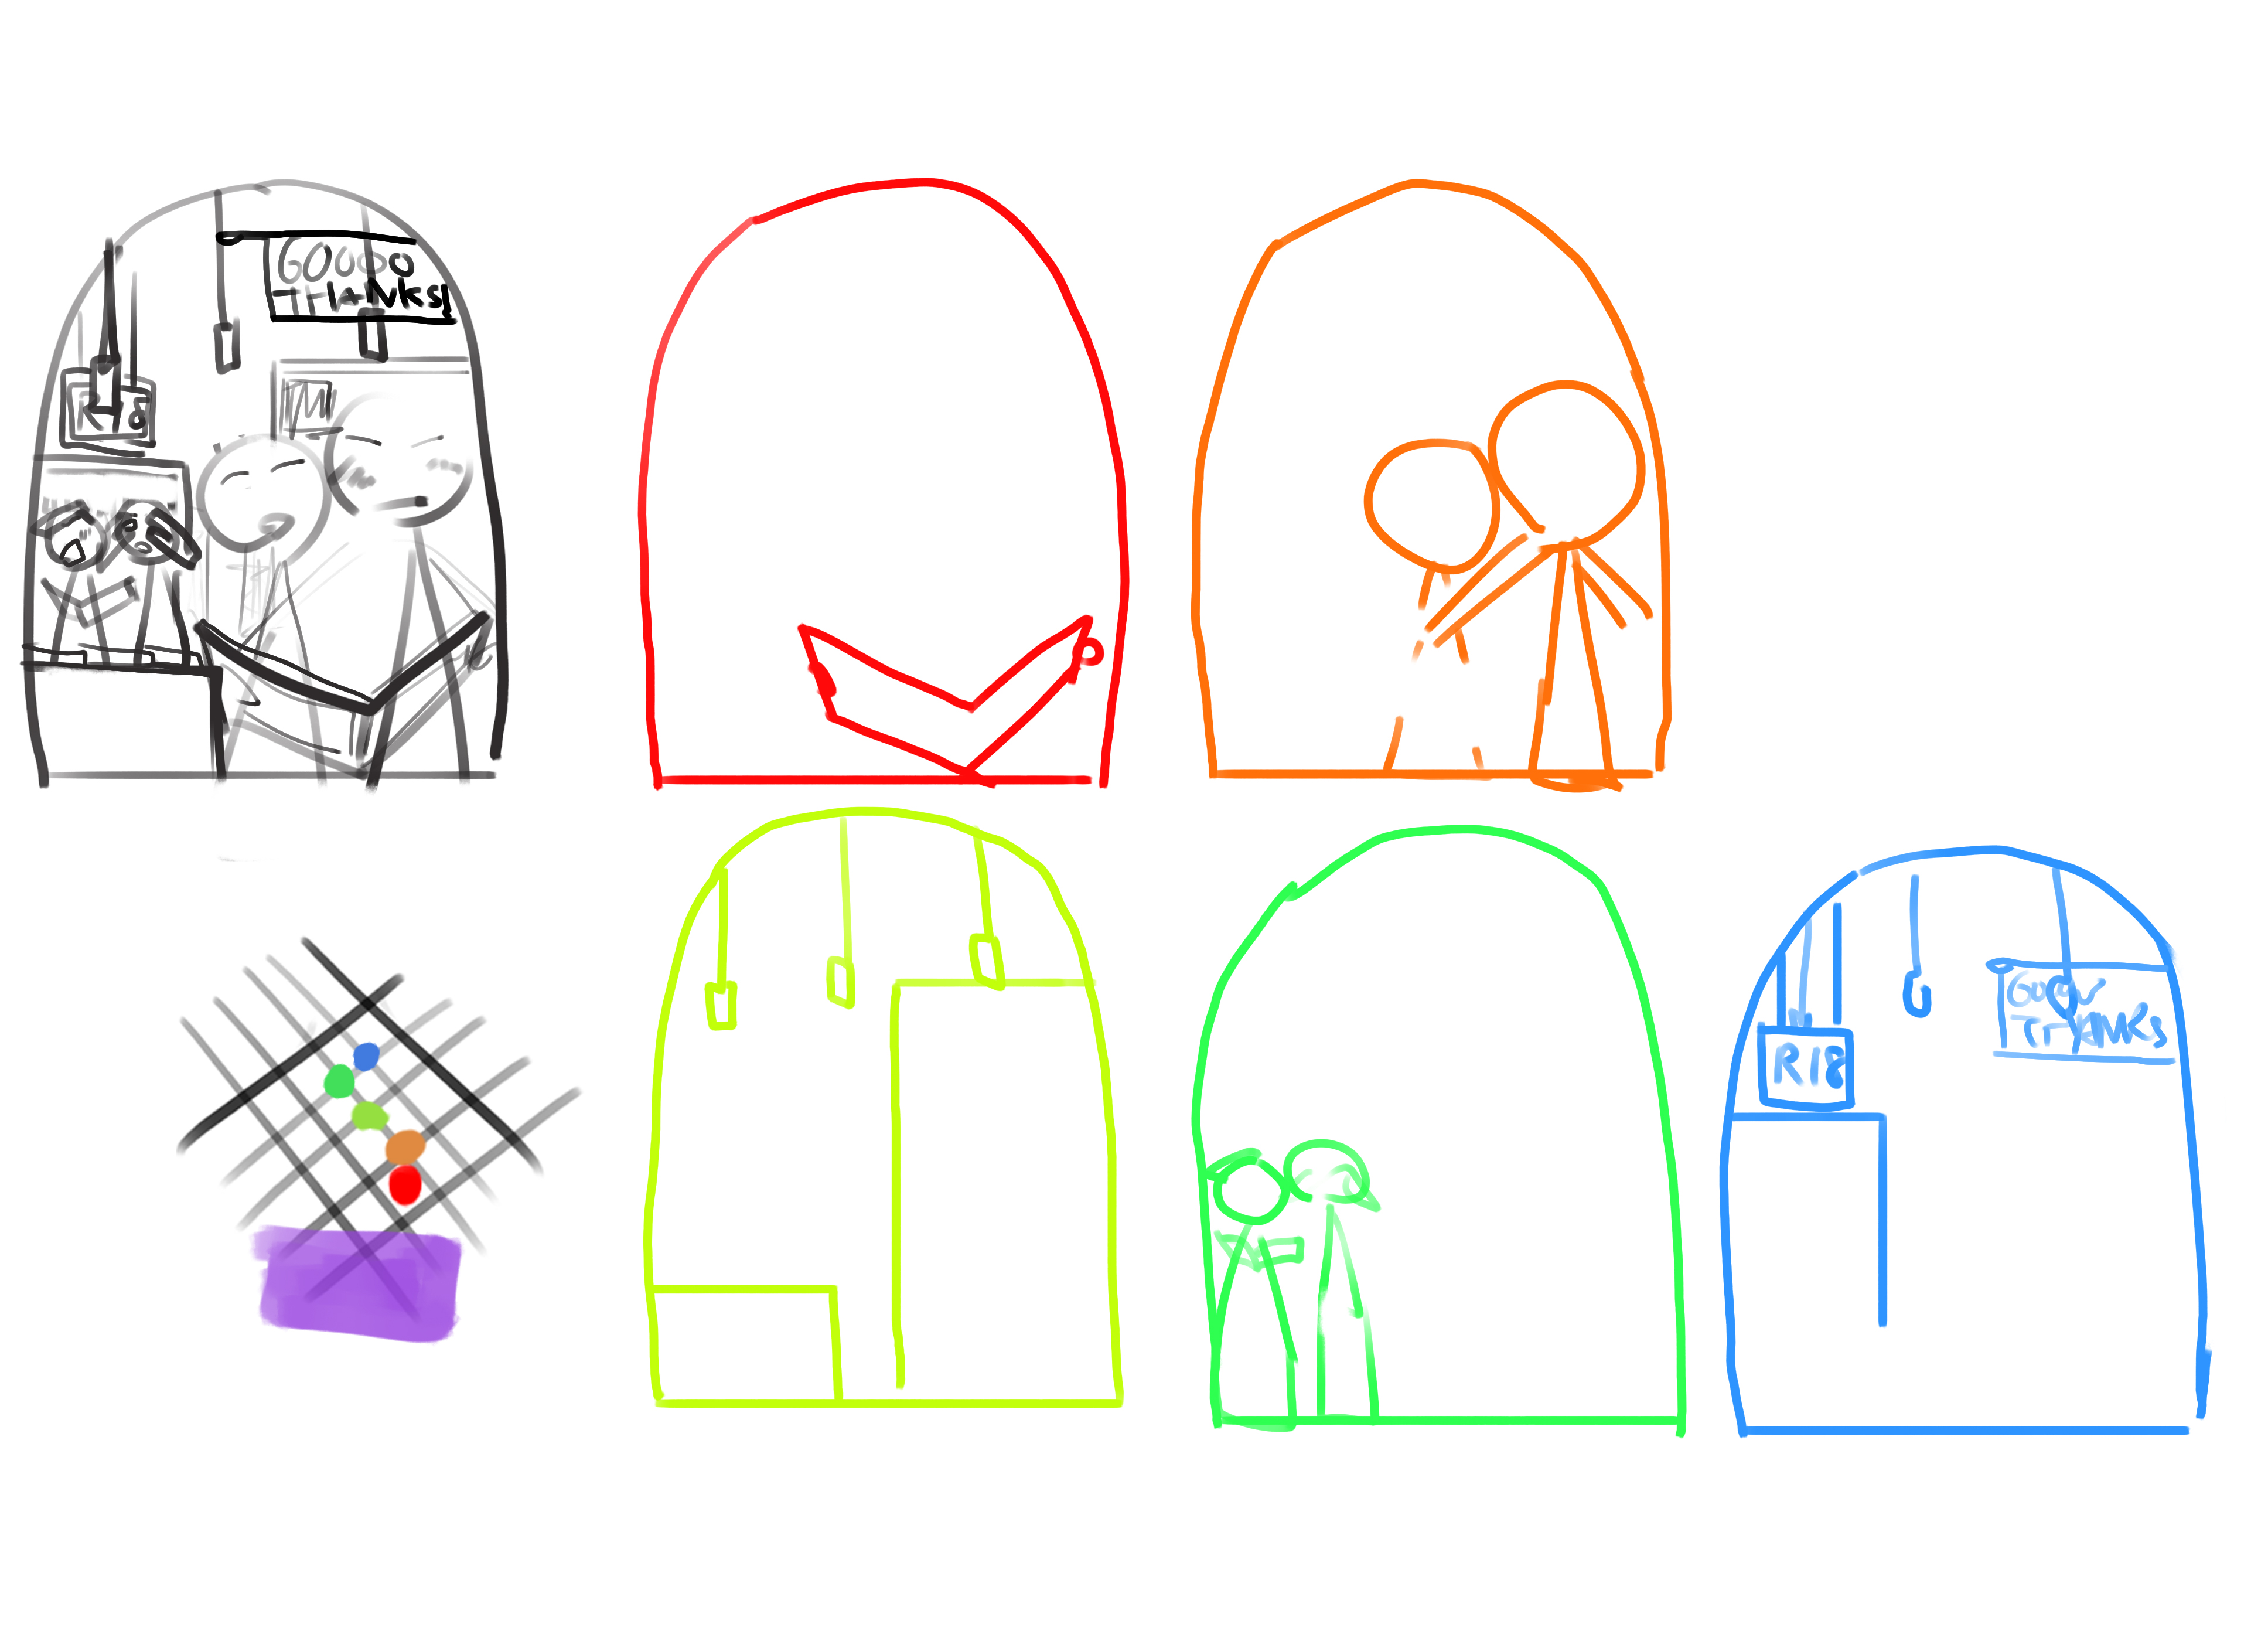
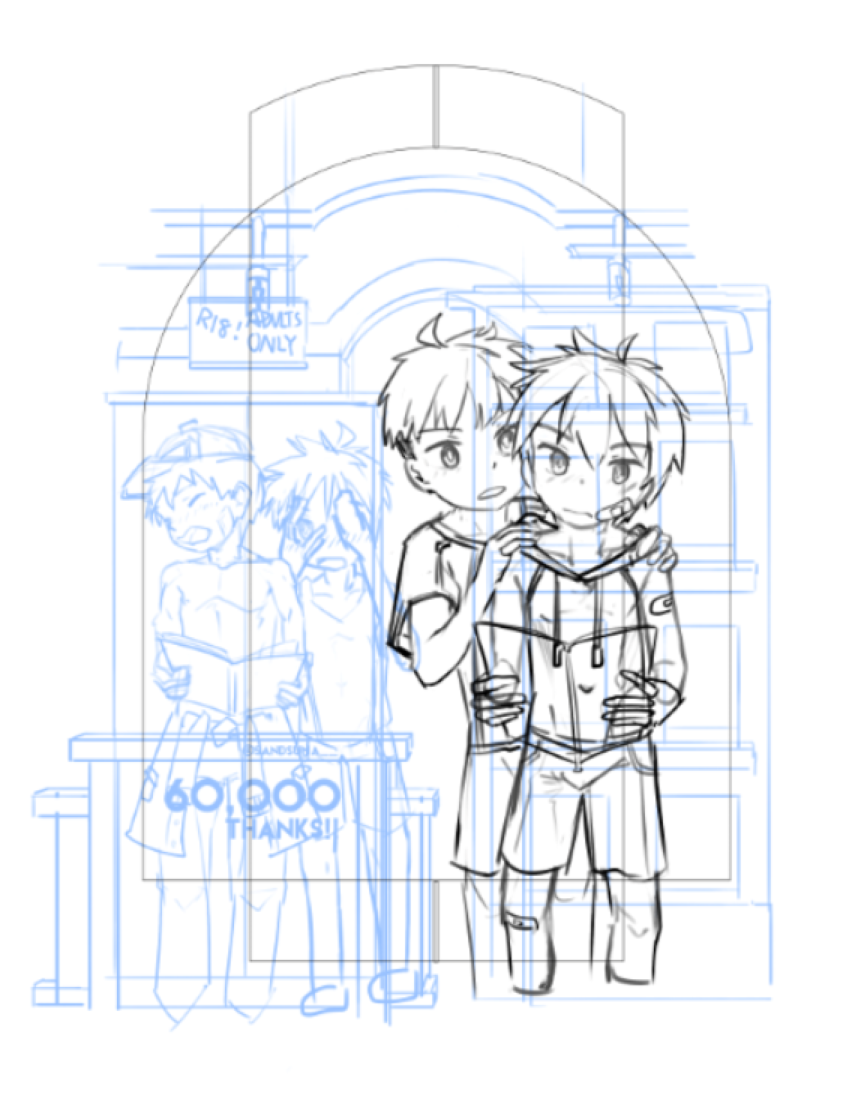
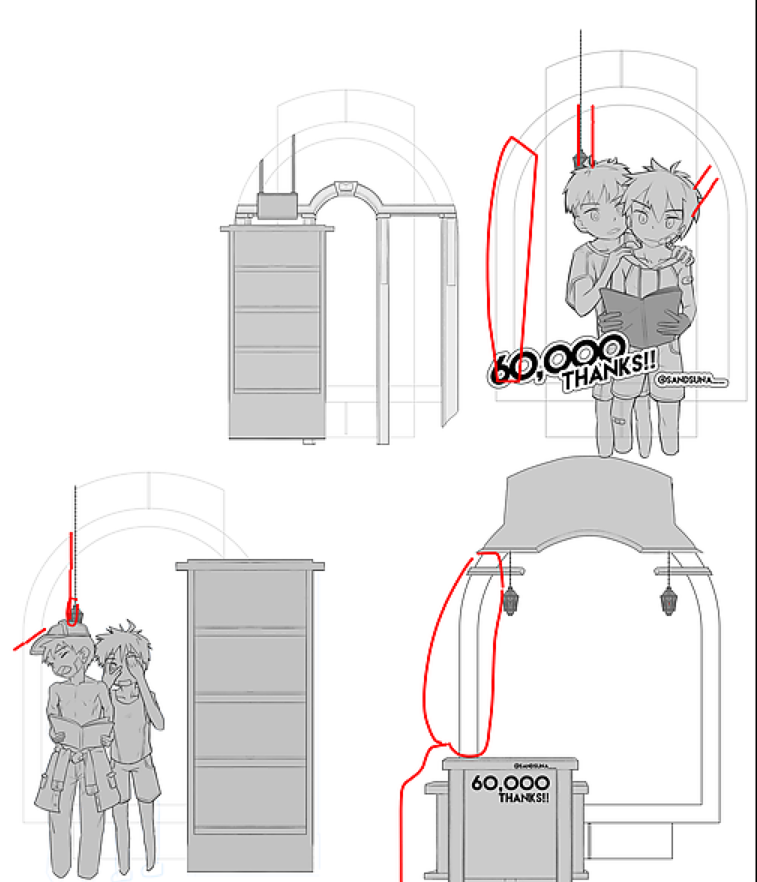
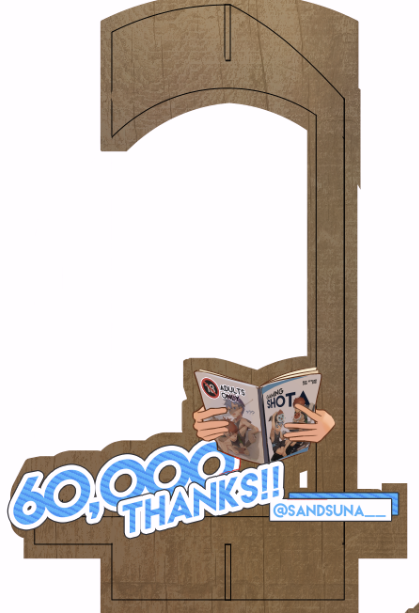
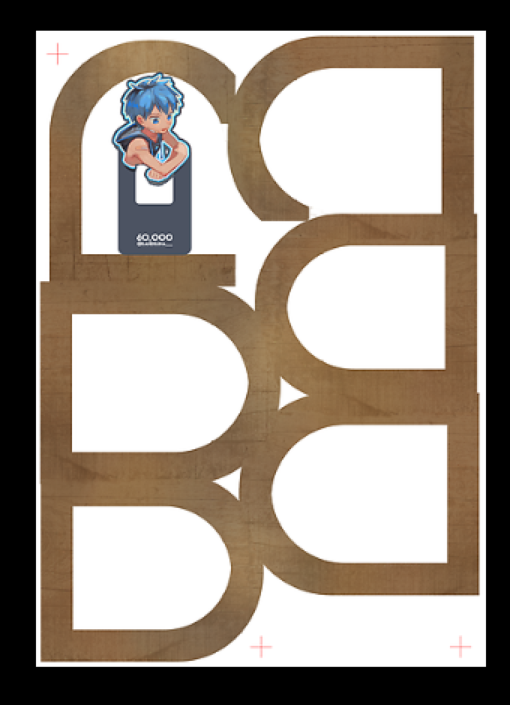
So here's what I'm thinking (the art is gorgeous, I know), my 4 OCs standing in the adult section of a bookstore, looking at NSFW books where the main characters are themselves XD. I want the bottom to be able to stand on its own so that it can be placed on the table; hence, the cage-like design.
On the bottom left corner, the purple section is the opening to be cut out so that we can see inside the bookstore, and the color dots represent where I'll be placing the cards inside. If it is confusing, that's because it is, my terrible maths skill is giving me tons of headache when making it (^._.^;).
這是我大概的想法(作畫非常精美,我知道):我家四個角色站在書店的成人雜誌區,翻閱著成人雜誌,不過主角是他們自己XD。我想讓底部能站起來,這樣才能讓收到的人放在桌上,因此才採用了這種籠子形狀的設計。
左下角紫色的部分是我打算切掉作成開口,這樣才能看到書店內部,不同顏色的點點則是我放不同紙卡的位置。如果聽起來很複雜的話,那是因為這真的挺麻煩的。我數學太糟糕,算這個的時候很頭痛(^._.^;)
Frame | 框架
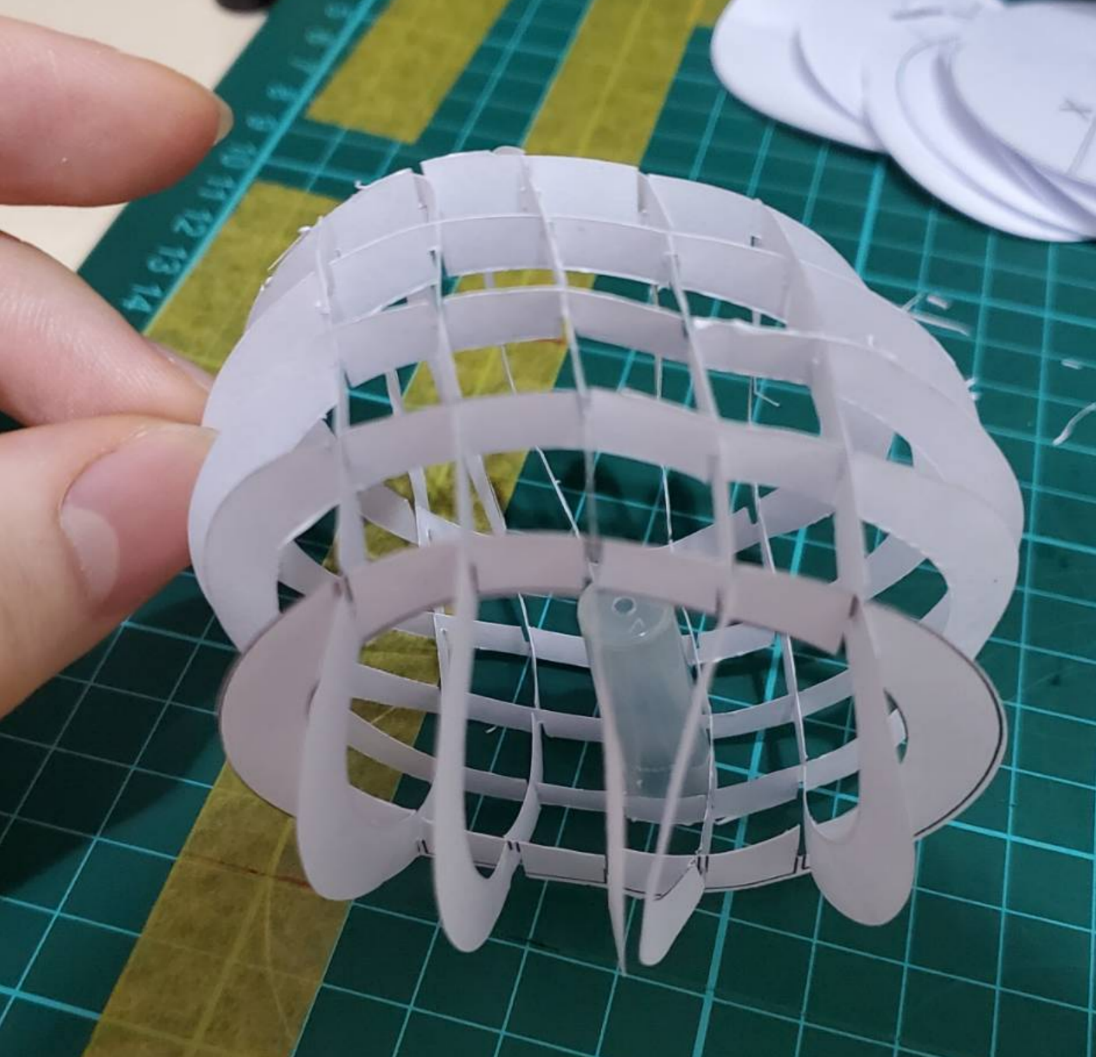
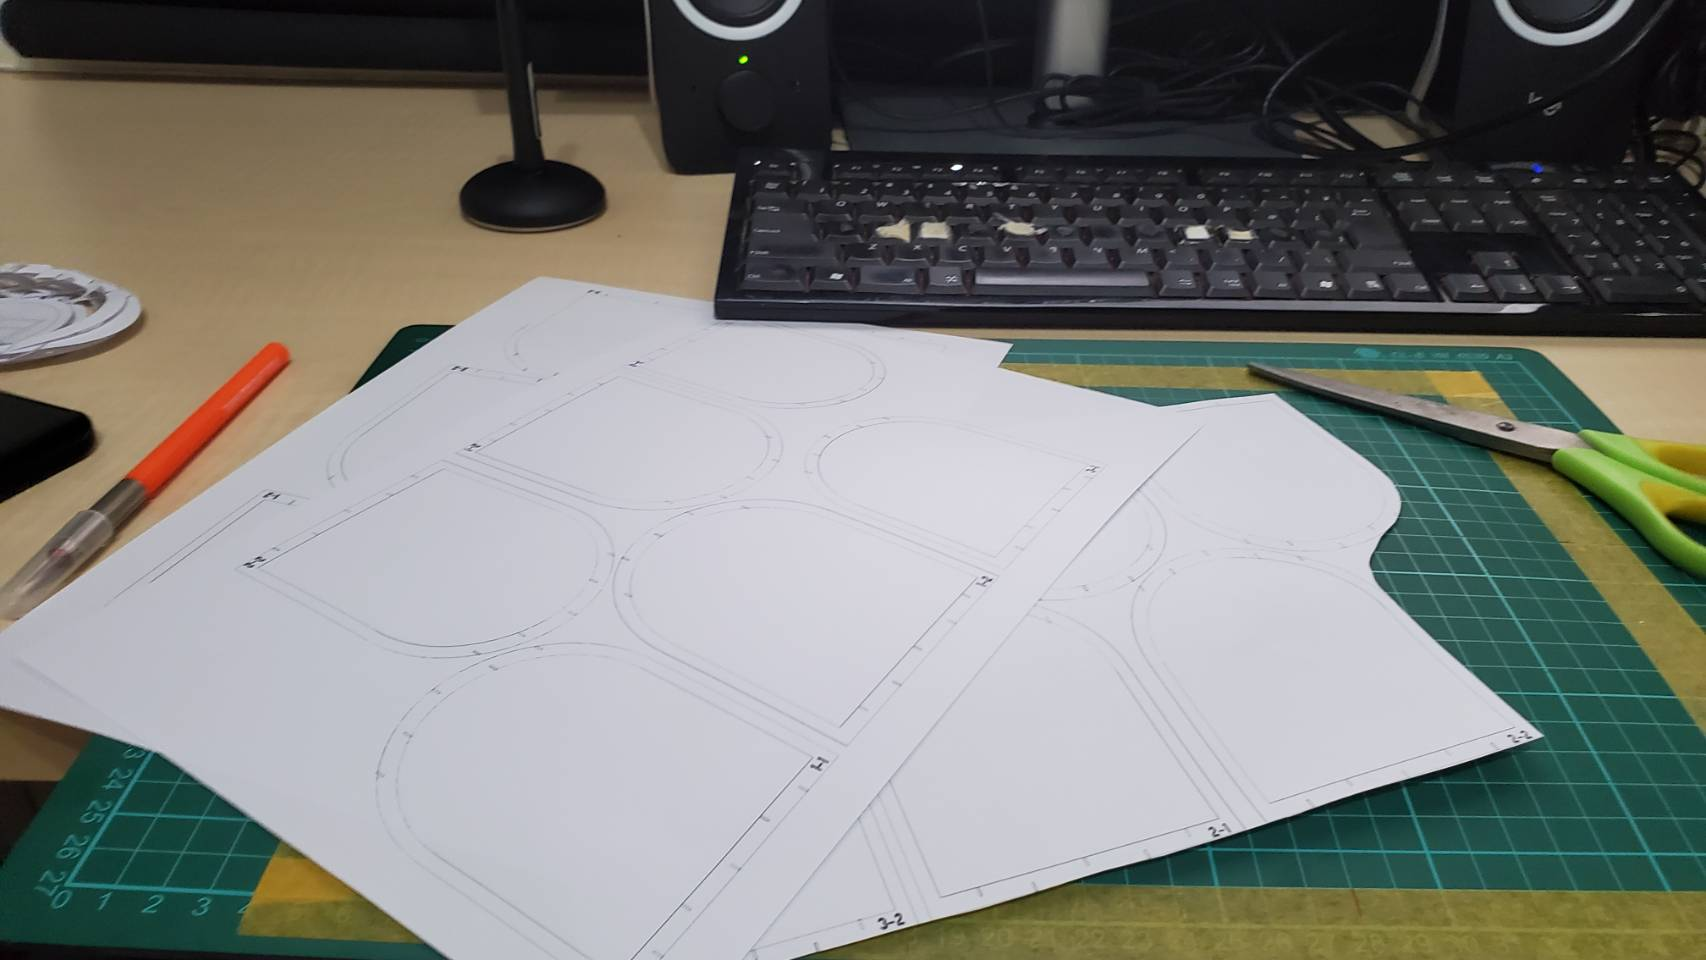
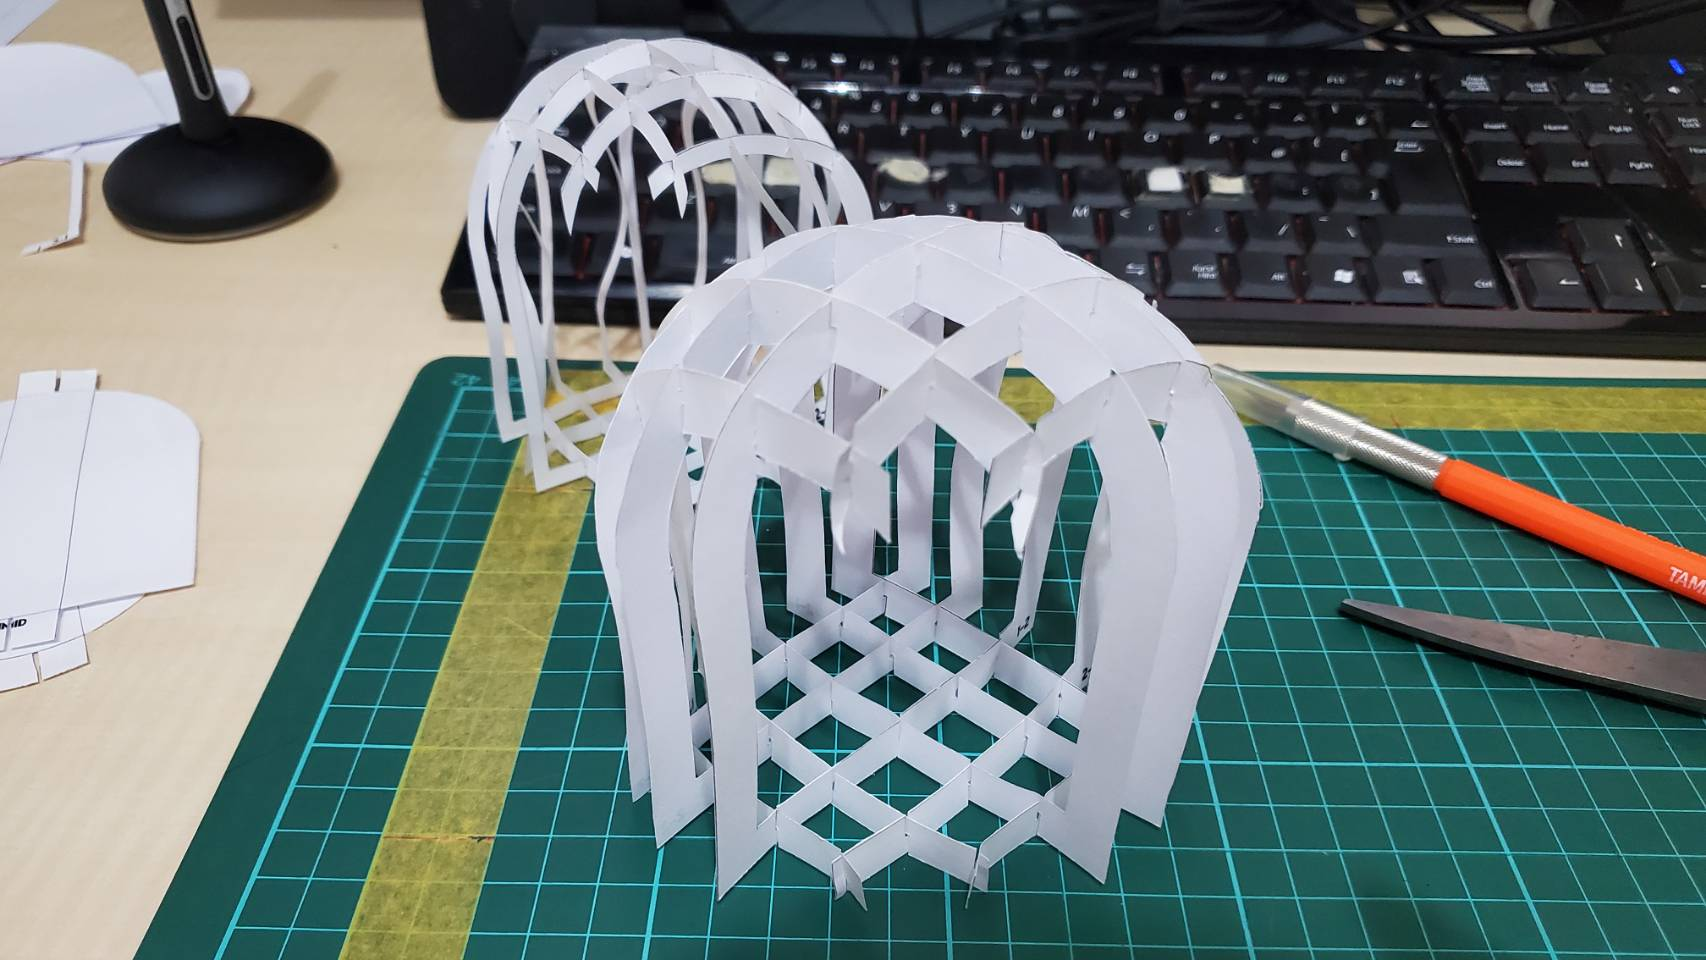
So I began by creating a frame to test using what I learnt from the sphere example. Below is the result:
透過球體試作所學到的經驗先做了一個框架,以下是成品:
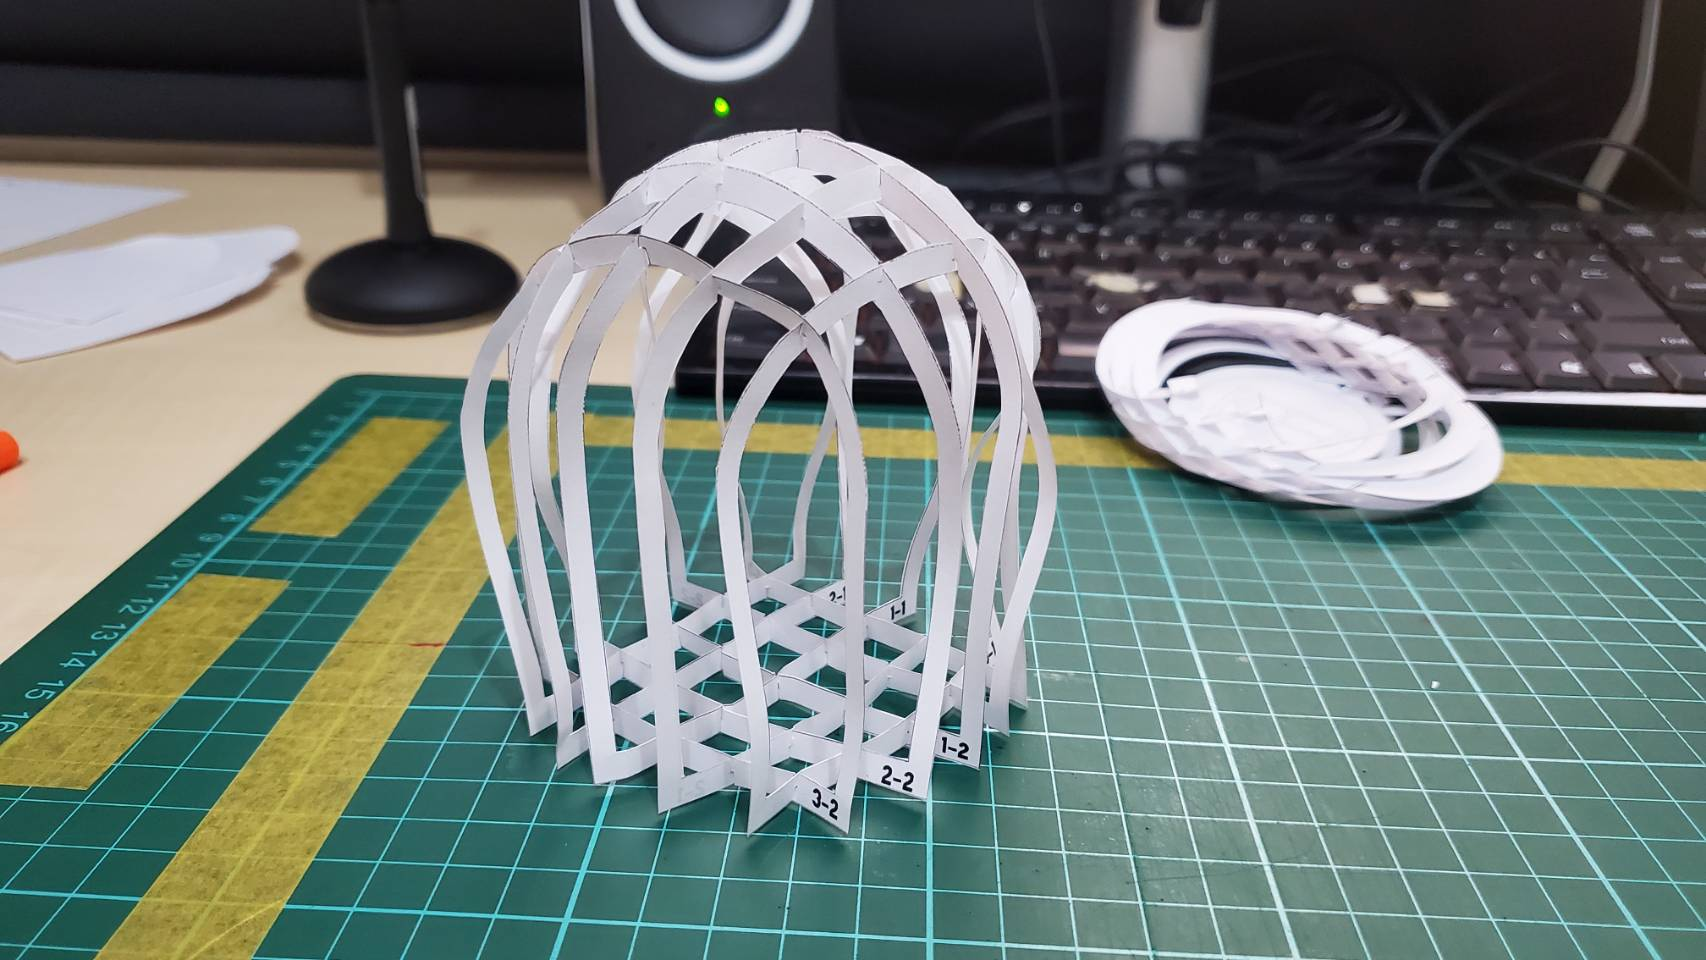
Yeah it looks like overcooked spaghetti, I know. But hey, at least I know that the structure works. So I began planning the insides while modifying the structure to be thicker.
對,看起來像是煮過頭的義大利麵。但至少我知道結構想法大概沒問題,於是我開始構思內部的設計,同時也把框架改粗
Rough Draft | 草稿
They're drawn in different layers, but it's merged together here to give a clearer impression
他們都是畫在不同圖層上,這邊合併在一起只是為了更方便解釋
I want the hand holding the book to be separate and in front so that the foreground feels more three dimensional.
我想讓握著書本的手在不同的圖層,並且在角色前面,這樣整體效果應該會比較有立體感。
I also added the opening onto the design :3
我也順便把開口的部分做入設計內了 :3
Prototype v1 | 樣品 v1
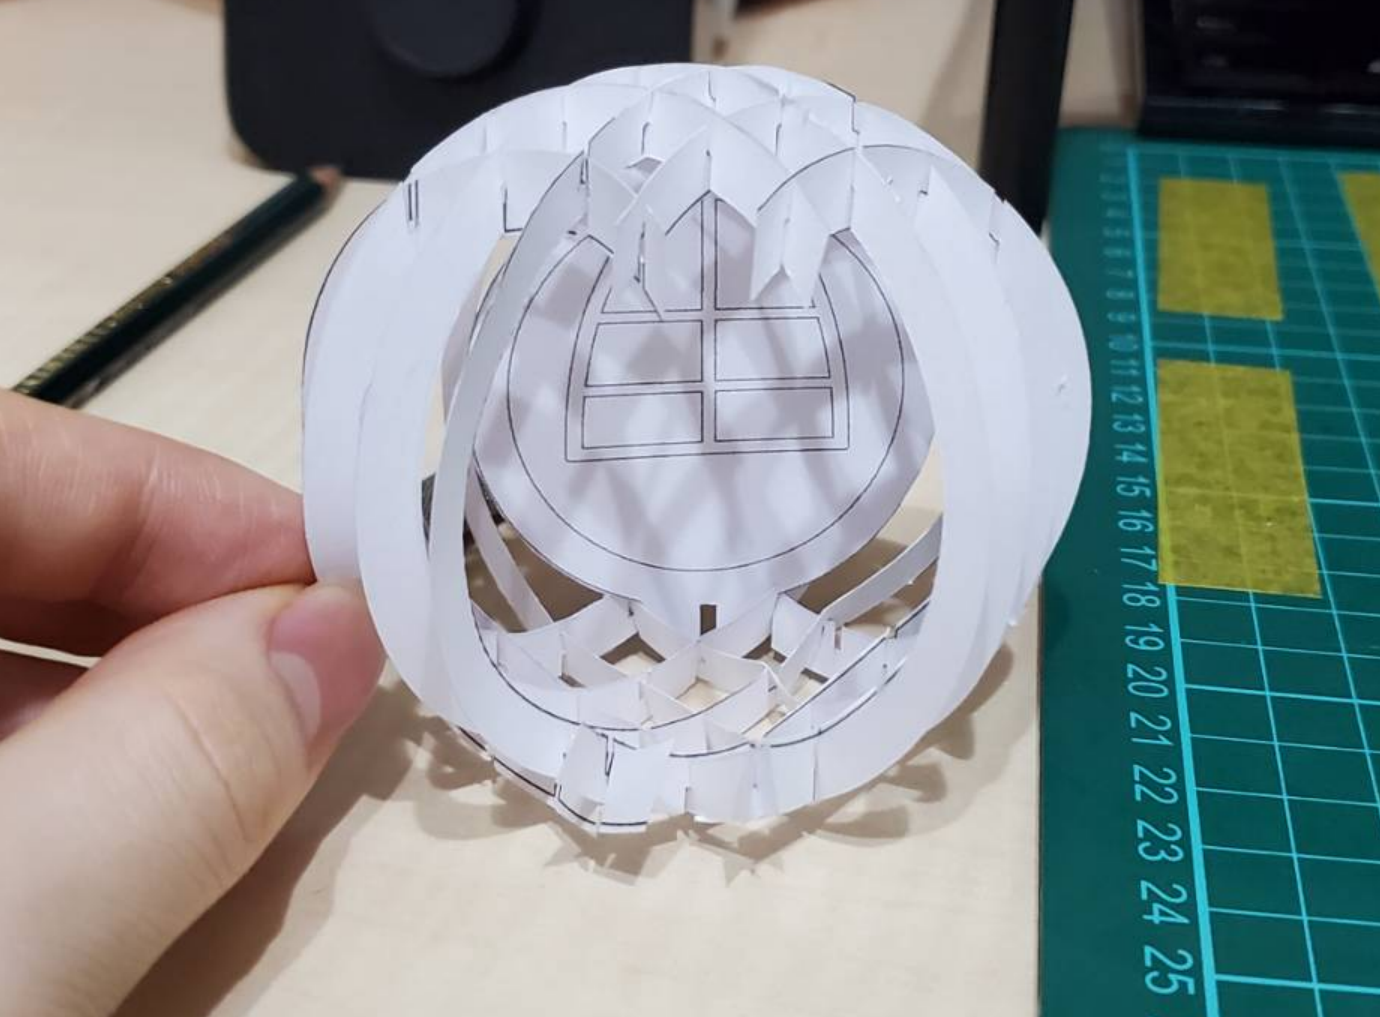
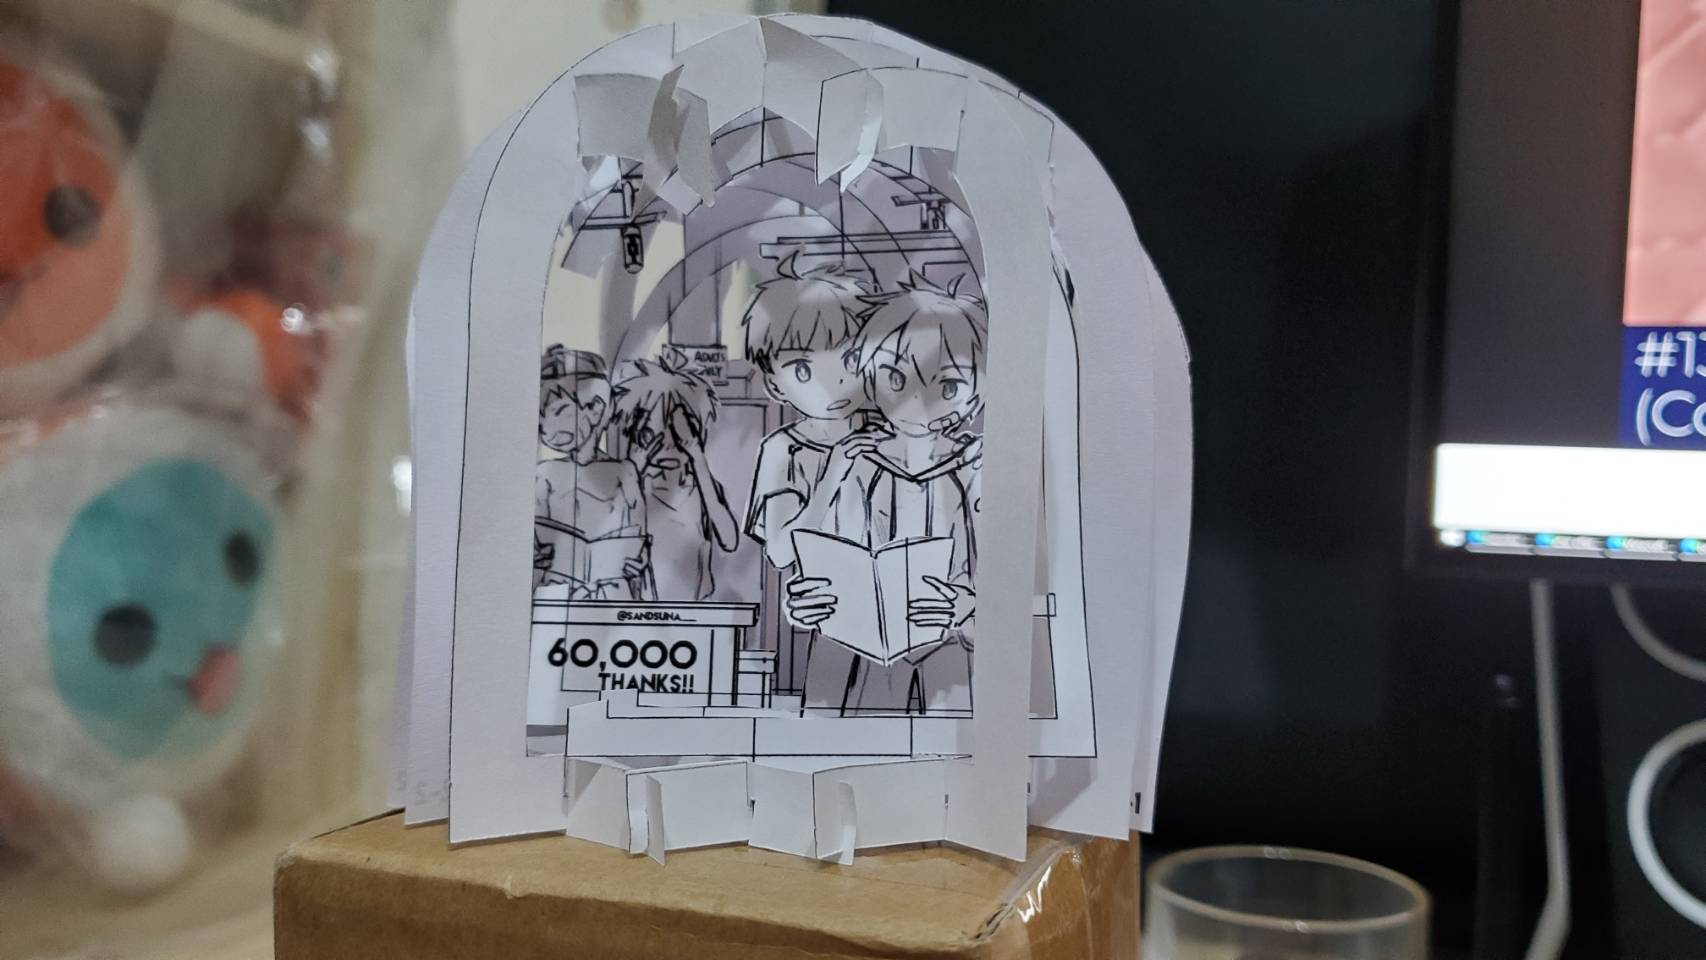
Okay, the cage looks much better, although I got some measurements wrong, it definitely feels more presentable.
好,框架終於看起來比較好了,儘管有些地方還是算錯,整體看起來能端上檯面多了
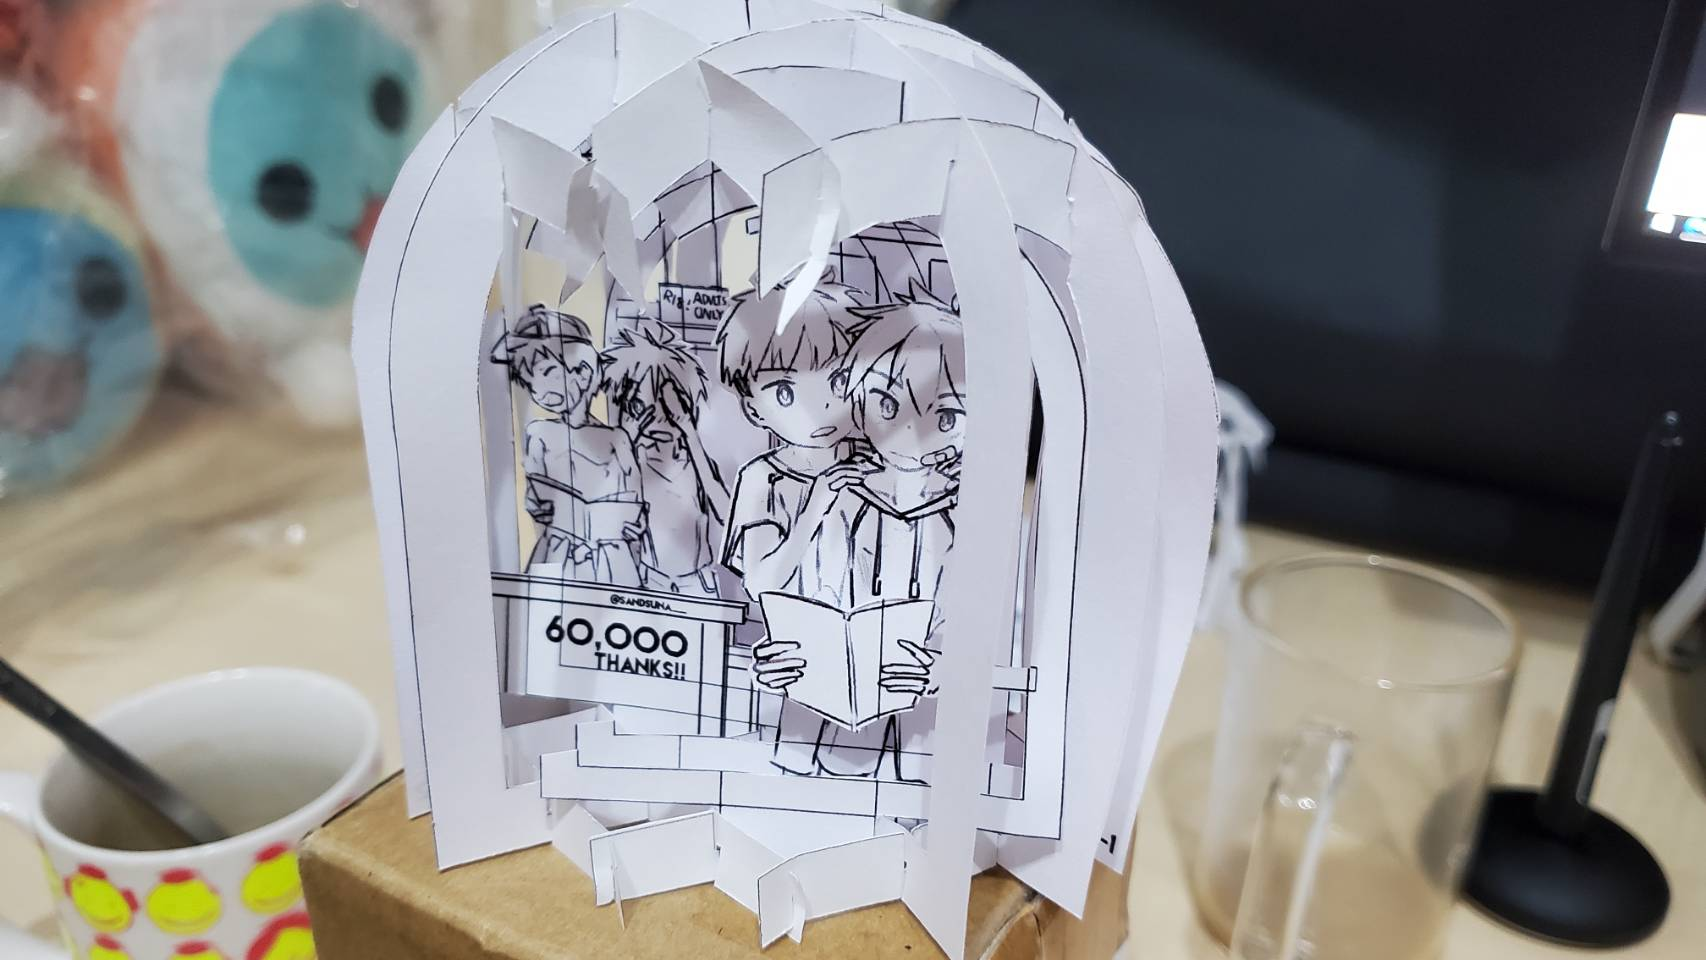
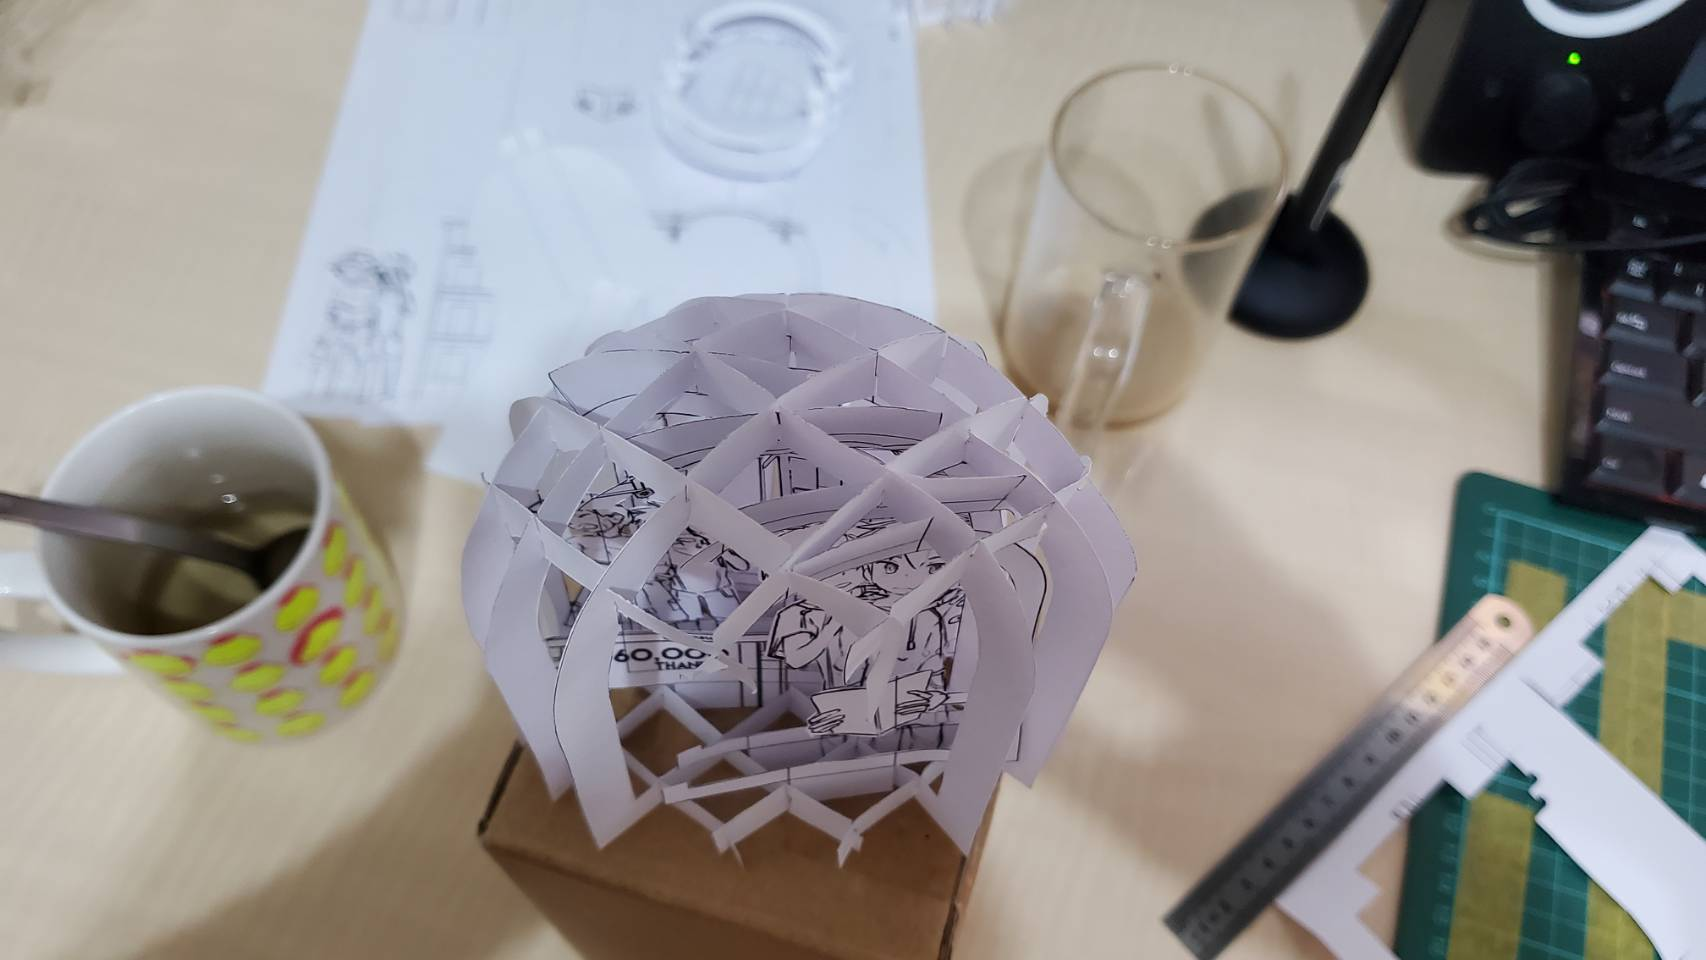
OKAY THAT LOOKS PRETTY COOL ♪⁽⁽٩( ᐖ )۶⁾⁾ ₍₍٩( ᐛ )۶₎₎♪
Although some pieces still need adjusting, and it's overall very wobbly (due to the paper being normal printer paper), I think the concept is pretty much there!
I'm unhappy with how the hand holding the book can feel off in certain angles, so I'll make adjustments on that.
幹,這真的看起來挺酷的♪⁽⁽٩( ᐖ )۶⁾⁾ ₍₍٩( ᐛ )۶₎₎♪
儘管有些部件還需要調整,整體體積也有點歪扭(因為我是拿一般影印紙測試),我覺得概念已經逐漸成形了!
我不太滿意那個拿著書的手在有些角度看起來很崩,所以我等等也會調整那邊
Revision | 調整
So I retraced the lines and began by using red markers to note down parts that needs to be revised in case I forget it.
我先重新描了線,之後用紅筆快速紀錄了一些需要調整的地方以免我忘記
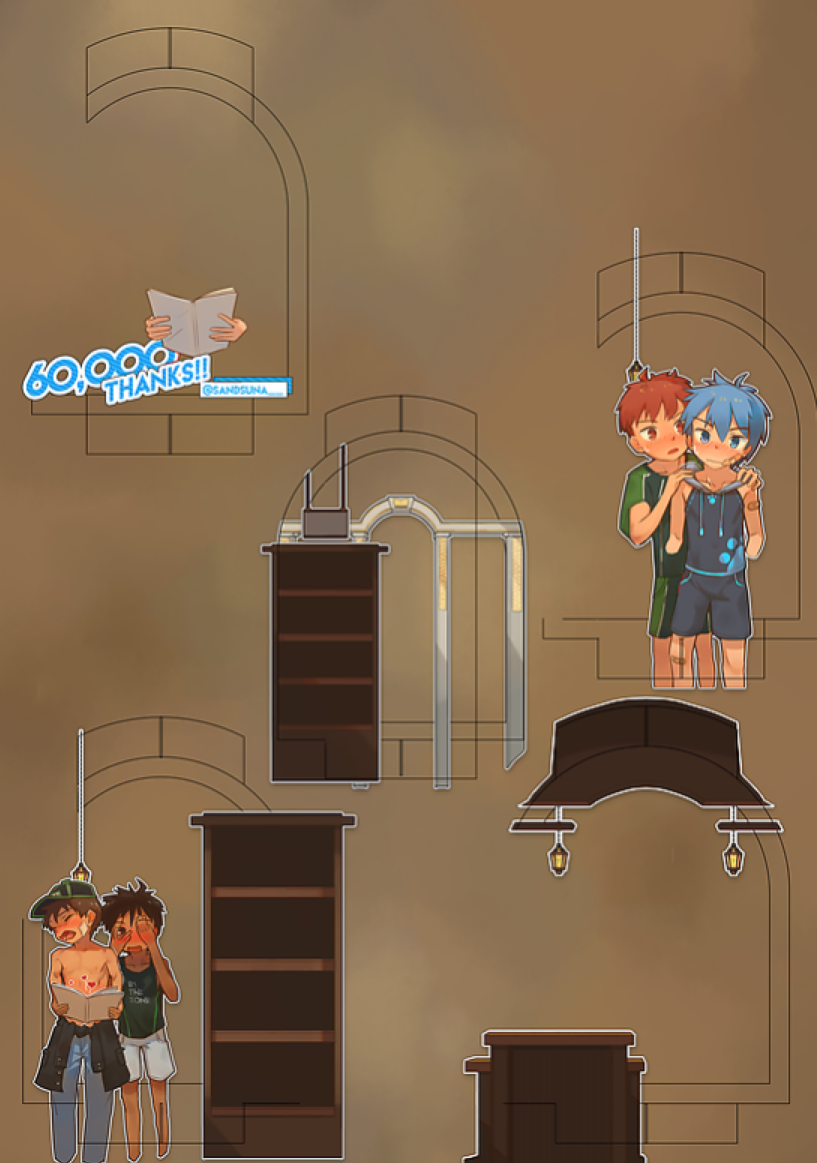
Base Color | 底色
I want the frame to be more wooden in color. The overall style is purposefully made to be more flat in order to fit the paper model theme.
I found a way to combine the hand holding the book with the characters in a more natural way while maintaining the 3D effect! Basically, you'll notice the little red lines I drew around the text and the character's pocket, I plan on cutting them open so that I can combine the two pieces together into one.
我想讓框架以木色為底色,整體風格也是刻意畫得比較扁平,因為我覺得這樣比較適合紙模型的主題。
我找到了一個將書本與角色更自然結合又能維持立體效果的方法!簡單來說就是你也許有注意到我在字還有角色口袋附近有畫紅線,基本上這邊都會被切開,讓兩片紙板能彼此卡入。
Rendering | 細修
Textures | 貼圖
Most of the backgrounds are removed to preserve ink.
為了省墨水,大部分的背景都被砍了
Ah yes, modern literature.
現代文學,啊嘶
Paper Shopping | 買紙
The typical Double A A4 printer paper is about 80p in thickness, which is way too thin. Therefore, to properly test the concept, I've went out and bought 150p~220p paper.
一般Double A A4列印紙厚度差不多是80磅,老實說真的太薄。因此為了好好測試下一個樣品,我去買了150磅~220磅的紙
Prototype v2 | 樣品 v2
The cage itself feels a lot more stable now, but I printed two of the pieces (the white ones) in the opposite direction XDDDD
框架本身感覺更穩固了,不過我把兩片(白色的)設計做反了XDDDD
(ง ˘ω˘ )ว ⁾⁾ ⁽⁽ 〪ɾ( ˘ω˘ 〫ɩ ) YES, despite my crappy cutting skill and my crappy home printer, the effect still looks super cool.
(ง ˘ω˘ )ว ⁾⁾ ⁽⁽ 〪ɾ( ˘ω˘ 〫ɩ ) 讚啦,儘管我的刀工跟自家印表機都爛到有剩,這個效果還是看起來超酷的啦
Of course, you can flatten it!
There are still many things to fix, including the measurements, line thickness and what not. Other than that, it's mostly ready for mass production!
當然的,你可以把它壓扁!
還有許多地方要修,例如量得不夠準的部分,加粗之類的,除此之外,已經快要準備可以量產了!
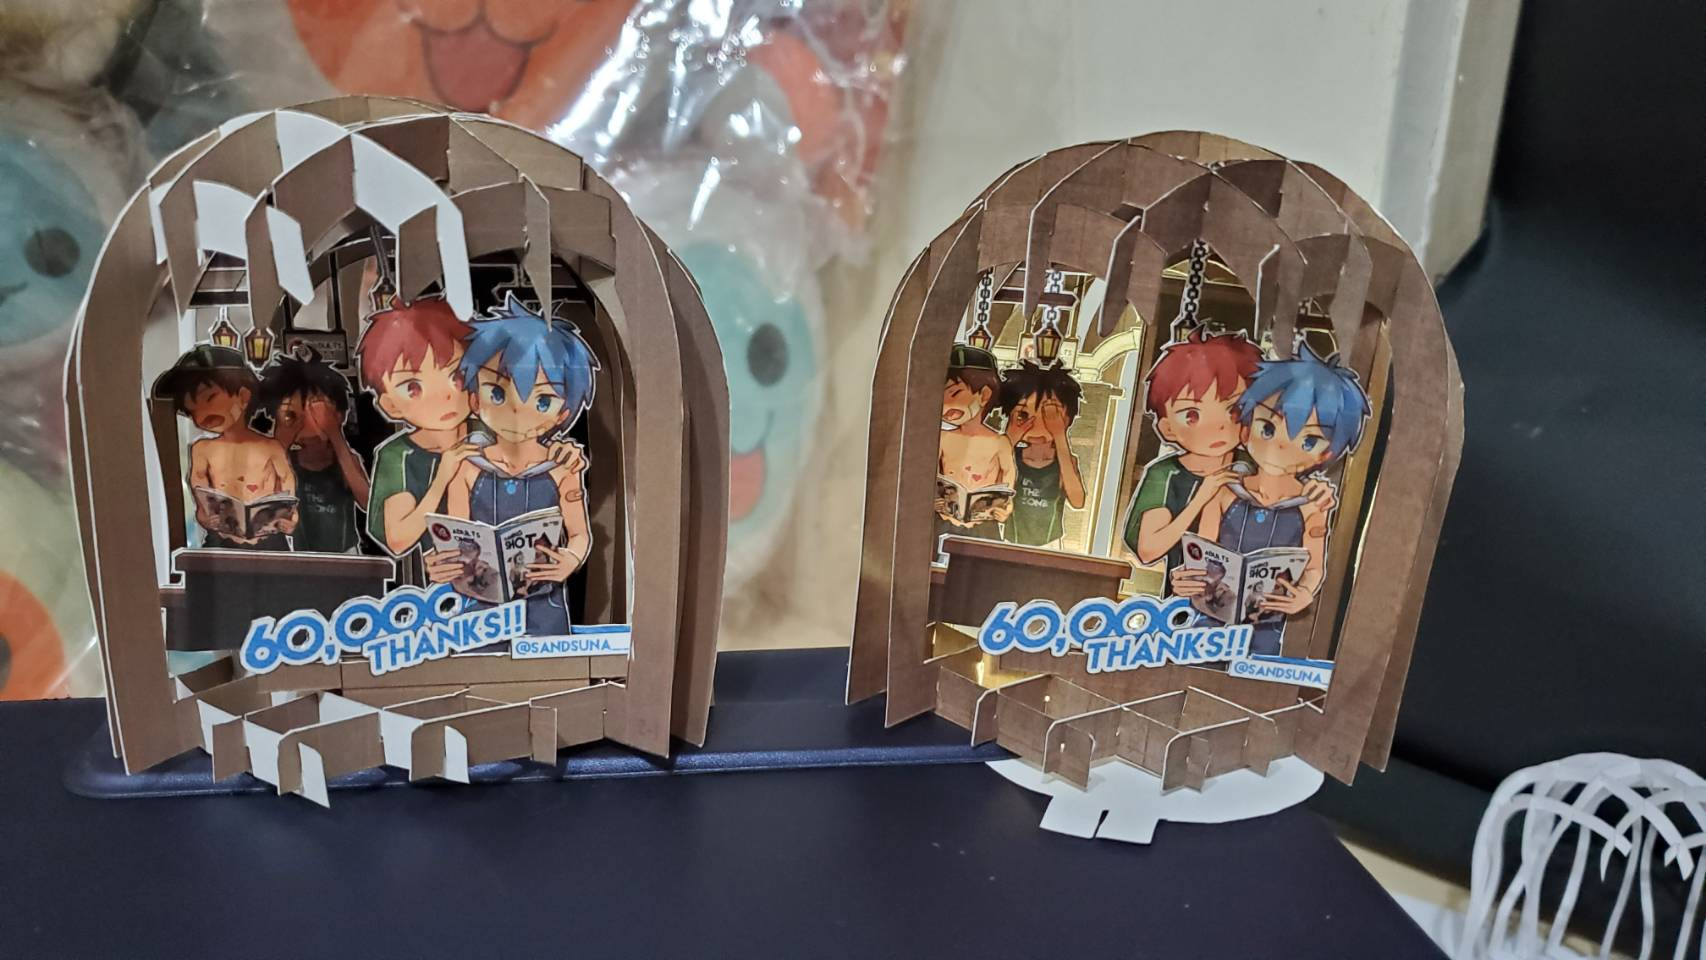
Prototype v3 | 樣品 v3
←v2 v3→
The ceiling is rounded off so that it doesn't pop out and create a visual mess. I also cut open another support beam to get a wider view of the bookstore. The background is also glazed with a wooden texture so that it feels more like wood. A lot more minor calculation fixes and now the structure is even more stable!
最上面的部分被削平,這樣中間的立牌才不會刺出屋頂讓形狀變得凌亂。我也把開口的另一對柱子給切掉了,這樣能看到的範圍比較廣。背景也上了一層木頭紋路,不然原本實在不太像木頭。很多比較細微的計算錯誤也修正了,現在整體更穩定了!
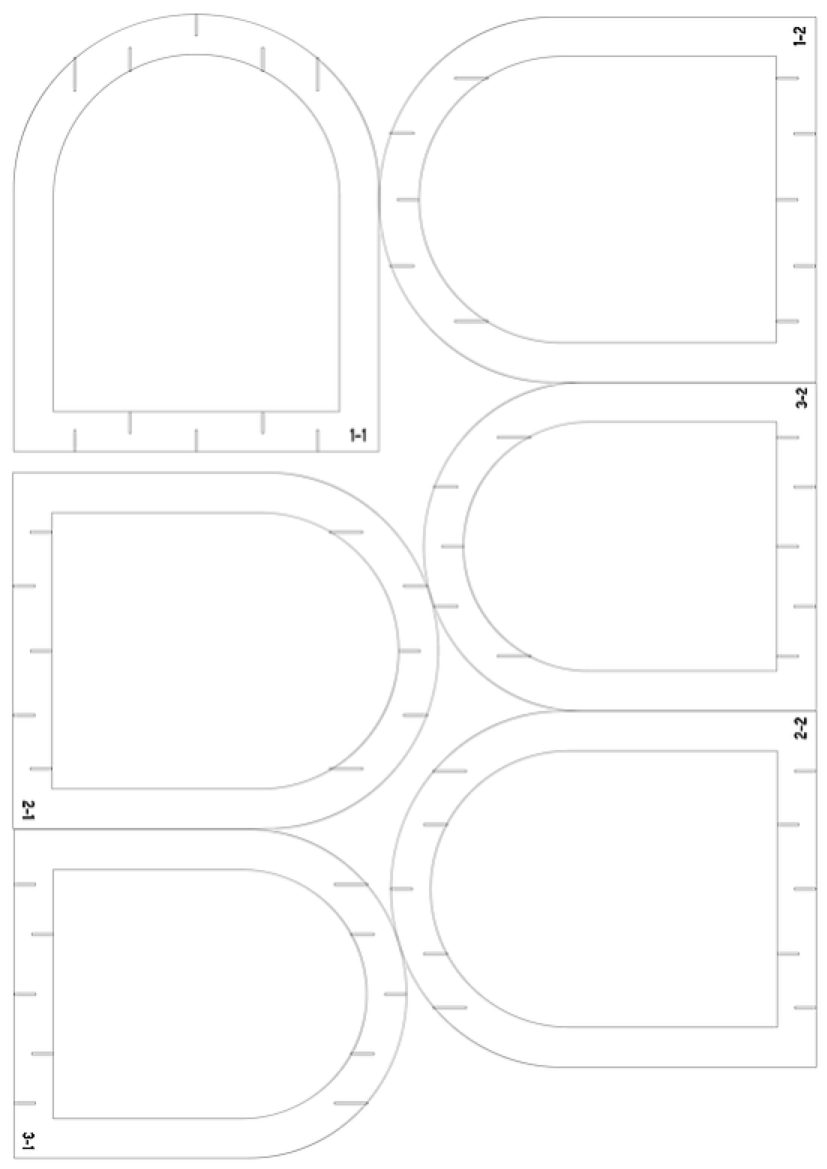
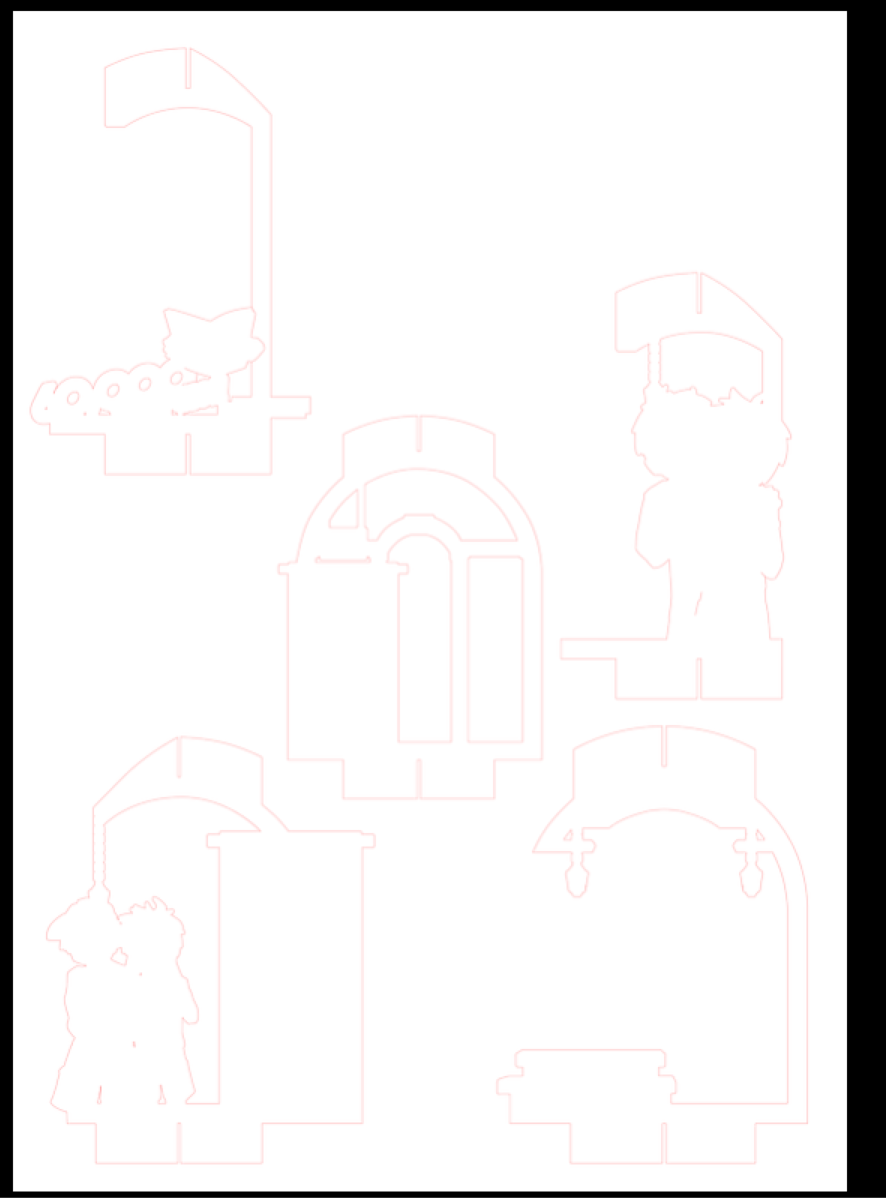
Laser Files | 雷射檔案
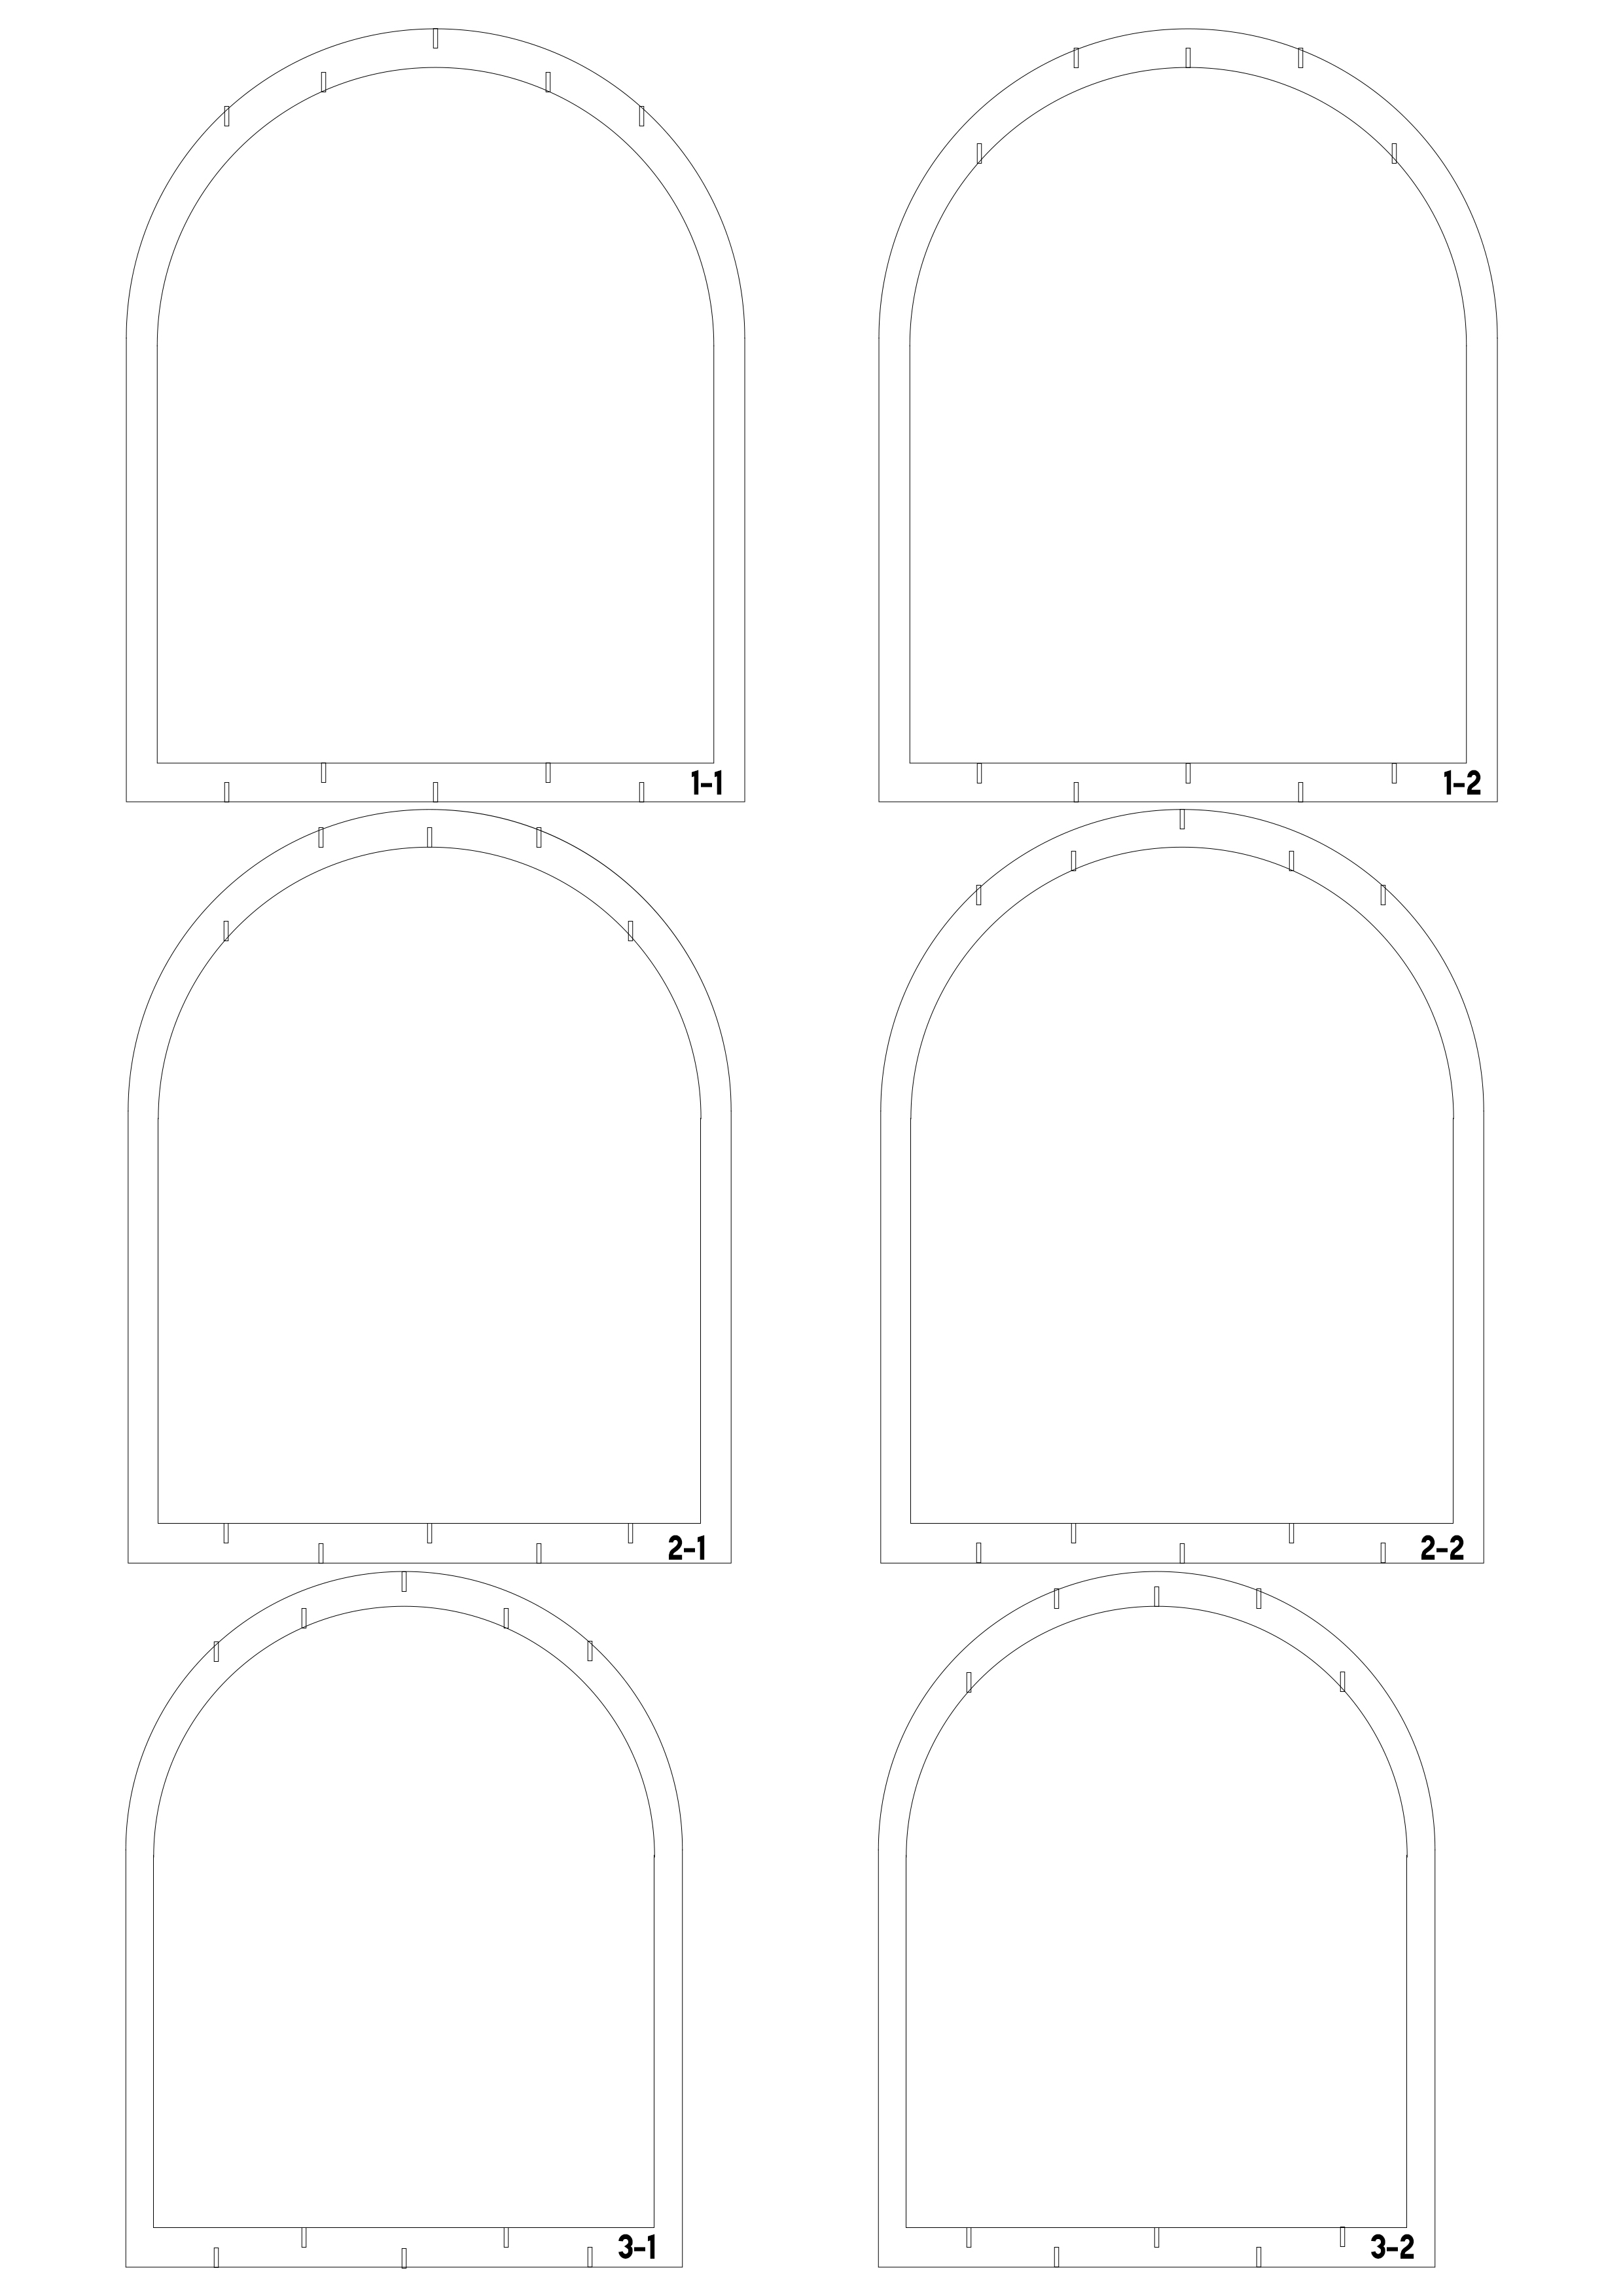
In this step, I have to use Illustrator to create lines for the laser to cut through. To ensure the highest accuracy, I manually traced these lines which took a few hours (´ωˋ ).
I then sent the files to the same company that did laser work for the 40,000 event, and OH BOY is this expensive. Laser cutting alone (without printing or paper cost) already costs 128NTD each. Well, since it's so expensive already, I might as well let them cut the cards this time.
We even considered buying our own laser cutter and we even went to workshops for test prints. However, the result wasn't as good as expected, so we didn't end up buying it, but that gave me ideas for a future giveaway which I will save the story for another time :3c
這個步驟中,我用Illustrator畫出了雷射會切割的路徑,為了確保最精準的切割,這些線都是自己手動花了好幾小時描的(´ωˋ )
接著我將這些檔案發給上次40,000活動的同一間雷射公司估價,結果幹,好貴喔。光是雷射切割的部分(不包含印刷或是紙的費用)就已經128新台幣了。反正已經沒有回頭路了,我打算讓他們也把這次的卡片也一起切下去
我們甚至考慮過直接買一台雷射切割機,甚至還到了經銷商的工作室去試用,不過結果離預期的差挺多的所以最後沒有買,不過倒是給了我一些未來抽獎的點子,這個故事我就留到下一次吧:3c
Card Design | 卡片設計
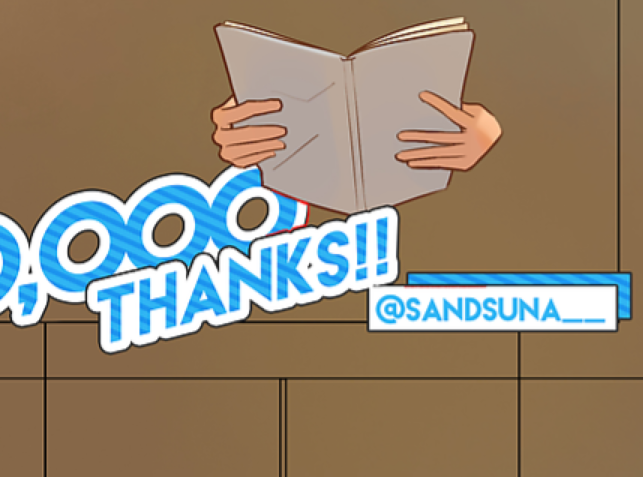
Some of you might've already seen this doodle on Twitter, it is illustration used for card design this time!
有些人可能已經在我的推特上看到這張塗鴉了,這就是這次卡片會用到的設計喔!
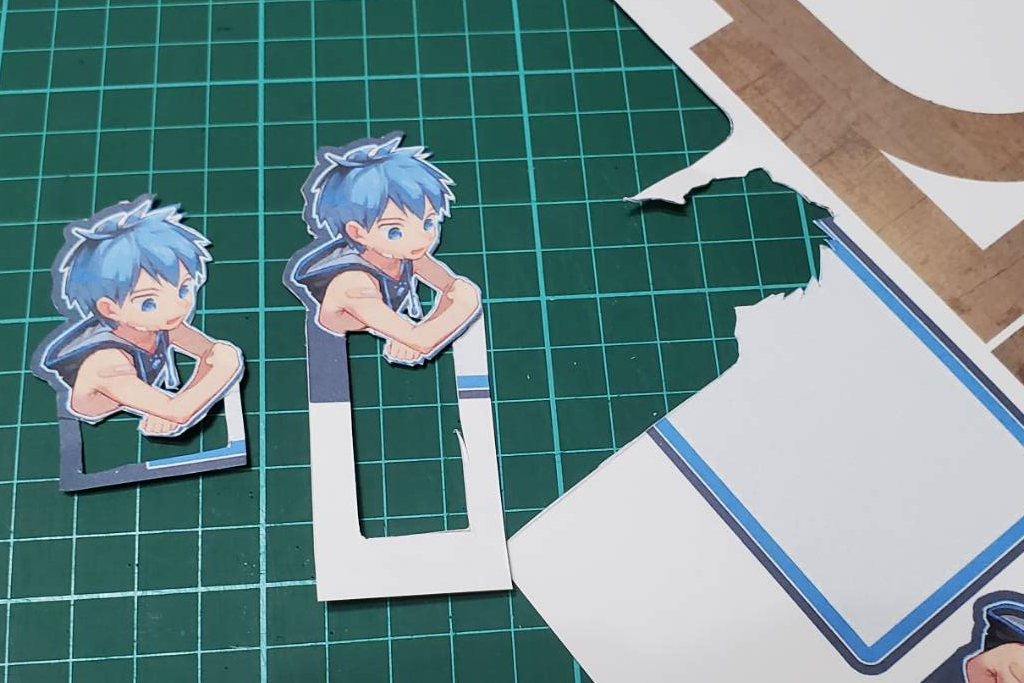
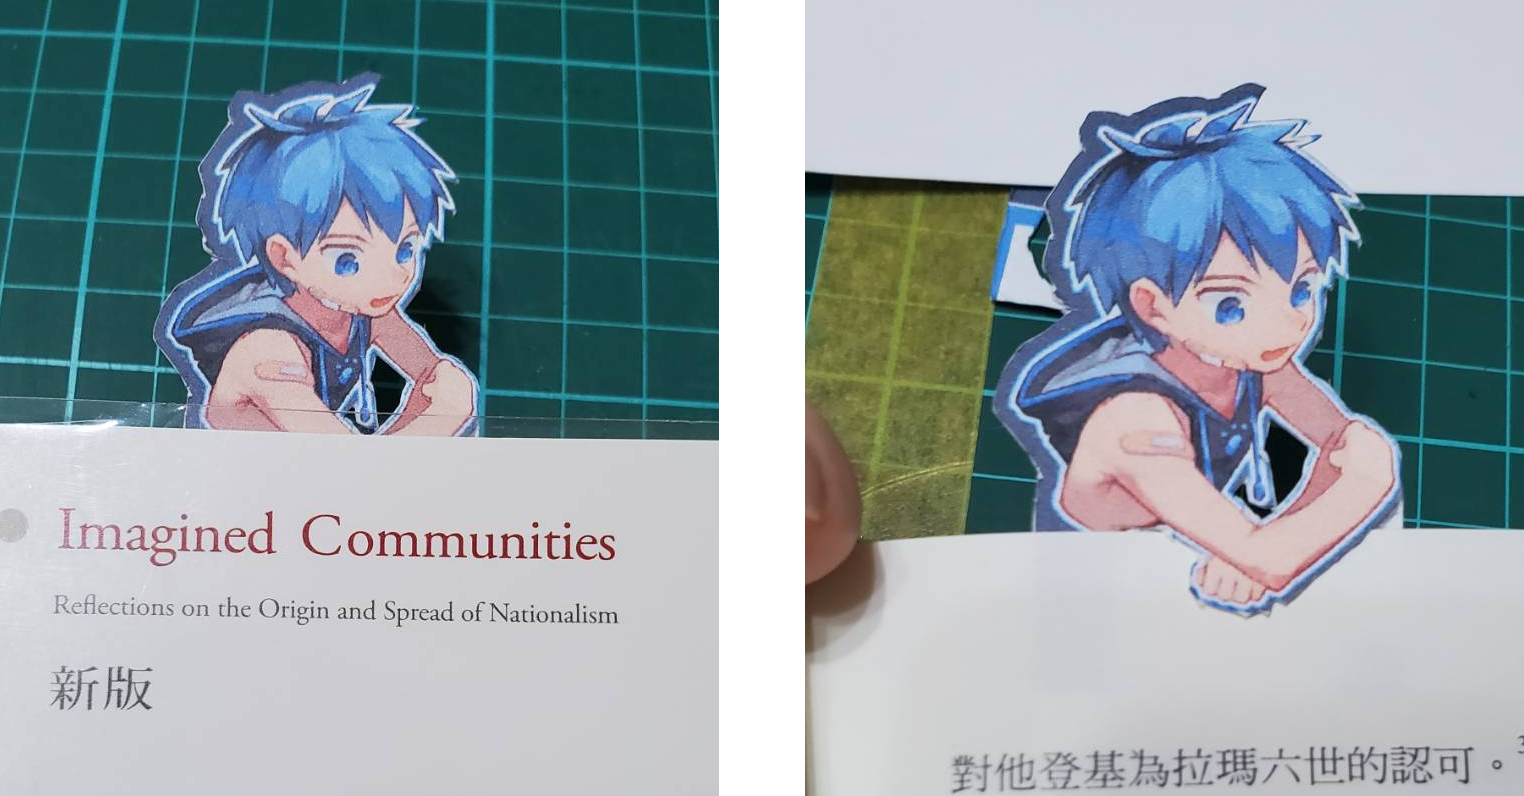
Bookmark | 書籤
@yingooo000 saw the doodle and asked if I was making a bookmark with it. I was like, no... but that sounds like a crazy good idea. So I cut out the cards and tried a few prototype.
@yingooo000 看到塗鴉問我是不是要做書籤。原本沒有打算要做的,不過想想這點子超讚欸。於是就開始把卡片剪成書籤的形狀來實驗一下
I think that's pretty cute (´,,•ω•,,)♡
Although it's not practical at all (easily bent/damaged and what not), but hey, it's cute (?
我覺得挺可愛的(´,,•ω•,,)♡
雖然實用性極低(容易折到/受損什麼的),不過可愛就好(?
I quickly made a design on the day I was supposed to print them and sent it off for printing!
我在印刷日快速地做了一個簡單的設計,接著就丟給印刷廠去印啦!
Here's one living on top of my monitor just for fun (?
因為好玩於是就把一個放到螢幕上了(?
Sample | 樣品
They sent one in first just to see if I need any modification, I have to say it looks so much better than my hand-cut one XD!
他們發了一個切割樣品給我確認是否還需要修改,我得說這看起來比我自己手切的好看多了XD!
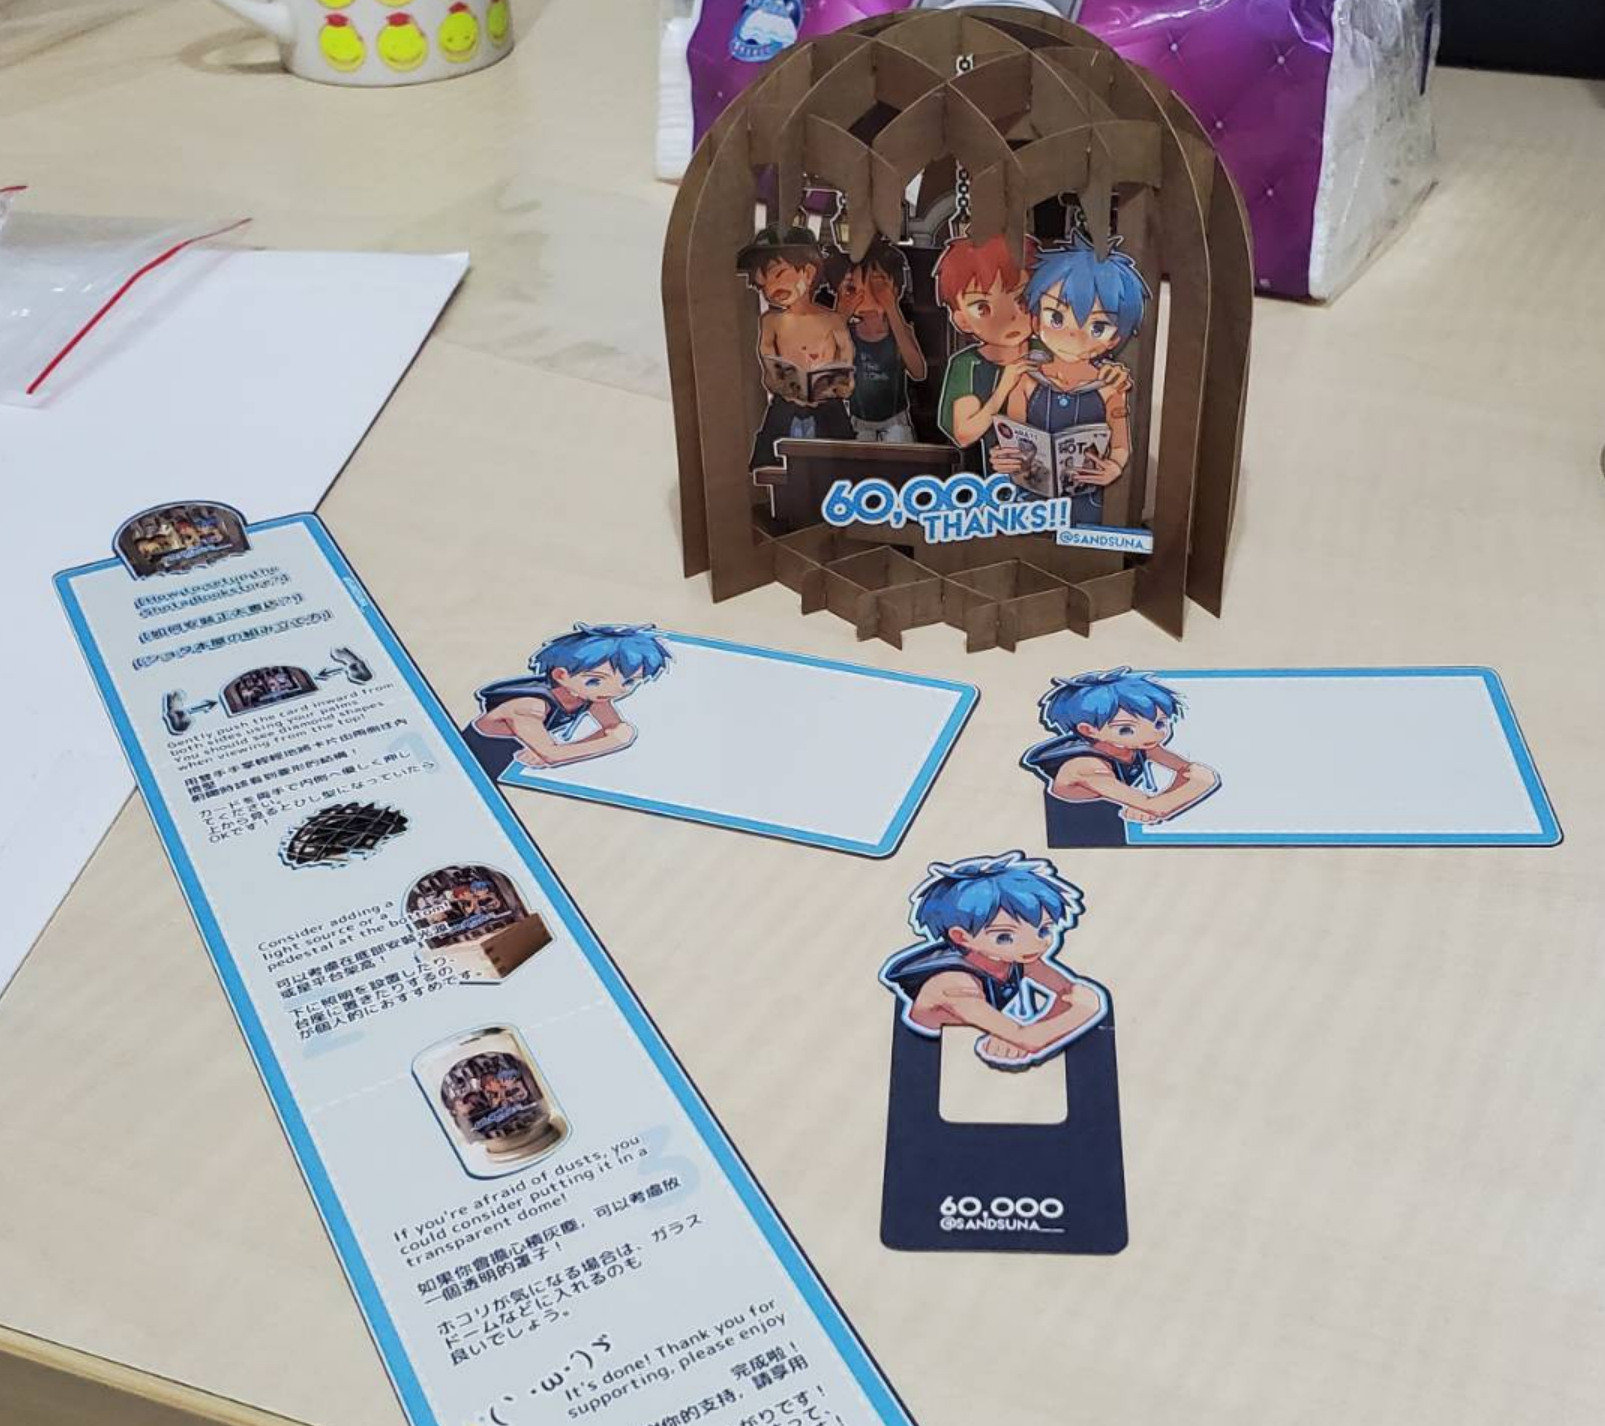
Product Photoshoot | 產品拍攝
I began taking photos of the sample while we wait for the rest of the parts to arrive.
Thanks to my mom's hoarding habit, we have tons of empty notebooks for this backdrop to work ( ・ิω・ิ)
在等待剩下的部件到來之時,我先拿樣品來拍產品照了
多虧了我媽的囤積症,我們家有足夠的空的筆記本來作為拍攝背景( ・ิω・ิ)
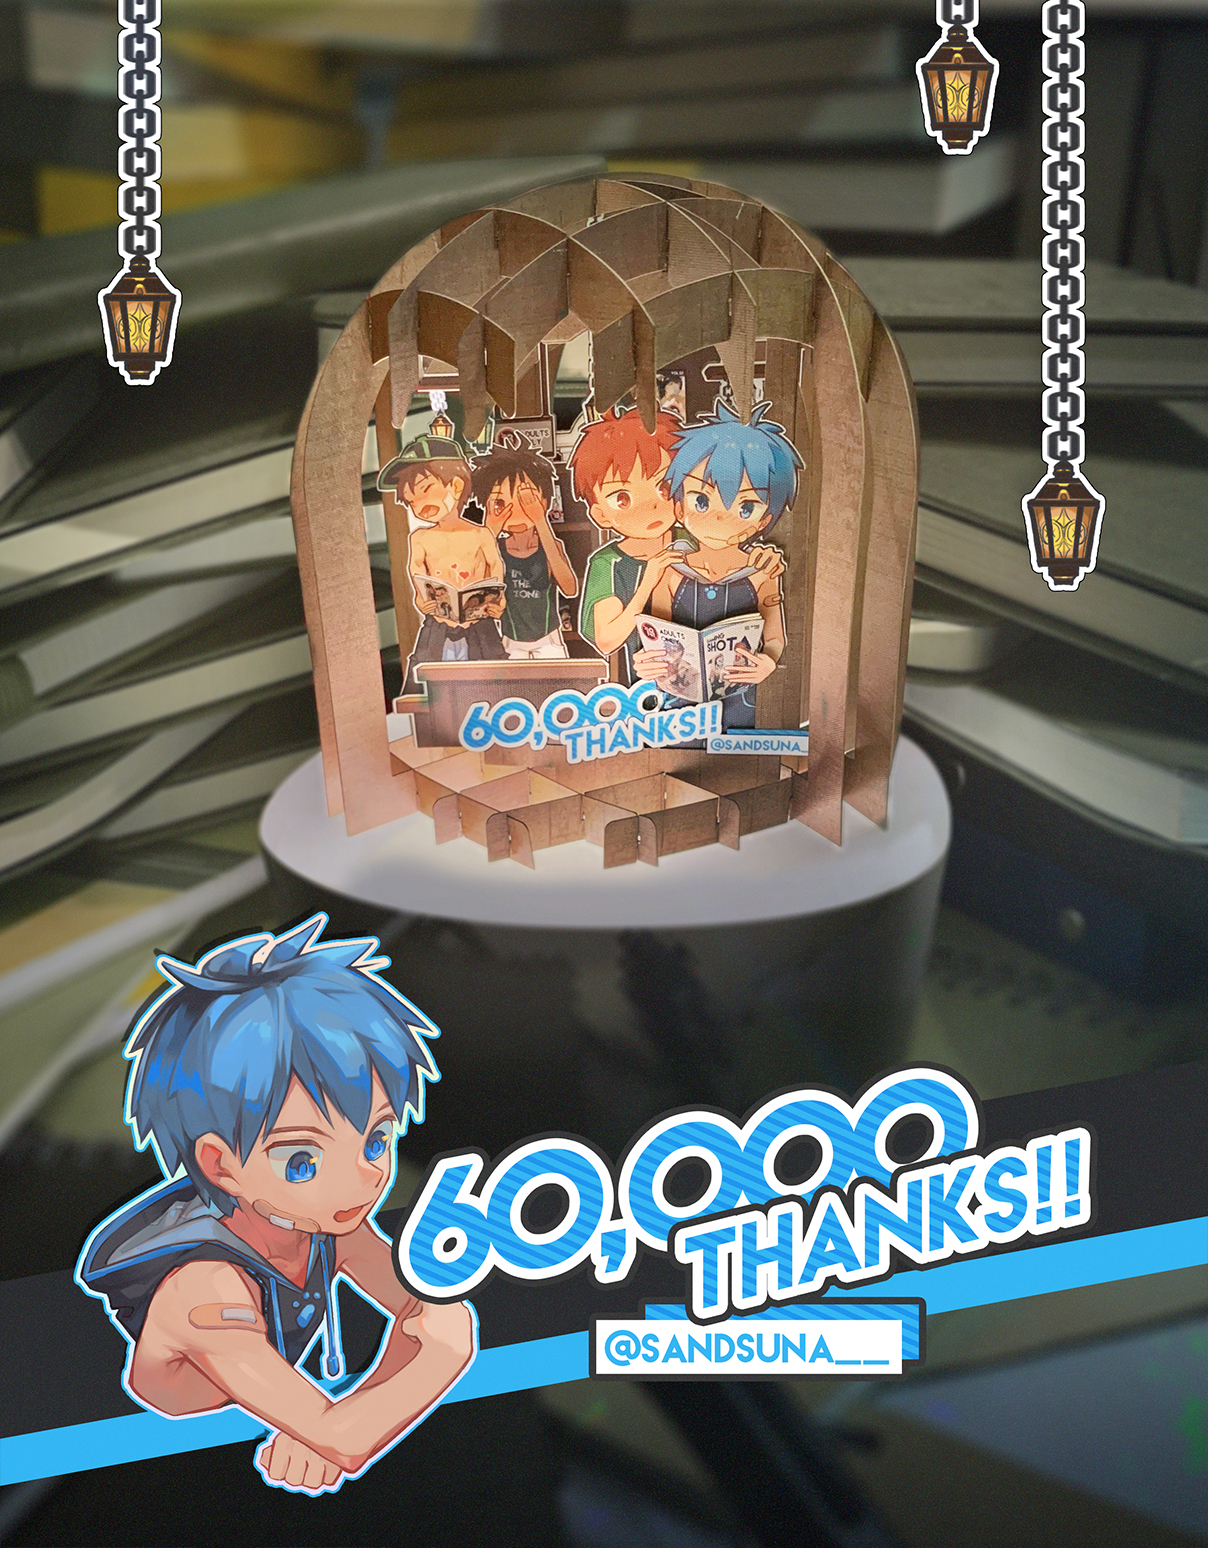
Product Photoediting | 產品照修圖
As you can see, I am terrible at photography, which is why I made a ton of changes when I finally arrive on photoshop ( 'ω'o📸o
如各位所見,我攝影能力真的很差,這也是為什麼我修圖修超大 ( 'ω'o📸o
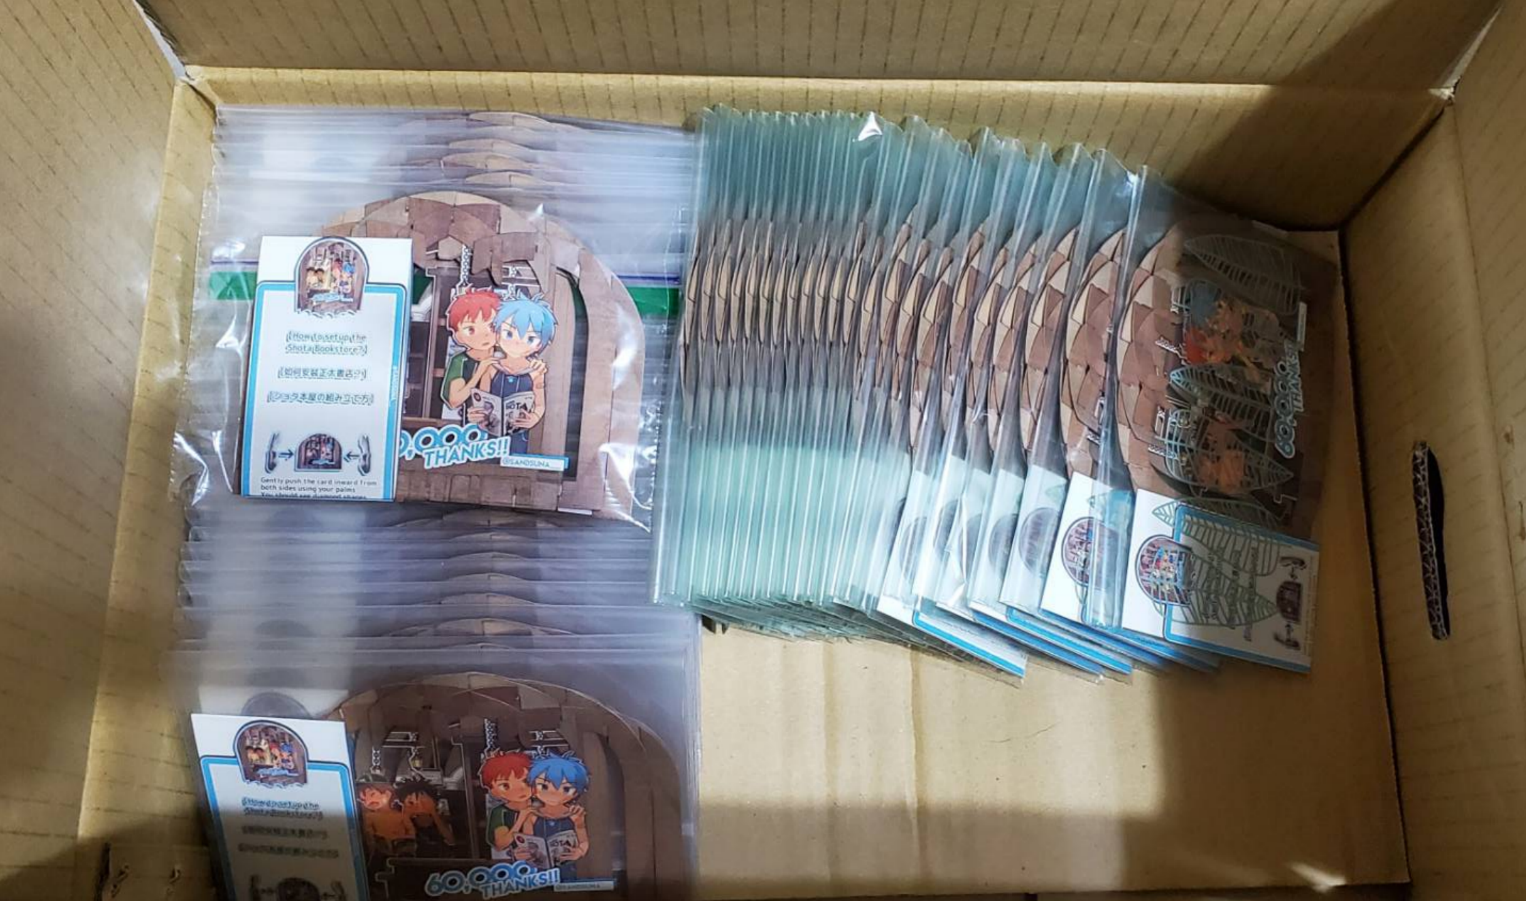
Assembling | 組裝
The rest of the parts finally arrived! It came in boxes like these. My family and I literally worked from morning to midnight to finally assemble every single model. I could not have done this without their help which I am super grateful ・゚・(つω`゚)・゚・
剩下的部件終於到啦!是像這樣一箱一箱來的。我和家人從早到半夜一直不停組裝才終於把每個都組好。真的很感謝他們的幫忙 ・゚・(つω`゚)・゚・
There were certain parts missing, so we had to contact both the printing shop and laser shop for remake. Now, I'm waiting for my translator to translate the giveaway post into Japanese, and we can finally release this event!
有一些部件其實有少,我們必須同時聯絡印刷廠跟雷射公司請他們重做/補上。現在我在等我的譯者將抽獎文翻譯成日文,接著就終於能發表這抽獎活動啦!
Files